 SmartWireless Dokumentation
docs
SmartAccess
Bluetooth Access Control System
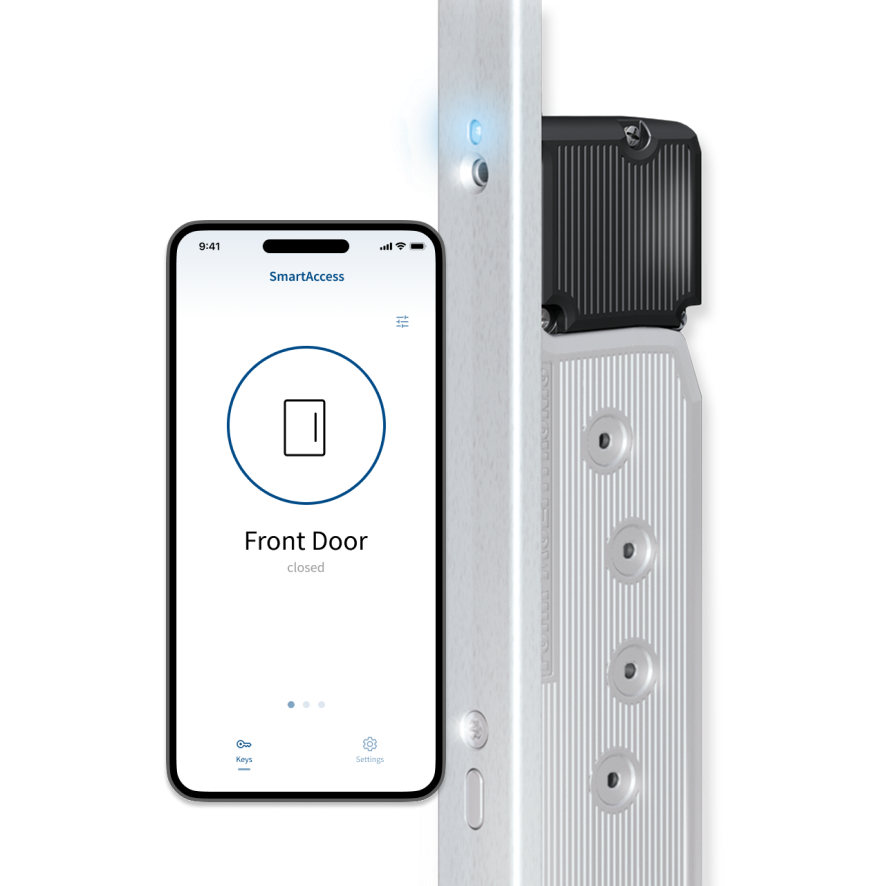
SmartAccess is a state-of-the-art Bluetooth access control system with KeylessGo technology. It allows the convenient, keyless opening of doors and gates. Via the SmartAccess App you can easily turn your smartphone into an AppKey and activate additional physical SmartKeys. The motor locks are unlocked just by touching the door handle or a sensor in combination with your smartphone nearby. And SmartAccess goes beyond. With AutoUnlock enabled your door automatically unlocks if you approach the door with your smartphone in your pocket.
SmartAccess Module SAM
Compact SmartAccess Bluetooth Transceiver
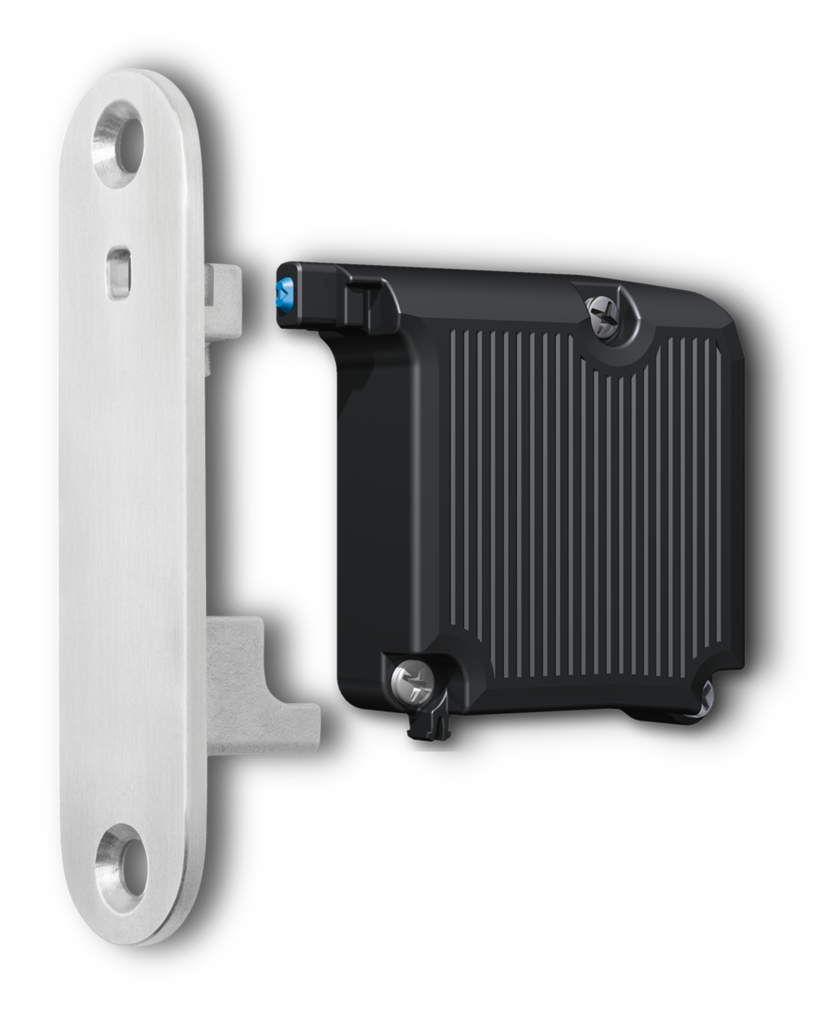
SmartAccess App
Open doors easily
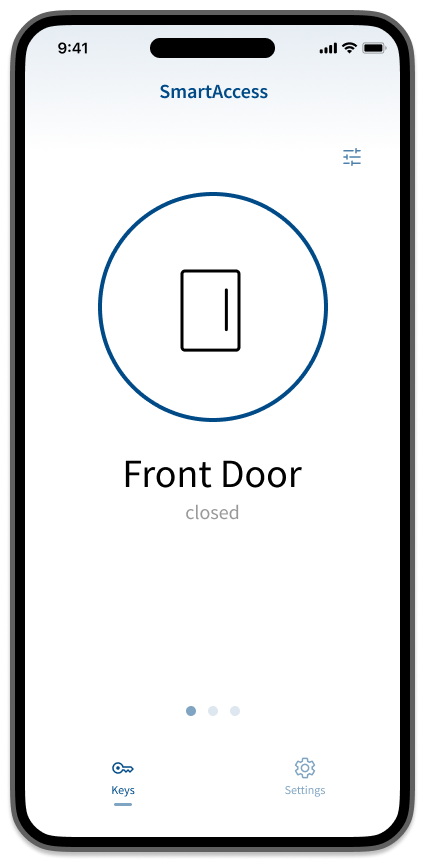
SmartAccess Access Control
One system, many options
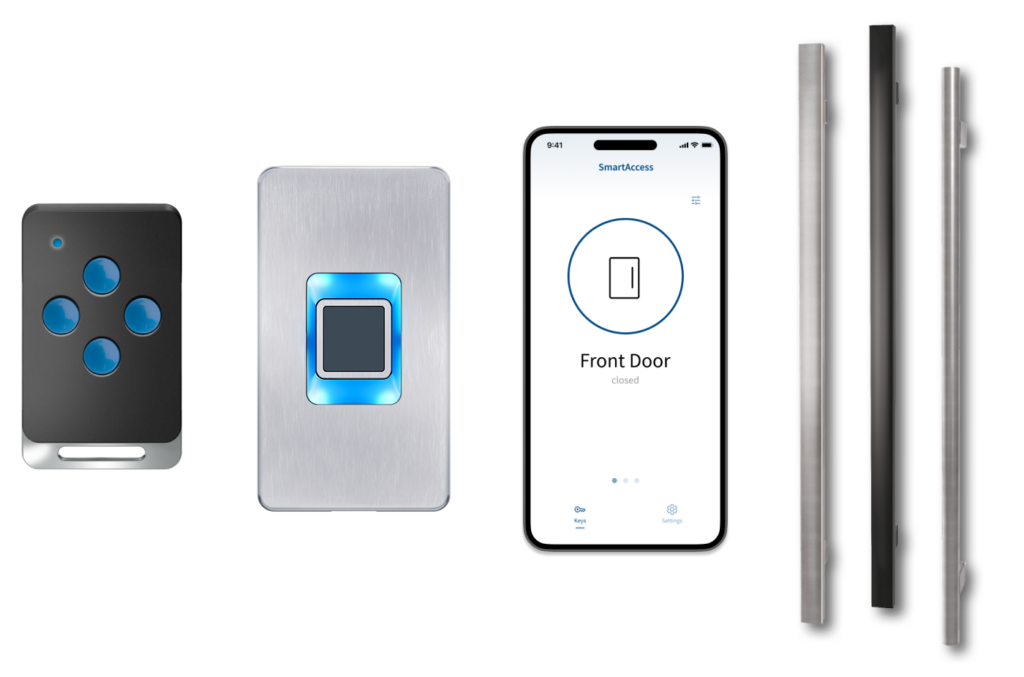
SmartAccess + SmartTouch
KeylessGo for the door
Optional
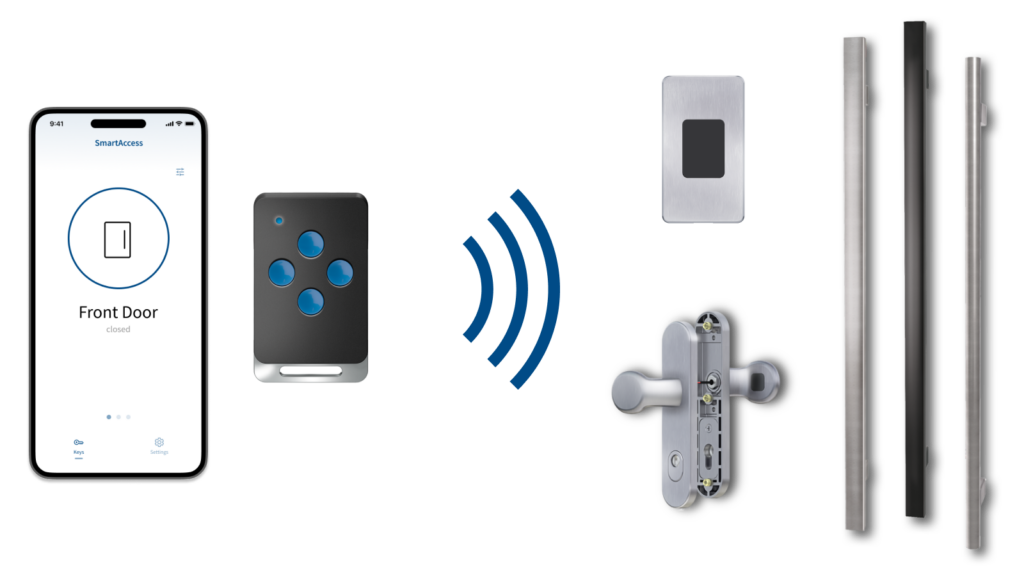
SmartAccess allows you the convenient door opening via KeylessGo technology. Therefore it is sufficient to carry your authorised smartphone. For unlocking the door by the motorised lock, simply touch the SmartTouch handle, the SmartTouch door fitting or SmartTouch sensor. The SmartAccess Module usually installed into the door leaf now transmits a Bluetooth-Signal, which is received and answered by the SmartAccess App. The SmartAccess Module checks the opening authorisation of the SmartAccess AppKey and then unlocks the motorised lock.
If the KeylessGo function is not desired, it can be disabled for each individual AppKey. The door can then still be operated via the SmartAccess App or the SmartKey’s transmit button.
For the correct use of the the SmartAccess Module, please read the operating instructions carefully before using the product. Follow the instructions given and follow the described instructions. Failure to comply with the information and instructions, no warranty for the proper functioning of the product can be given. The SmartAccess Module must be protected against moisture and tampering. Any other use than that described in this manual is not intended and will result in exclusion of warranty and liability. This also applies to conversions and changes to the device. Do not open this device under any circumstances! It contains no user-serviceable parts. If an error occurs, send the SmartAccess Module to the responsible service unit.
Be sure to keep the operating system, virus scanner and firewall of your smartphone up to date. Only in this way can you be protected against cyber attacks. Regularly check if your software is up-to-date and install the available updates. For your safety, use good passwords and change them at certain intervals. Recommendations for secure passwords can be found, for example, at the Federal Office for Information Security in the area of Recommendations: www.bsi-fuer-buerger.de.
The radio transmission takes place on a non-exclusive transmission path. This can lead to interference from other radio applications. Switching operations, electric motors or defective electrical appliances can also cause interference. The transmission power and reception characteristics of the SmartAccess Module depend heavily on constructional and environmental conditions. Thus, the range in the open field differs from that in buildings. Also, the signal is transmitted differently at high humidity than at lower humidity.
The SmartAccess Module complies with the requirements and regulations of Directive 2014/53/EU (RED).
Note: Please make sure that in the case of a data interruption, for example due to a power failure, relevant applications such as door locks can be operated differently (e.g. mechanically with a cylinder key).
Old devices and batteries are not allowed to be disposed with household waste!

Dispose of the old devices via a collection point for electronic waste or via your specialist shop.
Dispose of the old batteries in a recycling container for used batteries or via your specialist shop.

Dispose of the packaging material in the collection container for cardboard, paper and plastics.
 ).
). ).
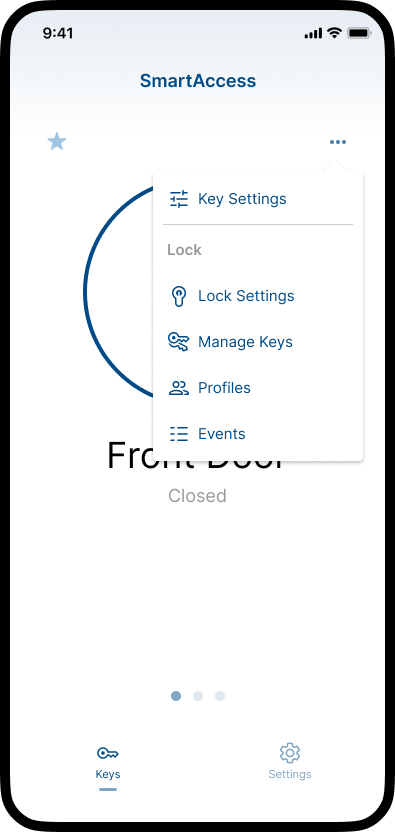
).Key Settings
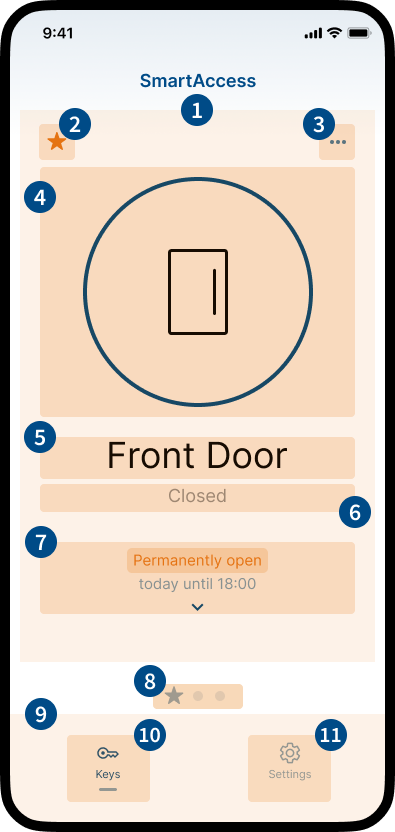
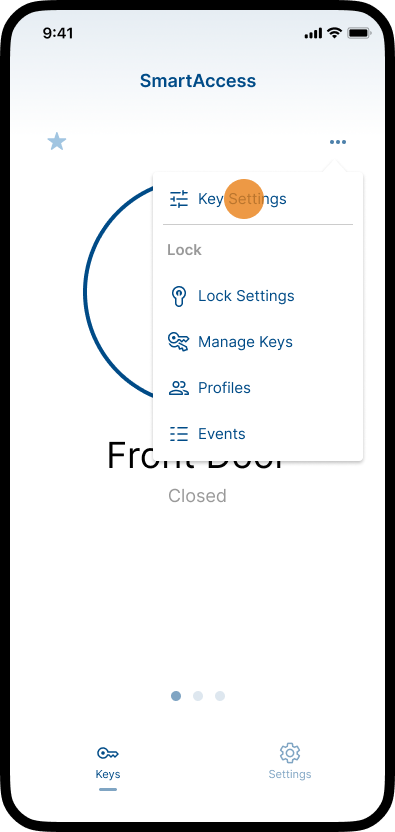
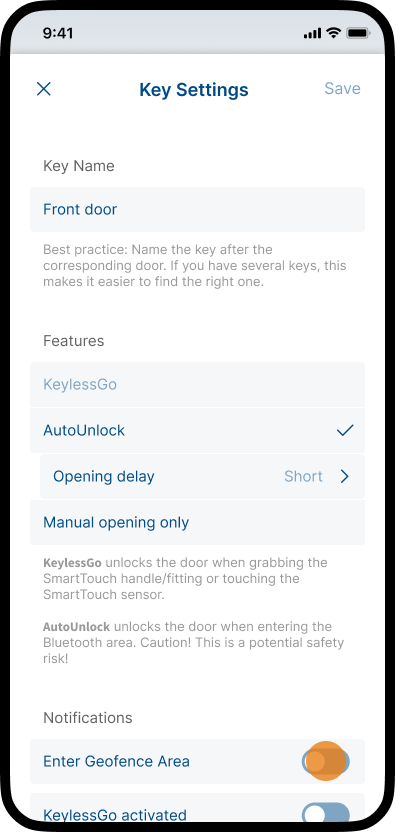
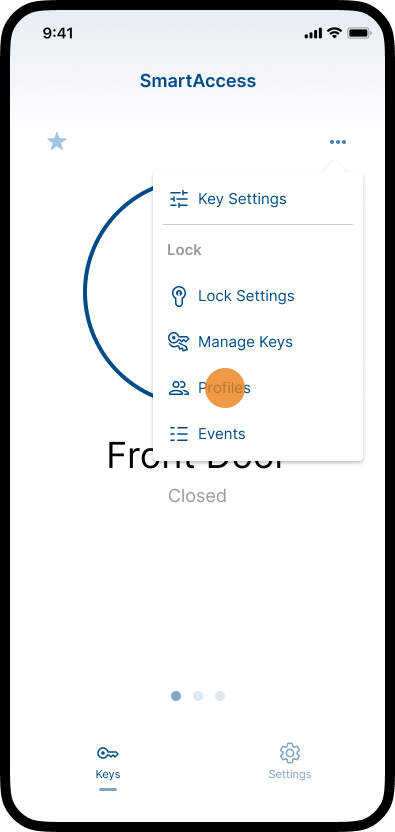
In the Key Settings area you have the possibility to adjust the settings of your personal key. E.g. change the name, view the location of the corresponding lock (SmartAccess Module), activate/deactivate supported features like KeylessGo or AutoUnlock and manage notifications.
Lock Settings
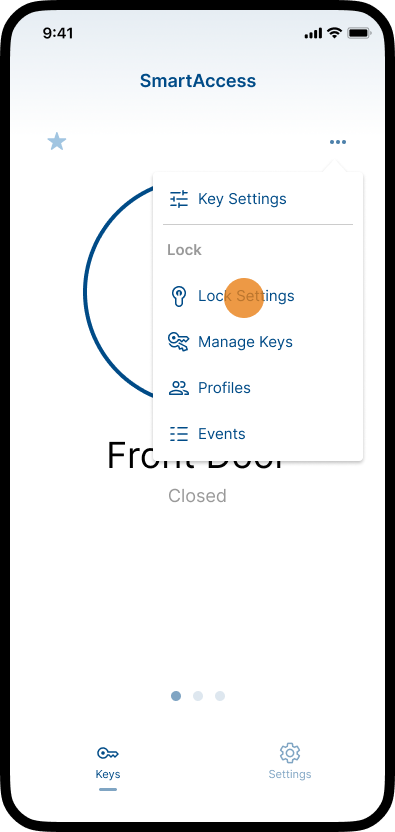
In the Lock settings area you have the possibility to adjust the settings of the lock (SmartAccess Module). E.g. change the name, edit the location, adjust the geofence radius and the bluetooth signal strength or activate/deactivate supported door modes like Day Latch Mode, Permanent Open Mode or Party Mode. Further more you can adjust the duration of the opening signal, do a firmware update or reset the lock (SmartAccess Module).
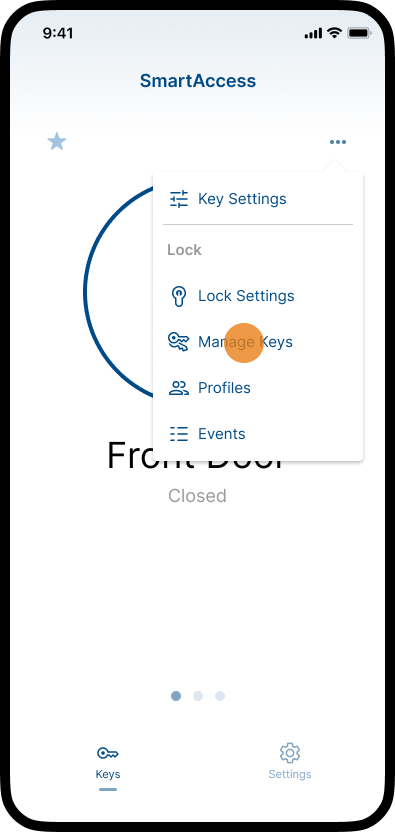
Manage Keys
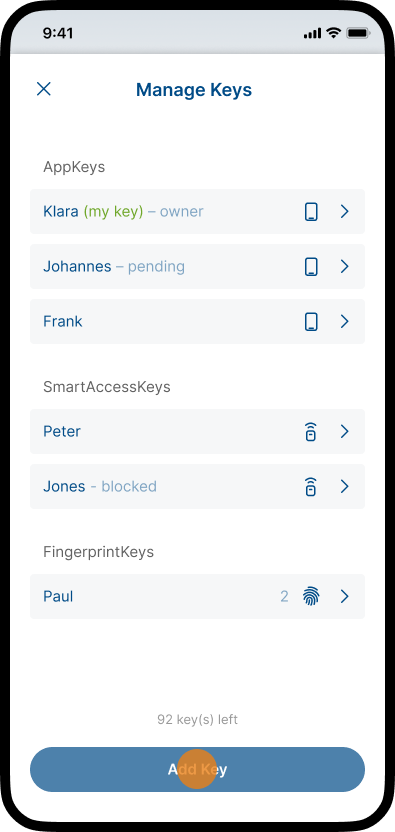
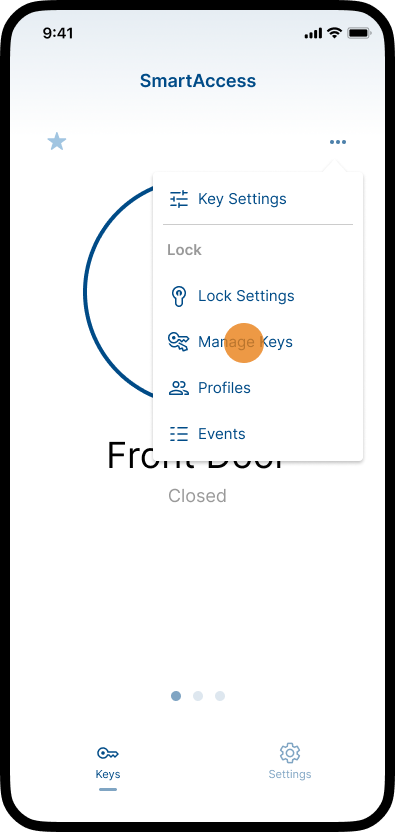
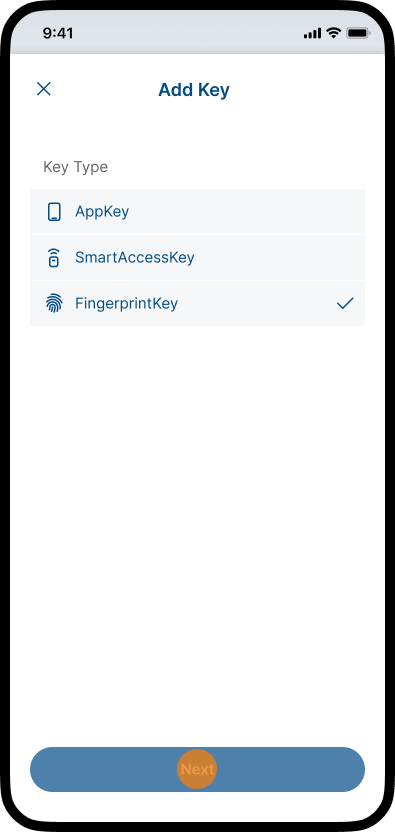
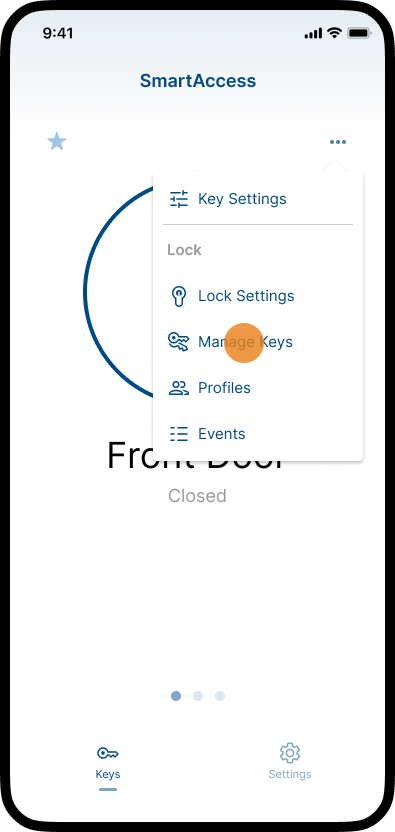
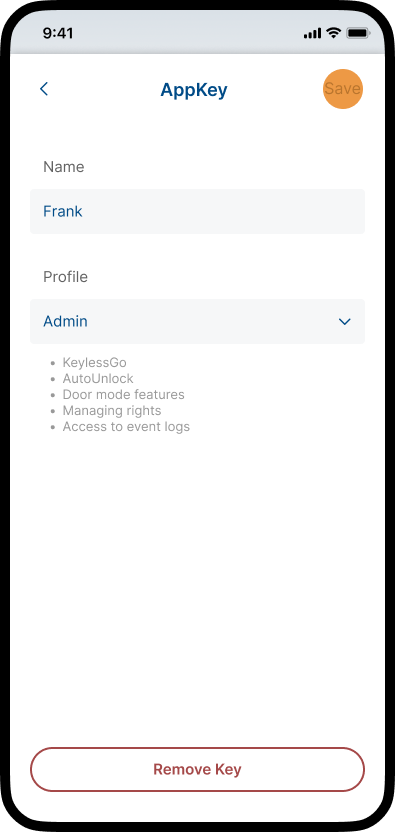
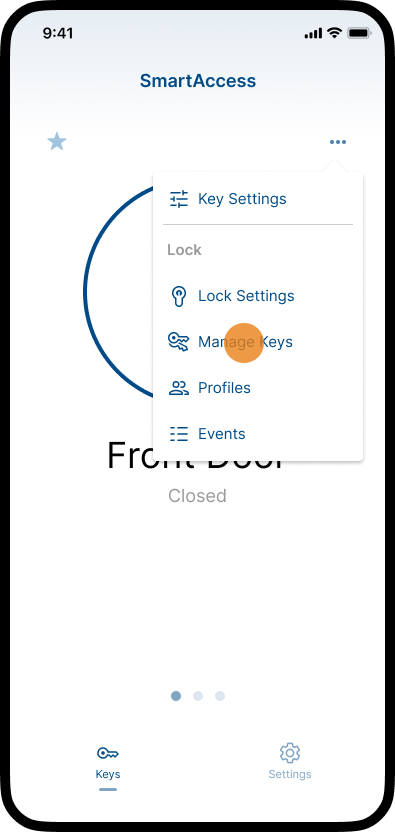
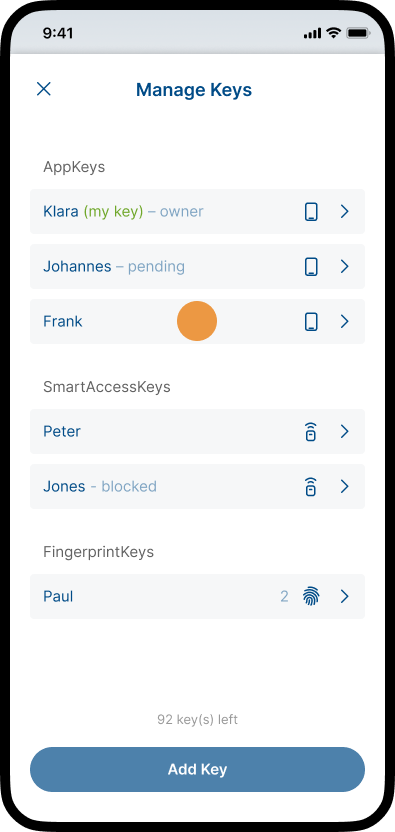
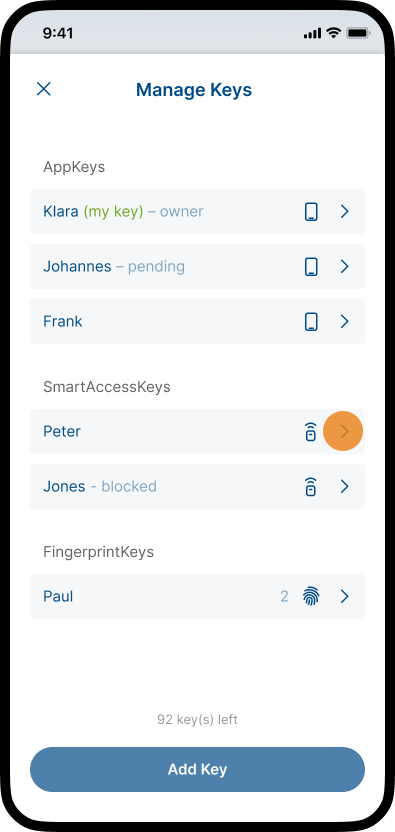
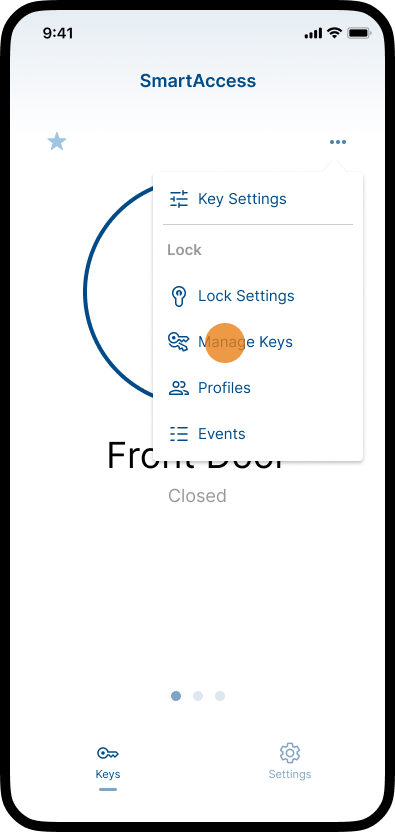
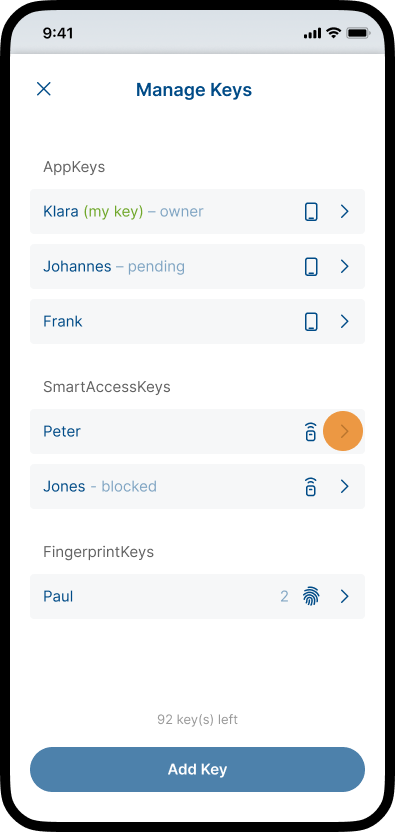
In the Manage Keys area you can invite new users to control the lock (SmartAccess Module) and manage their access permissions. Different types of keys can be added and assigned, such as AppKeys, SmartKeys or FingerprintKeys (coming soon).
Profiles
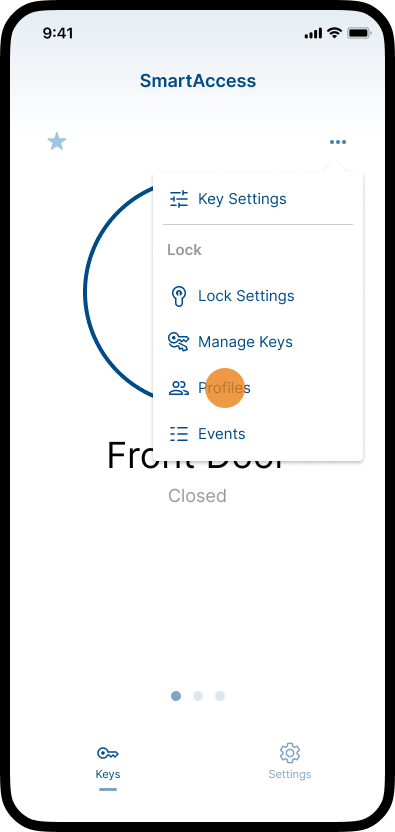
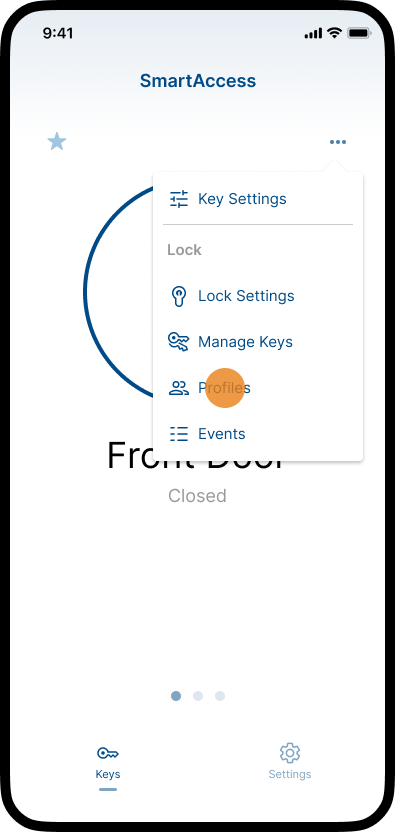
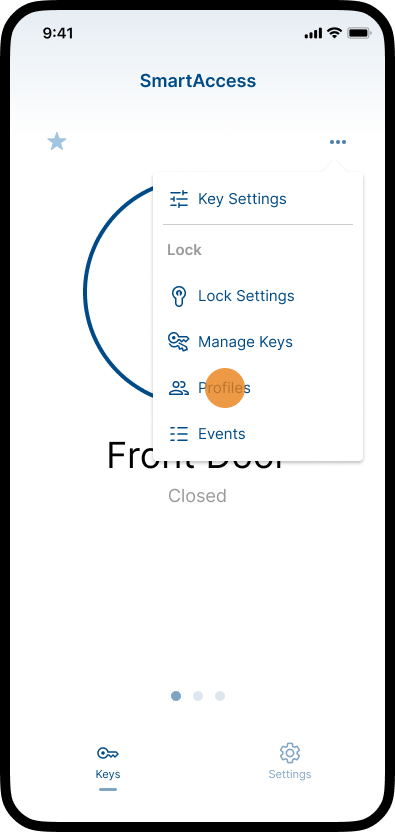
In the Profiles area you have the option to assign different types of access permissions for your lock (SmartAccess Module). By creating and assigning individual profiles with different access permissions, you have full control over the access permissions of different users.
Events
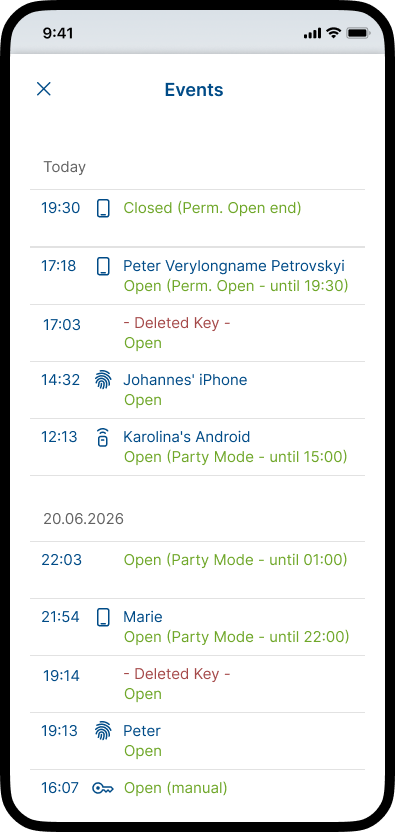
All actions performed by the lock (SmartAccess Module) are recorded in the Events area. This means you can see which user opened or closed the door at what time.
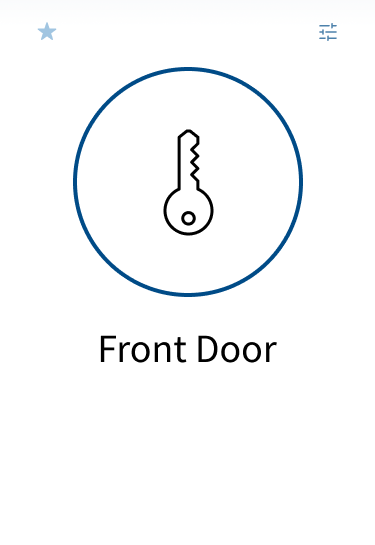
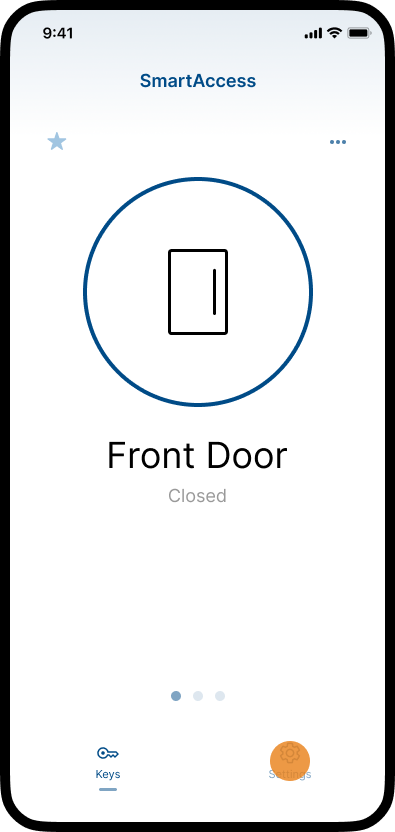
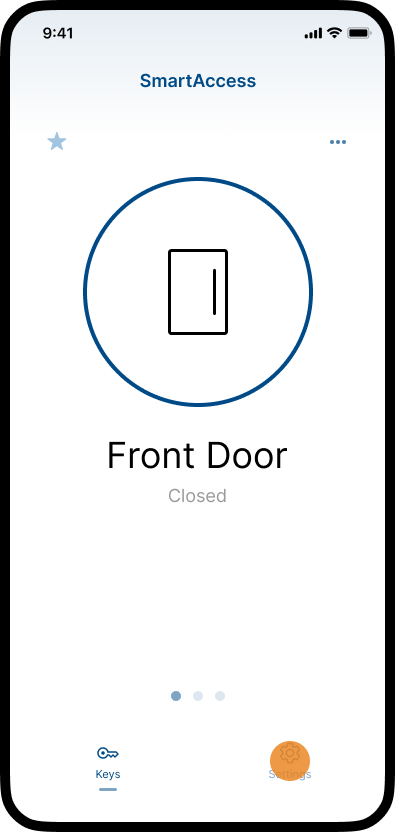
Depending on whether the lock can transmit status feedback or not, different icons are displayed on the home screen. For locks with feedback, the symbol also changes when the door is open or closed.
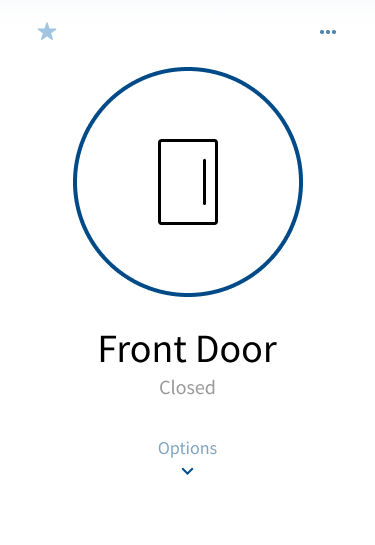
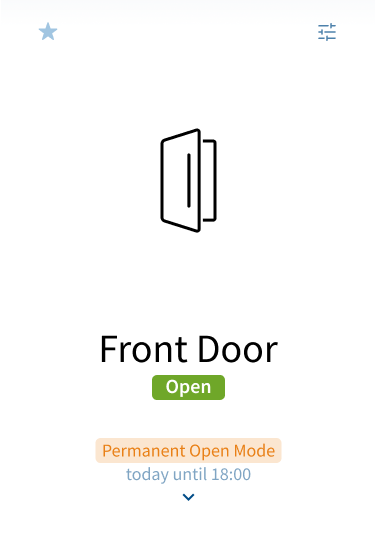
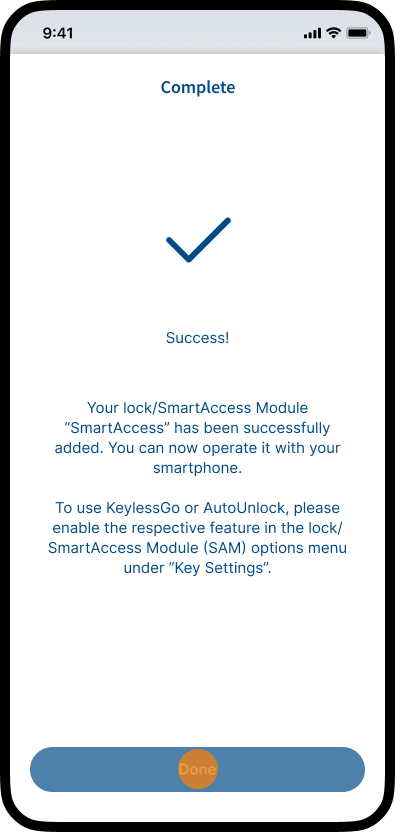
In order to use SmartAccess, it must be set up via the SmartAccess App.
You will need:
Note: Please refer to the SmartAccess App page in the Apple App Store or Google Play Store for the required operating system version and device compatibility information. The app stores always provide the current system requirements. For Android devices, you can also refer to Google’s Google Play supported devices list: Google Play supported devices.
Download the SmartAccess App from the appropriate store and install the app on your smartphone.


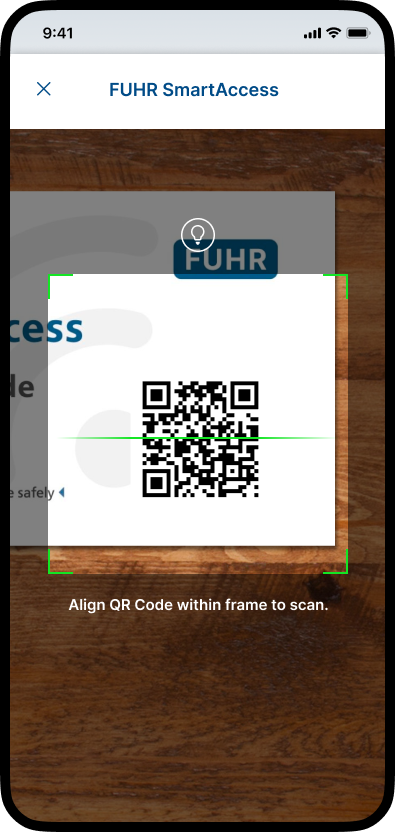
Set up SmartAccess easily and quickly with your personal SmartAccess Security Card (delivered with the SmartAccess Module).
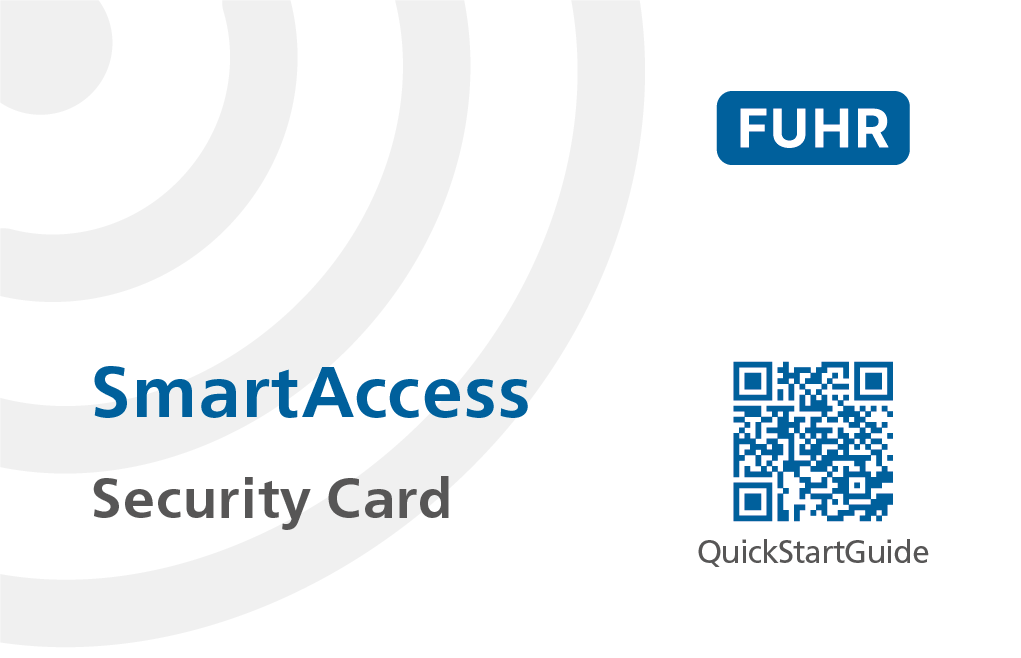
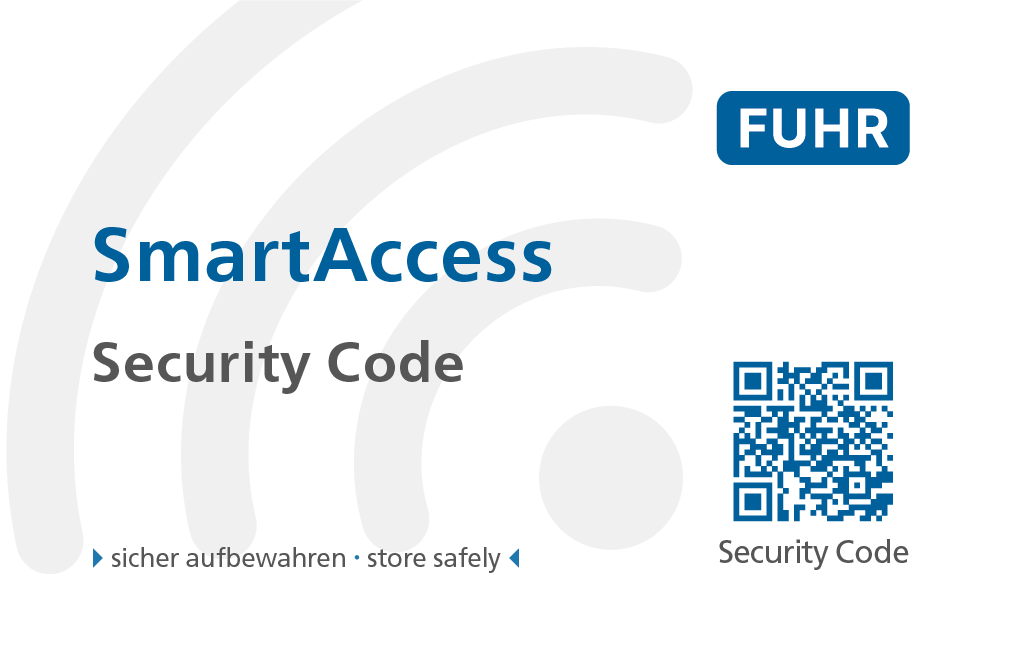
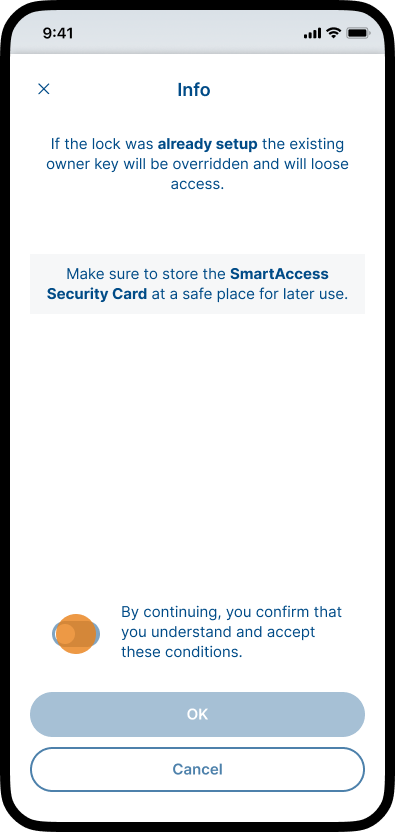
Note: After setup is complete, keep the SmartAccess Security Card in a safe place. In case you need to reset the system, you will need your personal SmartAccess Security Card.
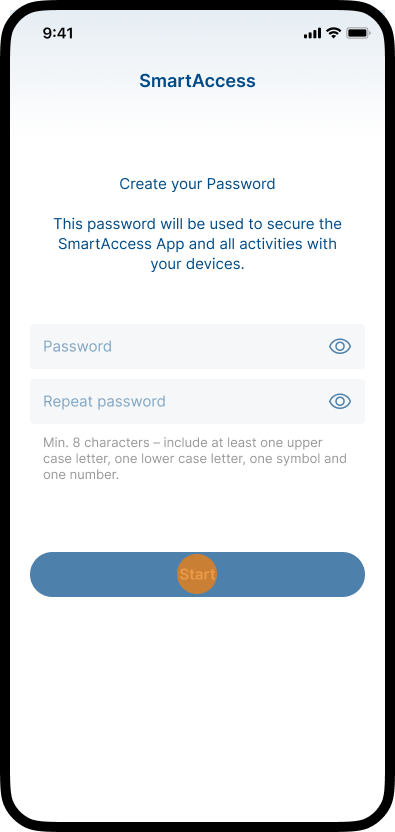
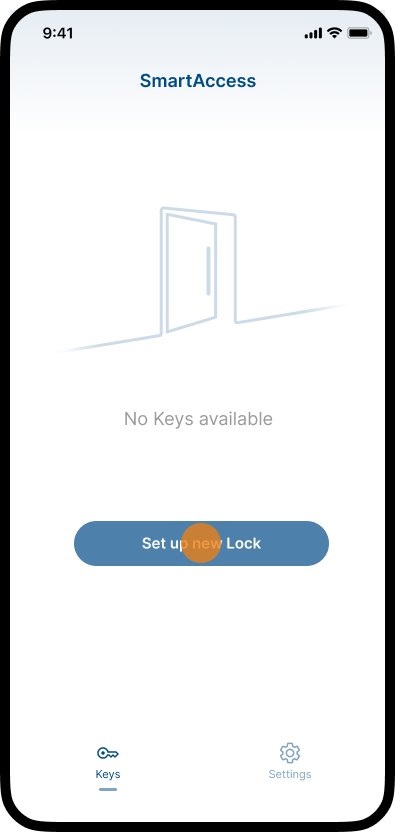
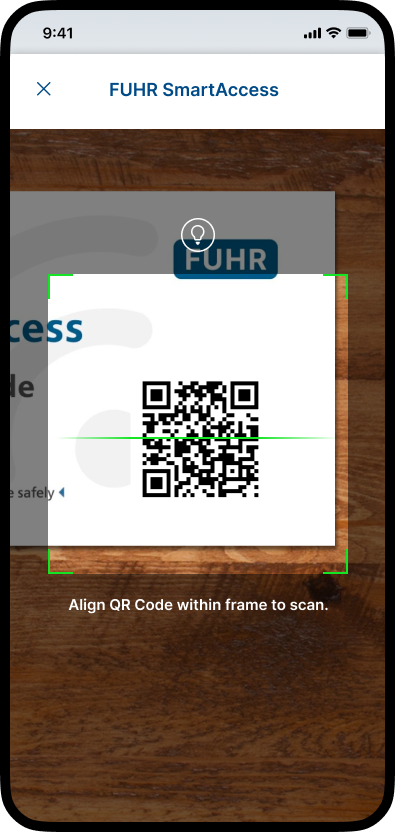
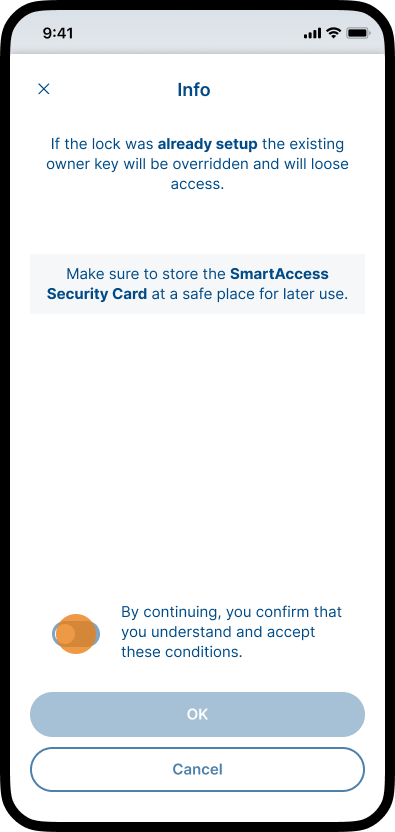
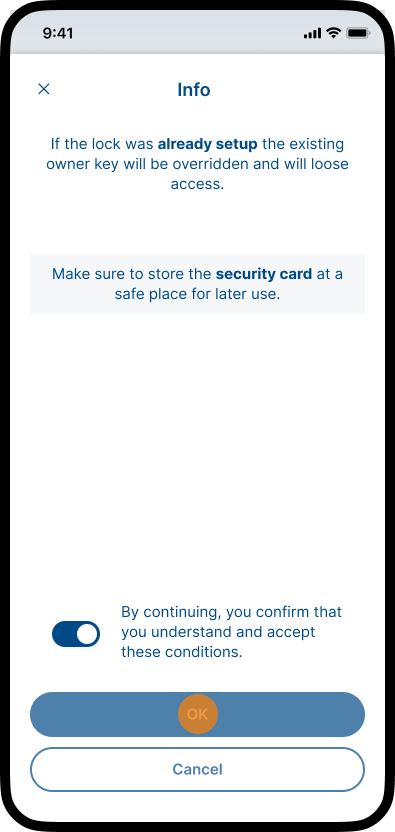
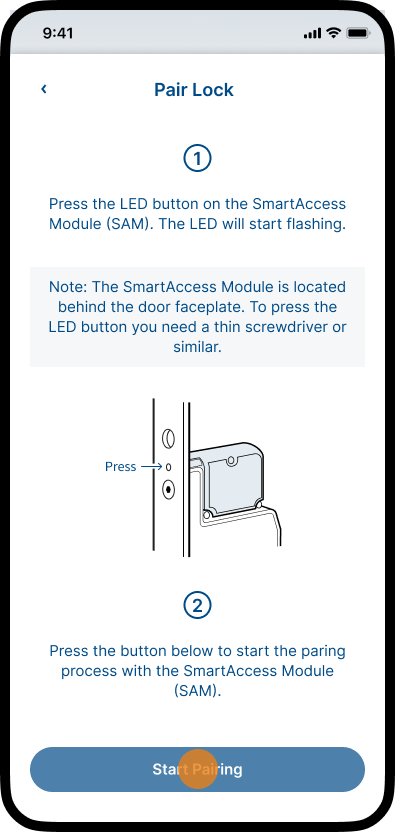
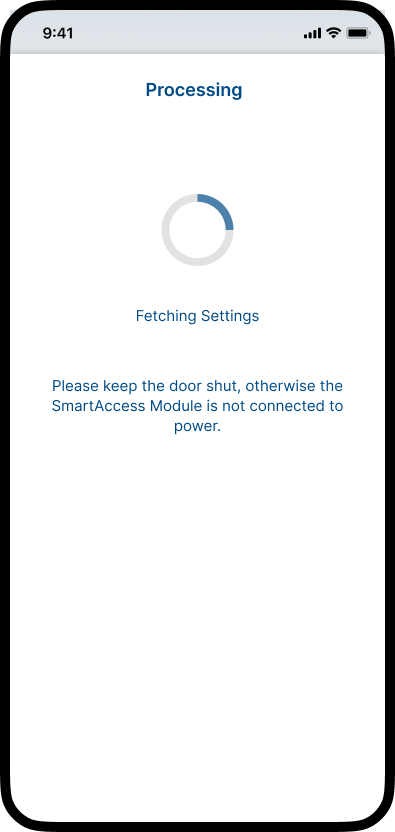
Note: The first user to set up a new SmartAccess Module is assigned an owner key. The owner key is a special type of key that cannot be deleted. This ensures that the user always has access to the lock, regardless of the number of additional keys added. The owner key is always displayed at the top in the Manage Keys section.
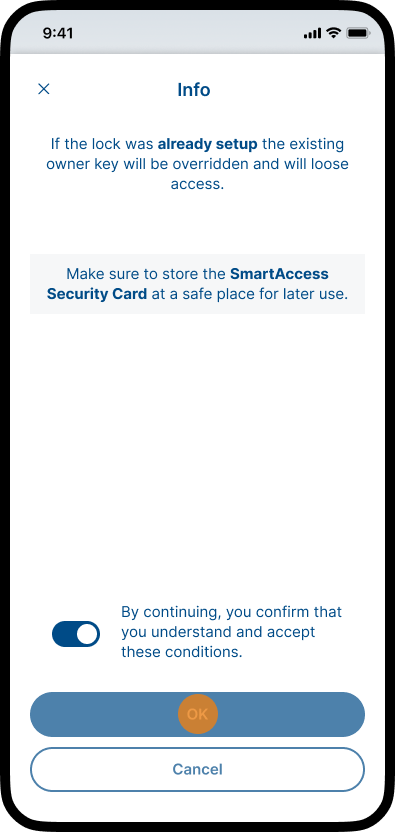
To create a new owner key, the SmartAccess Module must be set up again using the QR code shown on the SmartAccess Security Card. The existing owner key is overwritten during the new setup and loses access. There can only ever be one owner key.
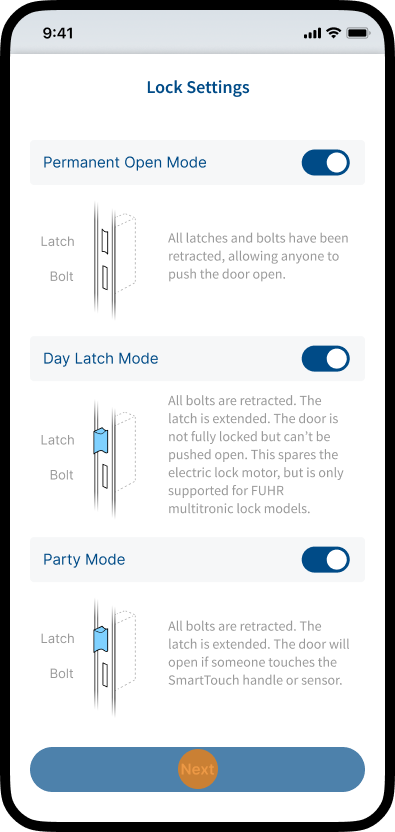
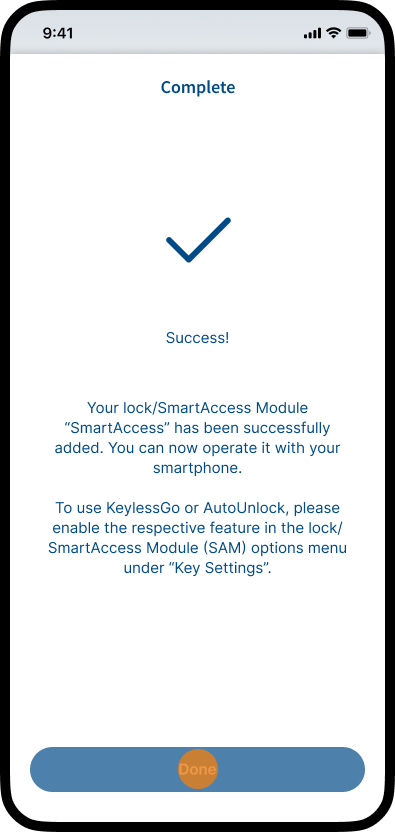
Set the basic lock settings by activating or deactivating the corresponding toggle switches. The lock settings can be adjusted at any time in the Lock Settings area (see chapter Lock Settings). Further information about the individual features and functions can be found in the Smart Access App or in this user manual.
Note: To set or adjust the lock settings of the SmartAccess Module, your smartphone must be within the Bluetooth range of the SmartAccess Module. The Bluetooth range of the SmartAccess Module is approximately 10m in open space. The transmission power and reception characteristics depend heavily on structural and other environmental conditions. Please make sure that your smartphone is near the SmartAccess Module or door.
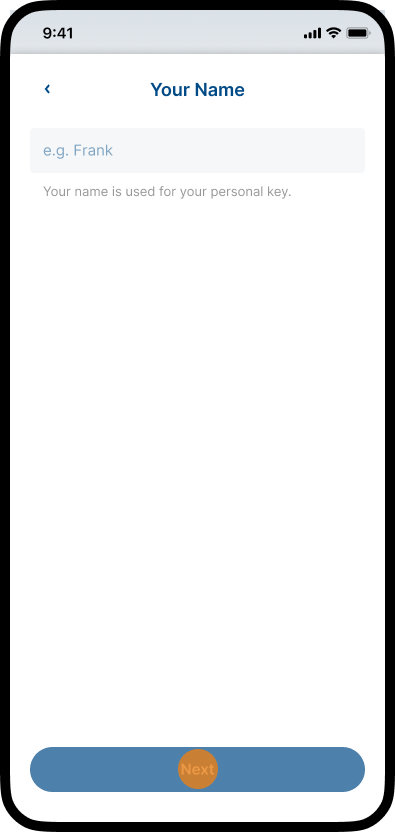
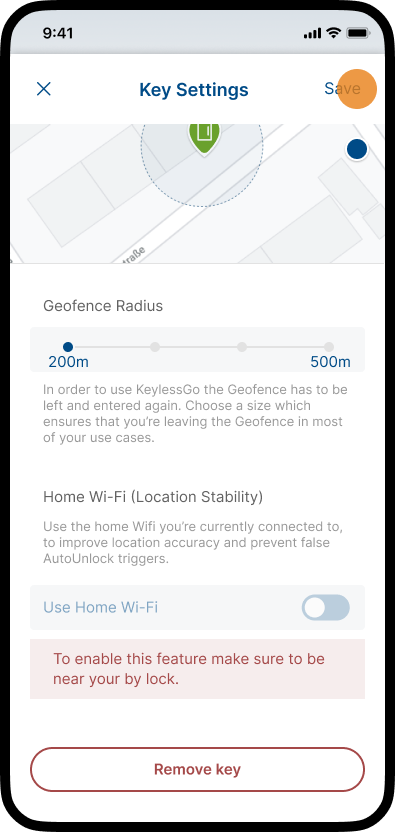
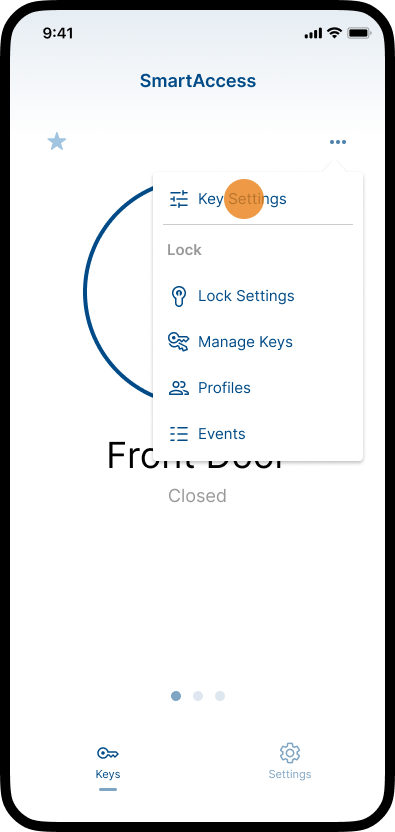
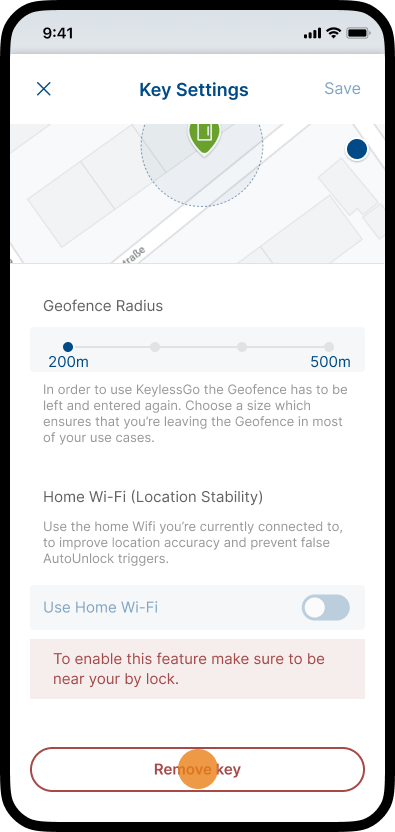
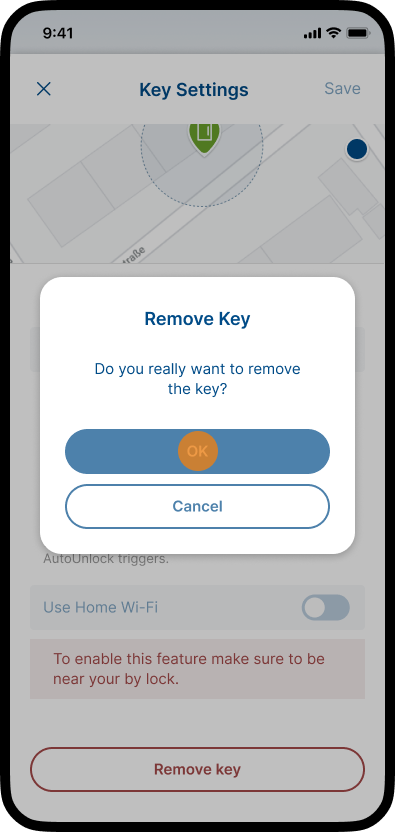
In the Key Settings area you have the possibility to adjust the basic settings of your personal key. E.g. change the name, view the location of the SmartAccess Module or door, adjust the geofence radius, activate/deactivate supported features like KeylessGo or AutoUnlock and manage notifications.
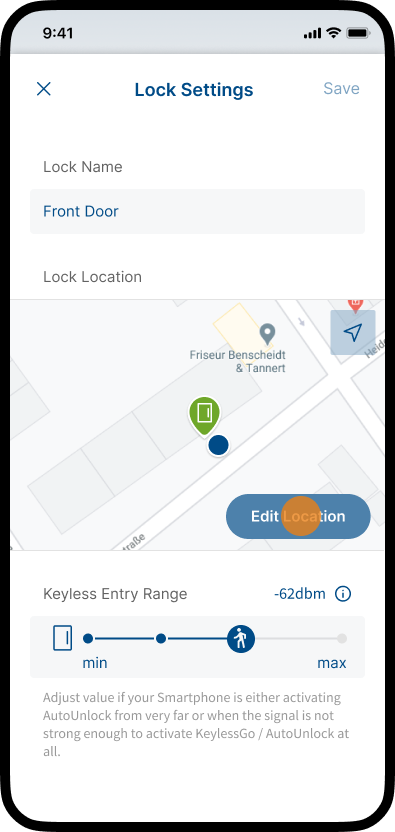
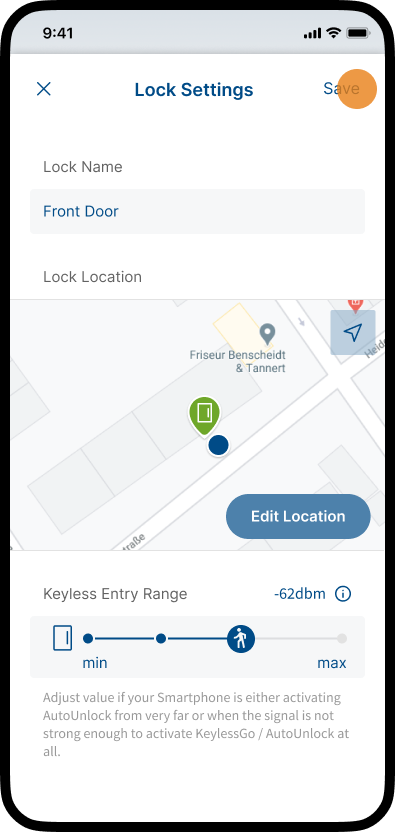
In the Lock Settings area you can adjust the basic settings of the SmartAccess Module — change the name, edit the location, adjust the keyless entry range, or activate/deactivate supported door modes. You can also adjust the duration of the opening signal, run a firmware update, or reset the device.
Additional settings may be available depending on the connected hardware, such as SmartAccess multiscan settings for paired fingerprint sensors or a Status Sensor Installed option for Pulse Control Locks.
Note: Administrator rights are required to make lock settings, and your smartphone must be within Bluetooth range of the SmartAccess Module.
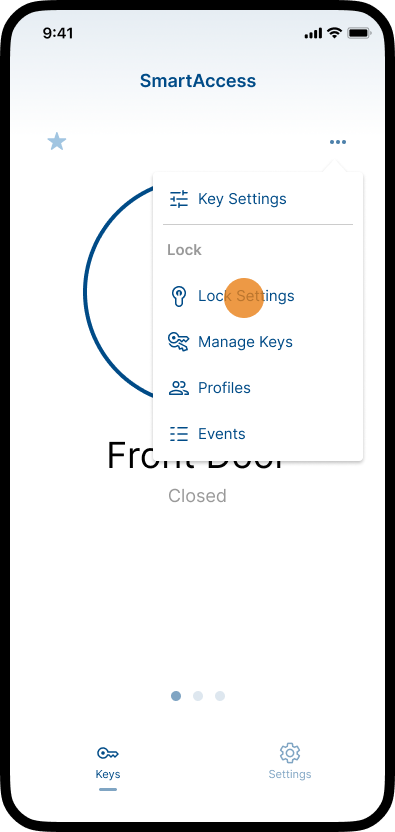
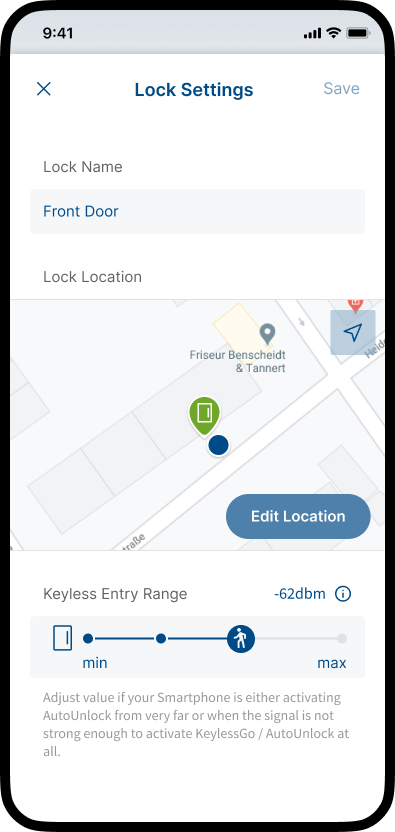
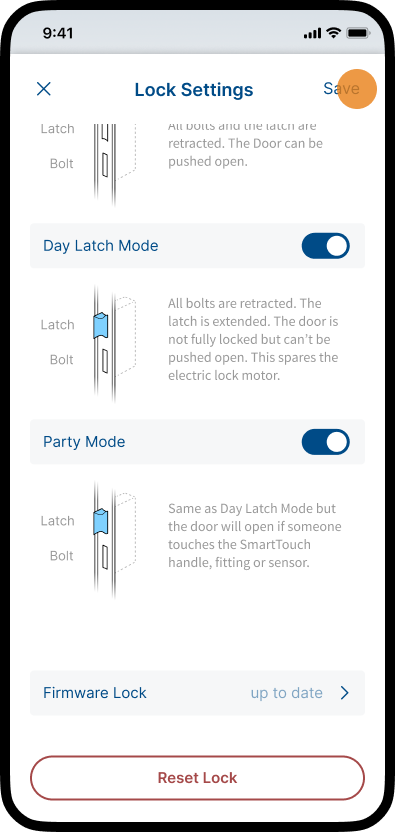
Note: In the Lock Settings area you have the option to enable the use of different door modes for the lock. In order to actually use a door mode, it must be activated. For further information on how to activate door modes, see chapter Door Modes.
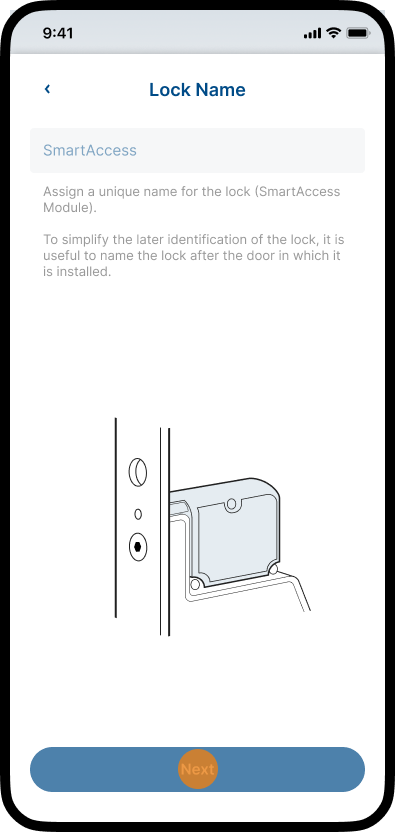
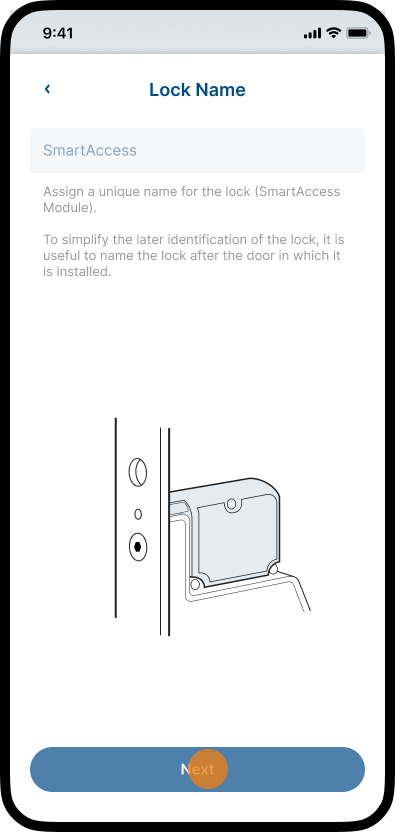
Lock Name
Assign a unique name for your Lock (SmartAccess Module) integrated inside your door. If you use multiple SmartAccess Modules, a unique name will help you identify the right Module in the SmartAccess App.
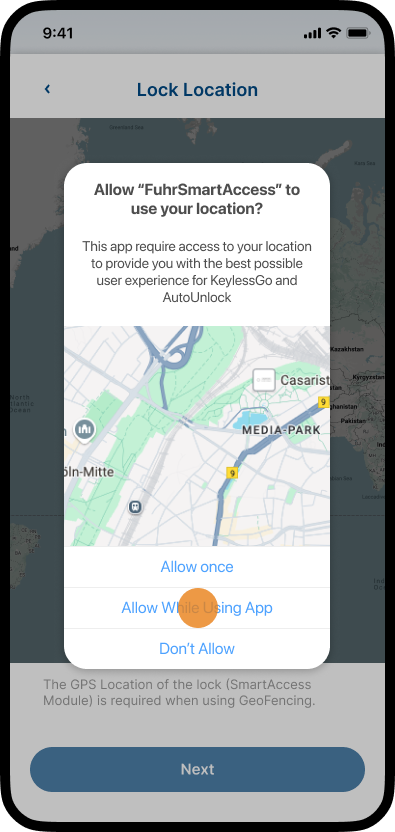
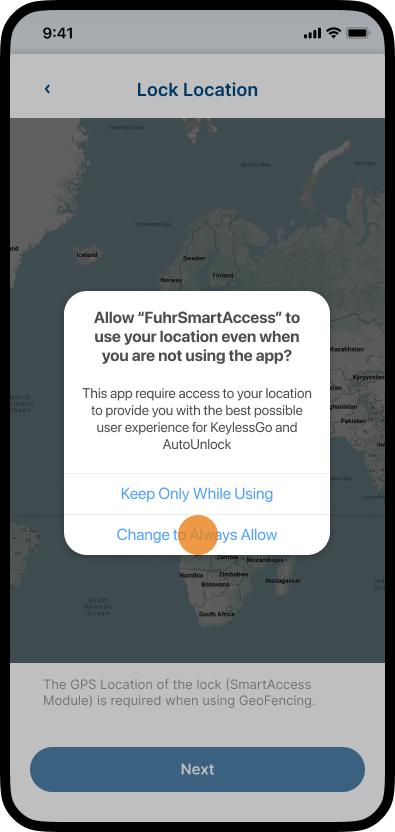
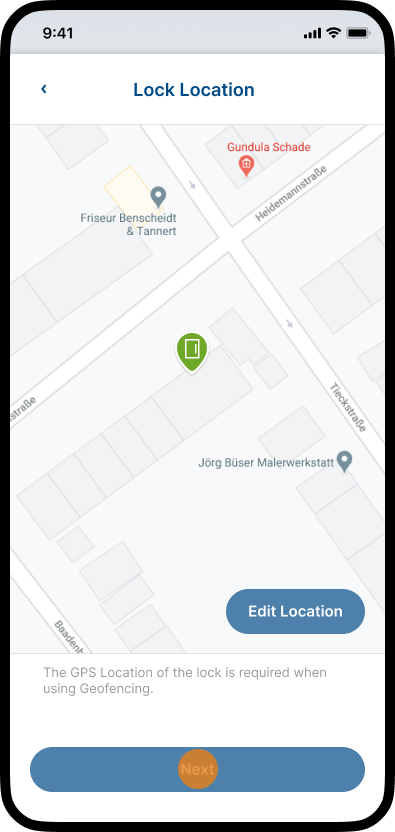
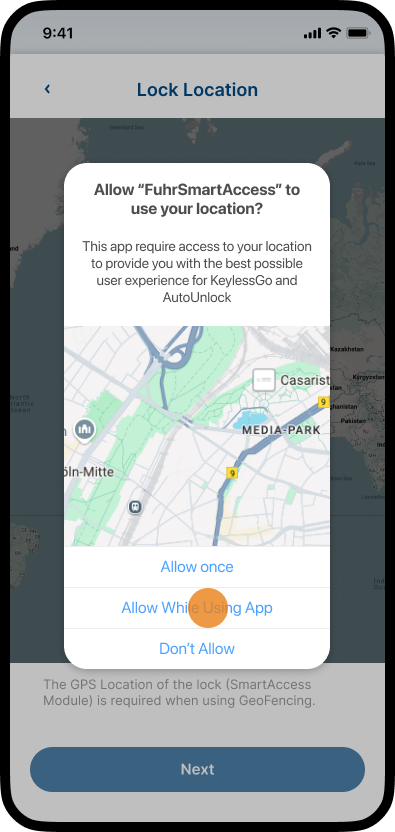
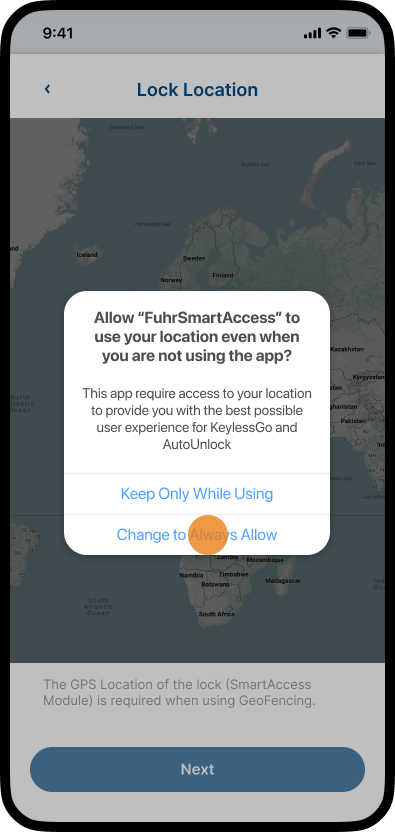
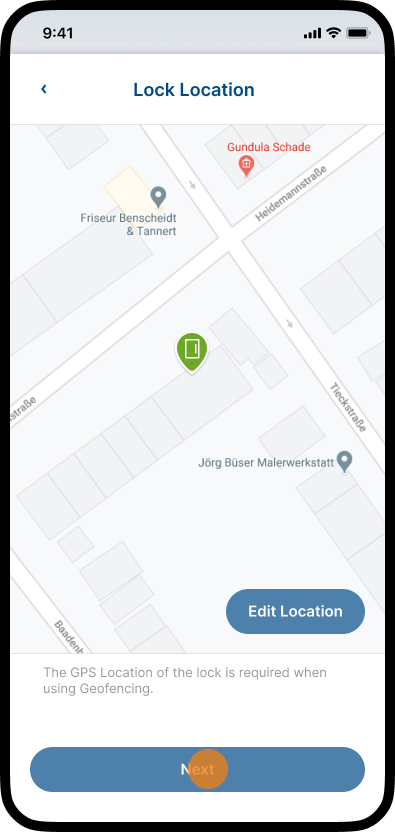
Lock Location
The SmartAccess Module automatically determines the location of your lock. The position of the lock and the position of your smartphone should be the same. Please check that the position has been set correctly.
Note: If the position is not correct, tap Edit Location to adjust the position manually.
For more information on manually setting the lock location, see the following chapter, Lock Location.
Keyless Entry Range
Adjust the value if your Smartphone is either activating KeylessGo/AutoUnlock from very far or when the signal is not strong enough to activate KeylessGo/AutoUnlock at all.
multiscan SmartAccess
(fingerprint sensor)
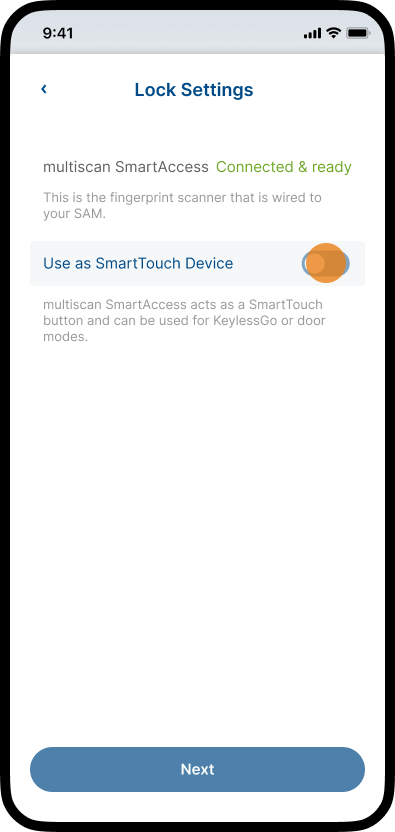
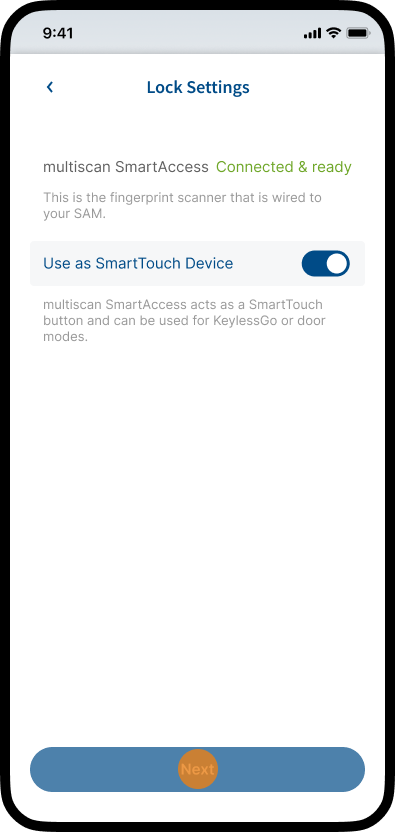
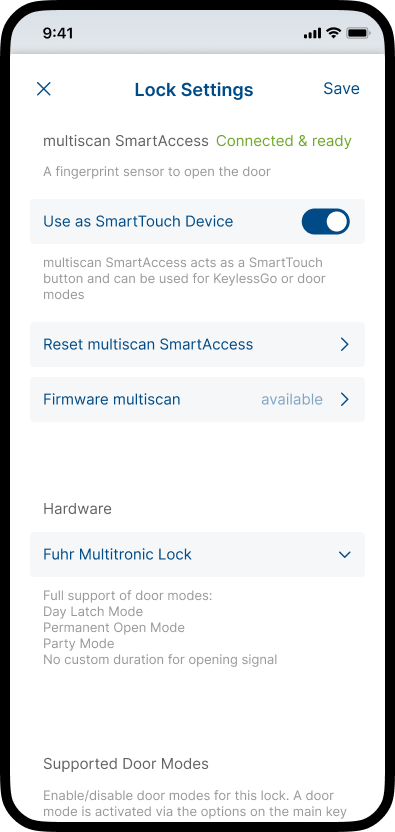
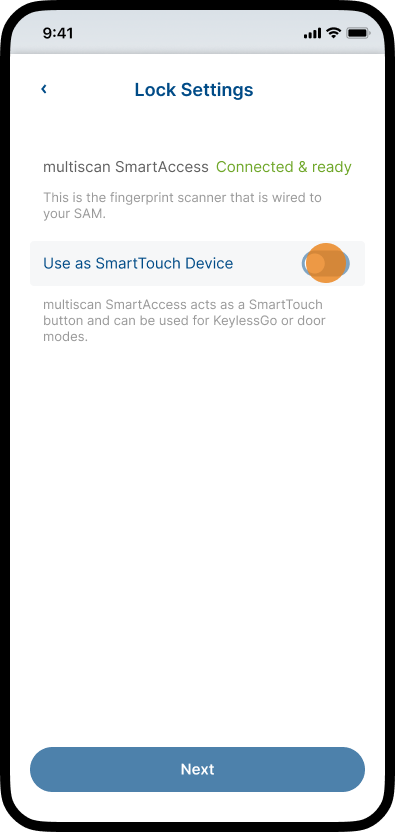
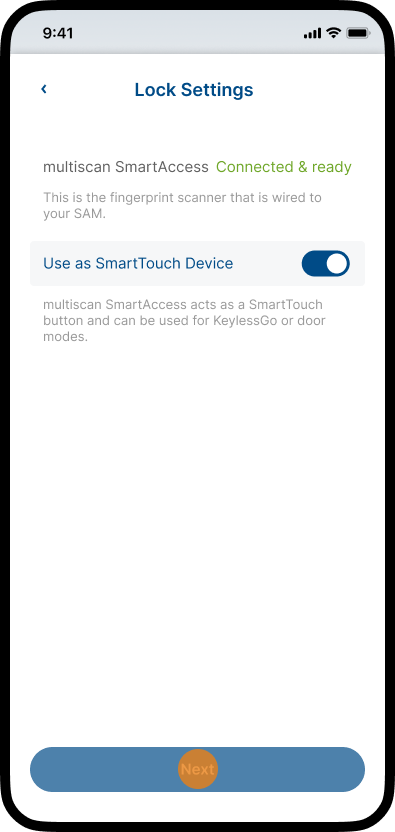
When a fingerprint sensor is paired, the multiscan SmartAccess section is displayed. Here you can view the sensor status, configure the sensor as a SmartTouch device, and reset multiscan SmartAccess.
For further information about multiscan SmartAccess, see chapter multiscan SmartAccess & FingerprintKeys.
Hardware
(Lock Model)
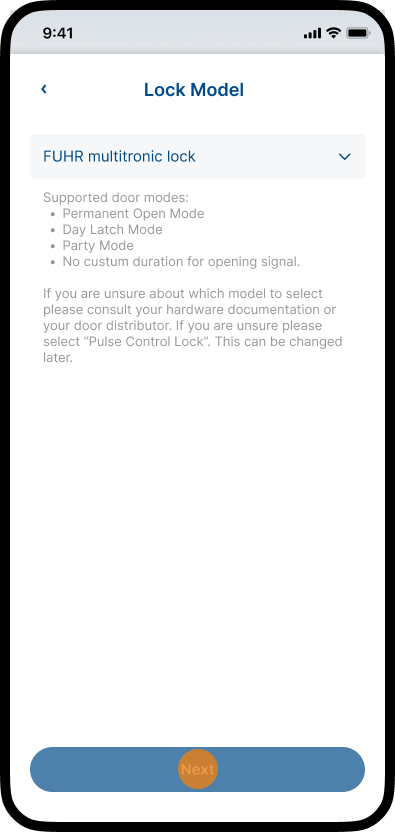
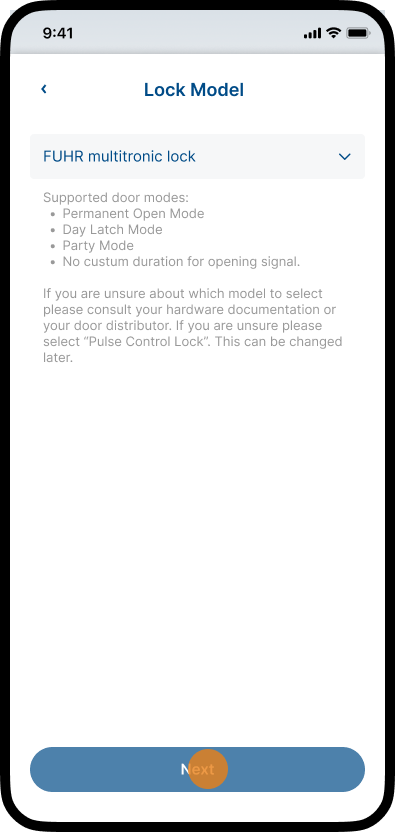
In the Hardware section, you can select your lock model. Depending on the lock model, different functions and door modes are available.
Make sure you select the correct lock model. If you are unsure about which model to select please consult your hardware documentation or your door distributor. If you are unsure please select “Pulse Control Lock”. This can be changed later.
Further information on the various lock models and their specific features and functions can be found in the chapter Lock Models below.
Hardware
Duration of Opening Signal
Depending on the lock model installed in your door, this may need to be adjusted. Please only change if you know what you are doing. If in doubt, please contact a qualified technician or your system provider.
The default value is 400ms. Minimum: 100ms, maximum: 10000ms (10sec).
Hardware
(Status Sensor installed)
For Pulse Control Locks, the Status Sensor Installed setting is available (default off). With a door status sensor wired to the SmartAccess Module and this switch ON, the Module knows whether the door is open or closed — which enables status feedback and the multi-user safety feature. KeylessGo and AutoUnlock work on Pulse Control even without it.
Note: Only enable Status Sensor Installed if a status sensor is actually fitted, wired to the Module, and working. If it is on without a correctly wired sensor, KeylessGo and AutoUnlock will not work. With the switch off (and no sensor), KeylessGo and AutoUnlock still work normally — you simply do not get the multi-user safety feature.
Hardware
(SmartTouch)
A SmartTouch handle or SmartTouch sensor allows you the convenient door opening via KeylessGo technology. For unlocking the door by the motorised lock, simply touch the door handle or sensor. The SmartAccess Module installed in the door leaf now establishes a Bluetooth connection to the SmartAccess App or the SmartKey. The SmartAccess Module checks the opening permissions of the key (AppKey/SmartKey) and then unlocks the motorised lock.
Note: In order to be able to open the door conveniently with the SmartTouch handle or SmartTouch sensor, KeylessGo or a corresponding door mode must be enabled in the Lock Settings area.
Supported
Door Modes
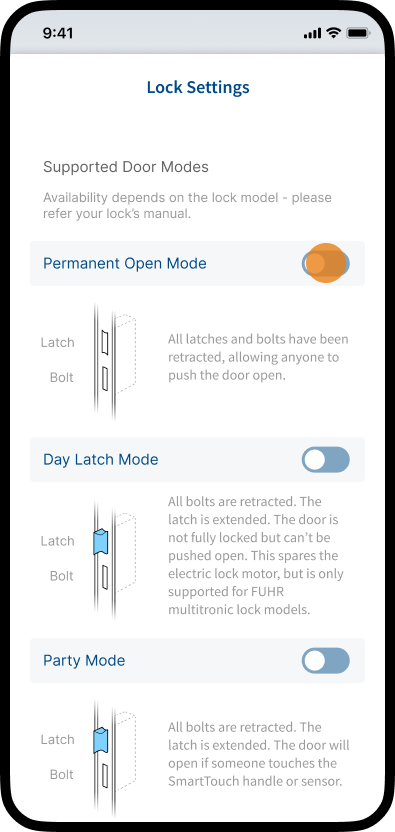
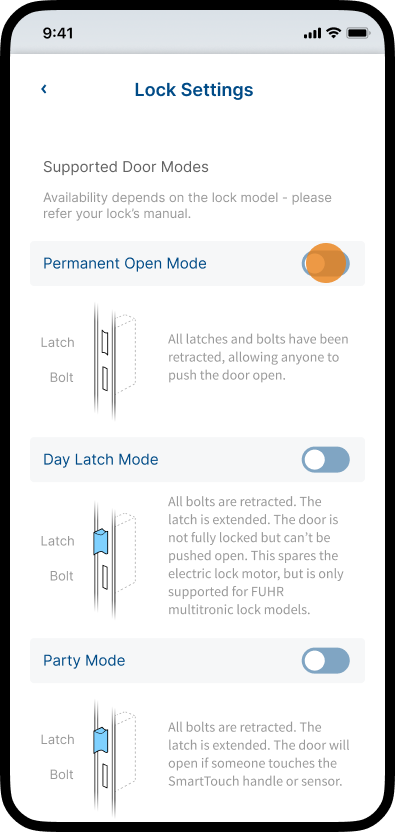
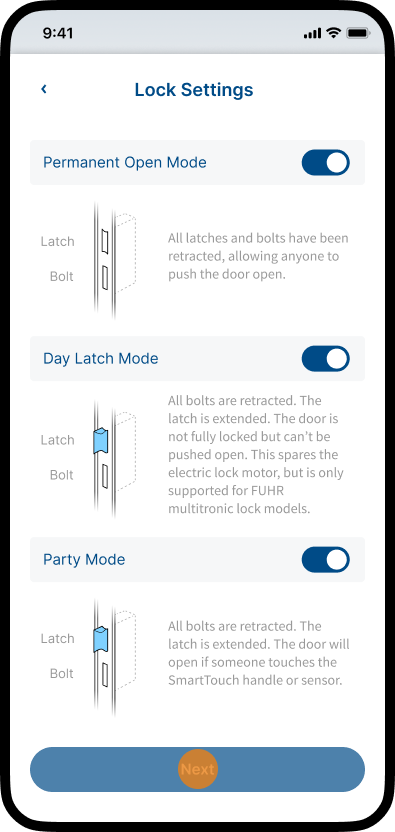
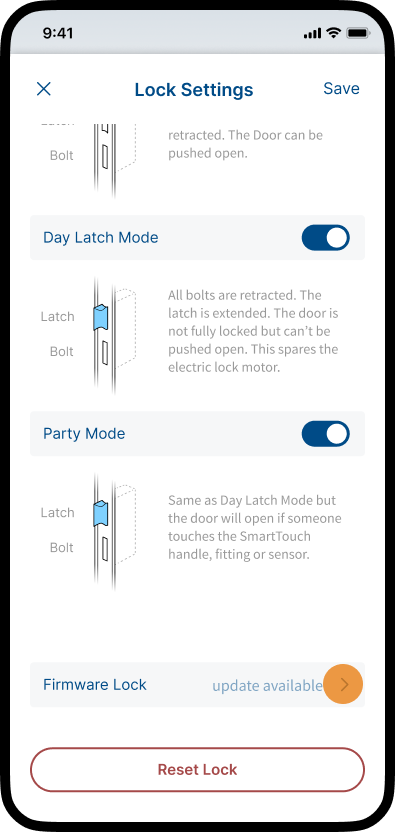
SmartAccess offers the option of using various door modes (Day Latch Mode, Permanent Open Mode, Party Mode).
For further information about the individual door modes, see chapter Door Modes.
Note: Not every lock supports all door modes. For information on which lock supports which door modes, see the following chapter Lock Models.
Firmware Update
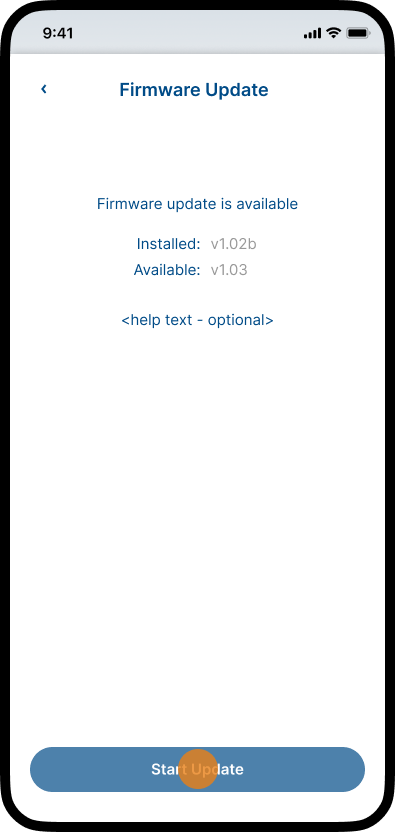
The firmware (software that is embedded in the SmartAccess Module) of your SmartAccess Module and the SmartAccess App should always be up-to-date to ensure maximum security and best compatibility between the SmartAccess Module and the SmartAccess App.
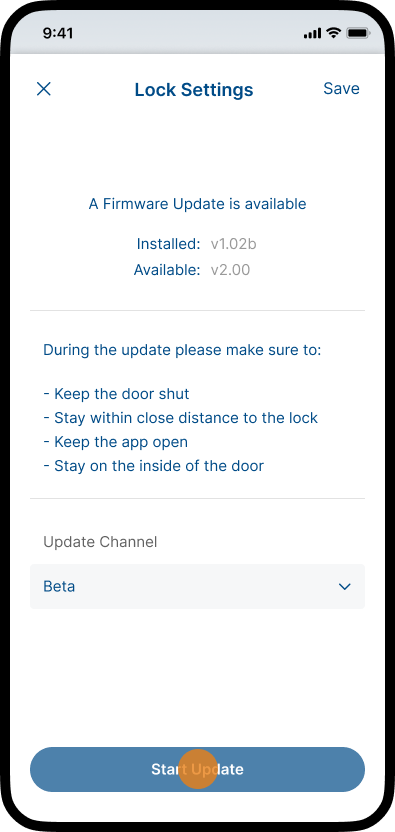
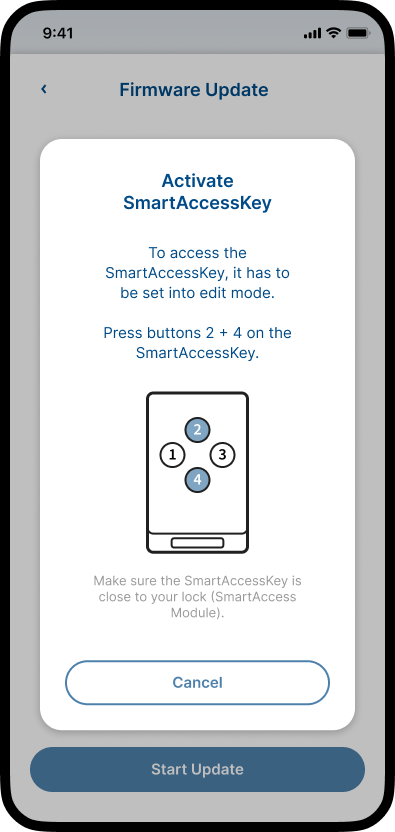
Note: The SmartAccess Module can only be updated manually via the SmartAccess App if the smartphone is within the Bluetooth range of the SmartAccess Module. For more information, see chapter Firmware Update.
Note: The SmartAccess App is usually by default automatically updated via the App Store / Google Play Store.
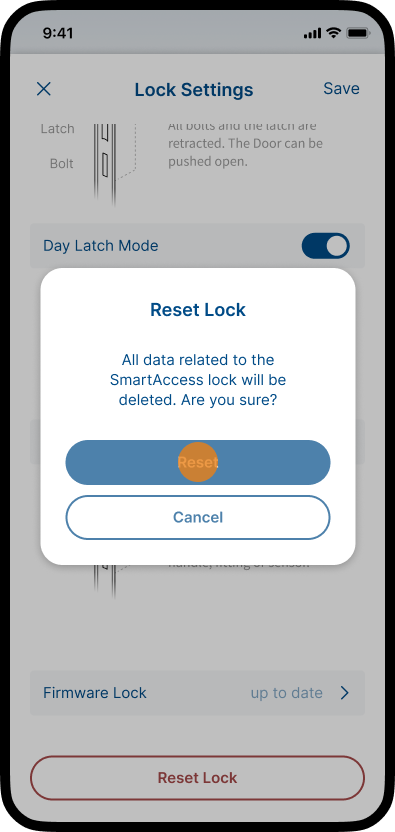
Reset Lock
A reset allows you to reset the SmartAccess Module to the delivery state (factory settings). For more information, see chapter Restart & Restart & Reset.
| FUHR autotronic Lock | FUHR multitronic Lock | Pulse Control Locks | |
|---|---|---|---|
| Status Feedback | Status on home screen & physical-unlock detection in Events | Status on home screen & physical-unlock detection in Events | Conditional — with a status sensor + “Status Sensor Installed” ON: status on home screen & physical-unlock detection in Events |
| Supported Functions | • KeylessGo • AutoUnlock • Manual Opening | • KeylessGo • AutoUnlock • Manual Opening | • KeylessGo1 • AutoUnlock1 • Manual Opening *KeylessGo/AutoUnlock require a door status sensor and the “Status Sensor Installed” setting enabled. |
| Supported Door Modes | • Permanent Open Mode • Party Mode | • Day Latch Mode • Permanent Open Mode • Party Mode | • Party Mode |
| Duration of Opening Signal | Fixed (not exposed) | Fixed (not exposed) | Adjustable — default 400 ms (100–10.000 ms) |
| Status Sensor Installed | – | – | Available (default off) |
1On Pulse Control locks, KeylessGo and AutoUnlock work without a status sensor. Fitting a door status sensor (wired to the Module, with “Status Sensor Installed” ON) adds door-status feedback and the multi-user safety feature. Turning the switch on without a working sensor stops KeylessGo/AutoUnlock.
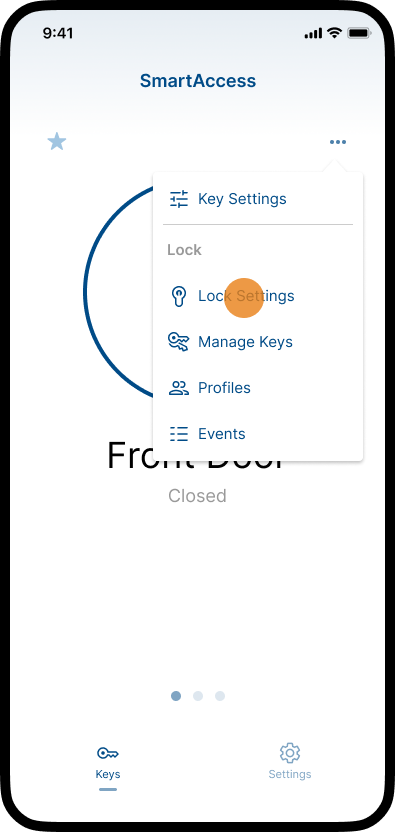
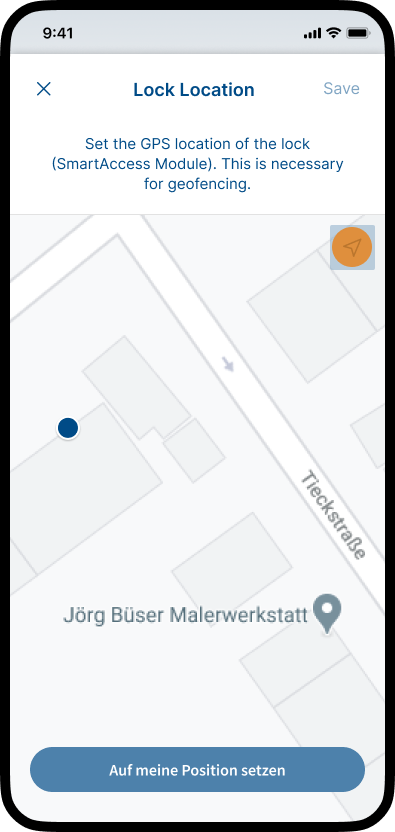
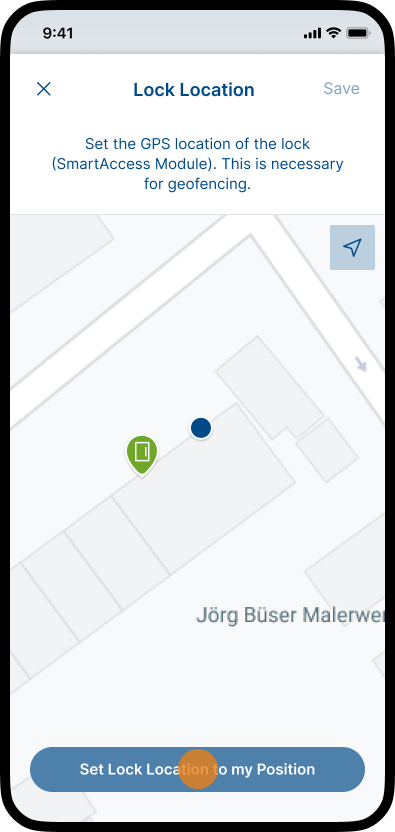
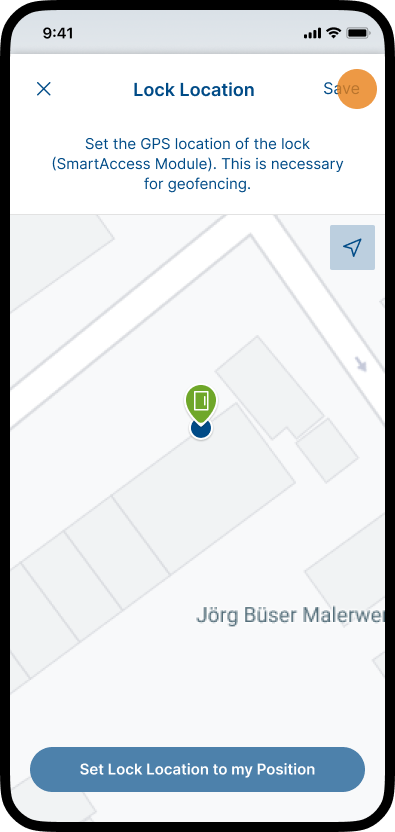
Usually the SmartAccess Module automatically determines the location of your lock. The position of the lock and the position of your smartphone should be the same. If the position is not correct you can adjust the position manually. Follow the steps described below.
Status
Displays the current status of the fingerprint sensor, including whether it is connected and ready for operation.
Use as SmartTouch Device
When enabled, the fingerprint sensor acts as a SmartTouch trigger, so KeylessGo and Party Mode become available. This option can be switched on or off even while the sensor is disconnected, because it only needs to communicate with the Module.
Reset multiscan SmartAccess
Removes the sensor pairing and all saved fingerprint keys and enrolled fingers. Available whenever the sensor is paired, even if it is currently disconnected.
Firmware multiscan
Displays the current firmware version of the fingerprint sensor and provides access to firmware updates when available.
Note: A door has either a SmartTouch handle/sensor or a multiscan fingerprint sensor — not both. When a fingerprint sensor is present, the Use as SmartTouch Device option here replaces the Use as SmartTouch Device option in the Hardware section.
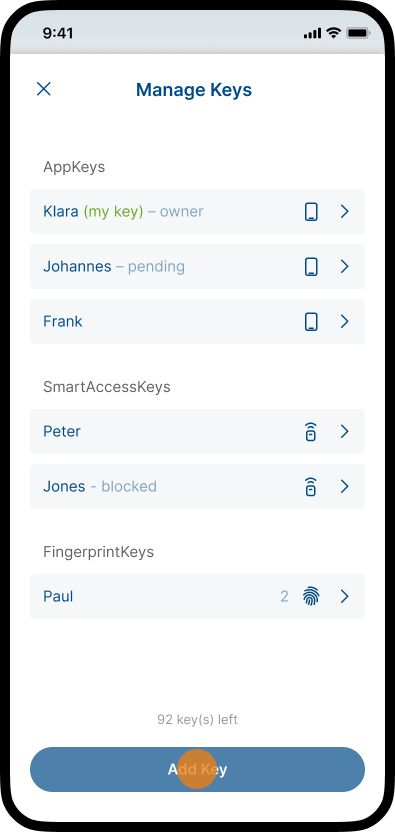
Share access for your SmartAccess Modul or door with family, friends and employees. With the SmartAccess App you can easily invite new users to control the SmartAccess Module and manage their access permissions. An individual key is added and assigned for each user of the SmartAccess Module.
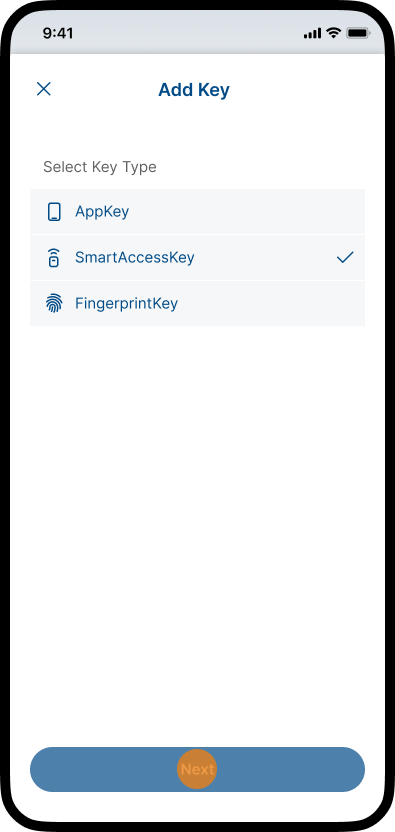
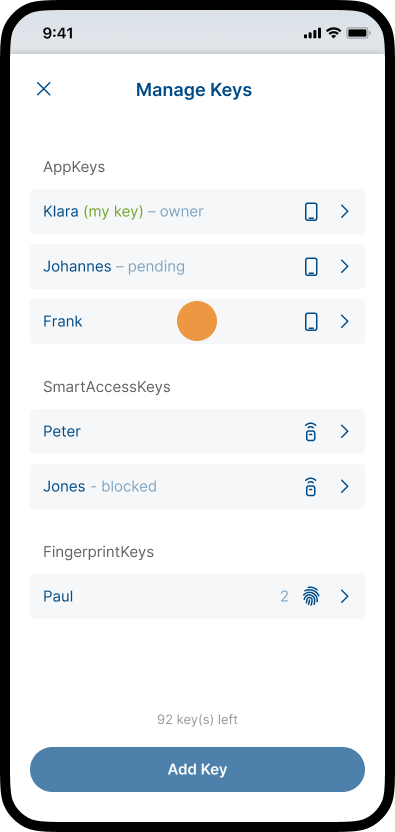
Different types of keys can be added and assigned, such as AppKeys, SmartAccessKeys or FingerprintKeys.
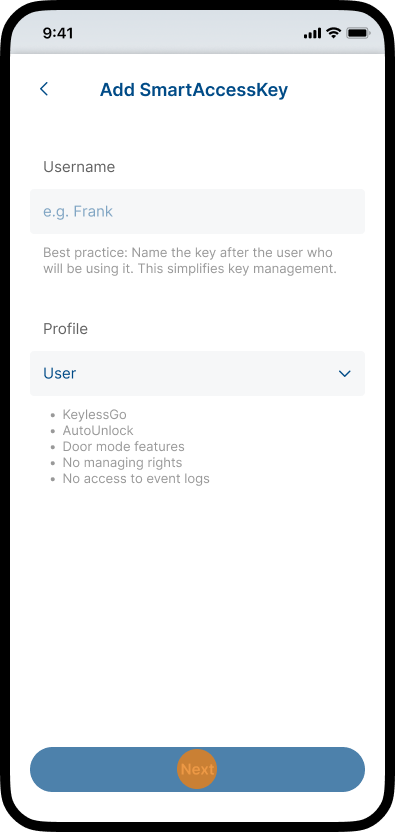
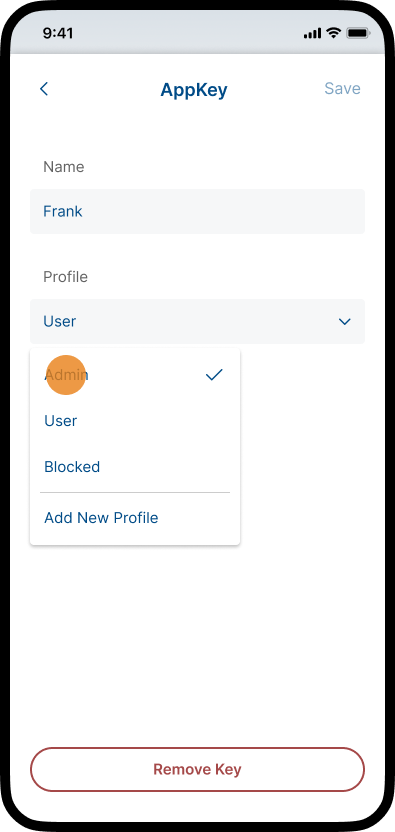
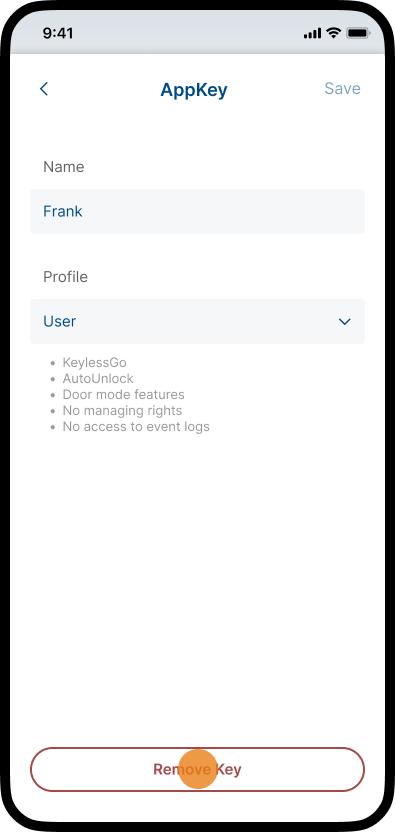
Note: To set the user’s access permissions assign the user a profile with the desired permissions or create a new profile. For more information on how to add and edit profiles, see chapter Profiles.
A SmartAccess Module stores a limited number of keys, shown live in the app. Current firmware supports up to 100 keys (older firmware: 25 keys). Every credential uses one slot — each AppKey, each SmartAccessKey, and each enrolled fingerprint. When the storage is full, no new key can be added until one is removed.
The Owner Key does not count toward this limit — it is stored separately and stays available on both current (100-key) and legacy (25-key) firmware. A 100-key Module therefore holds up to 100 user credentials plus the Owner Key.
The Owner Key can always create a new key by scanning the Module’s Master QR code — a recovery path if the key storage is full or all other keys are lost.
AppKeys are digital keys that enable doors and other electronic locking systems to be opened. With an AppKey, doors can be opened manually via the SmartAccess App or, if the KelessGo or AutoUnlock function is activated, simply by approaching the door.
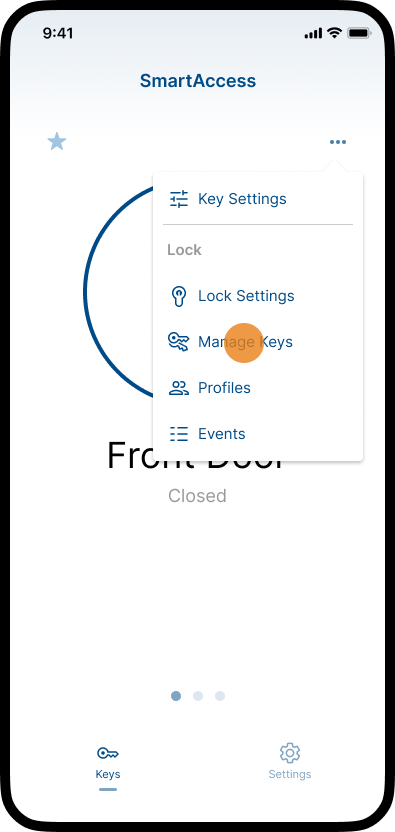
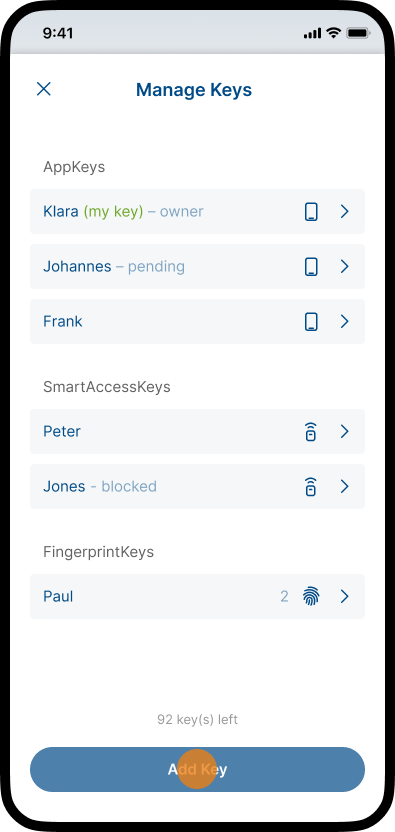
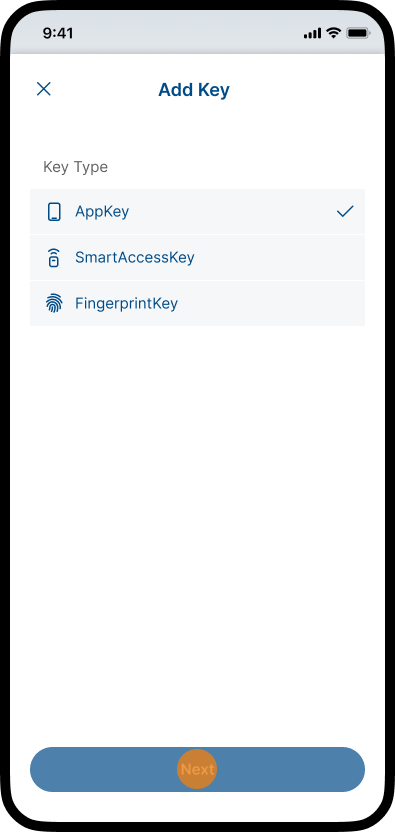
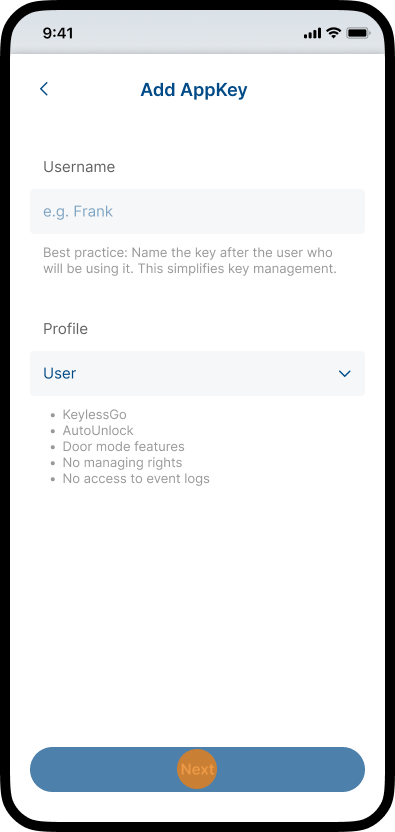
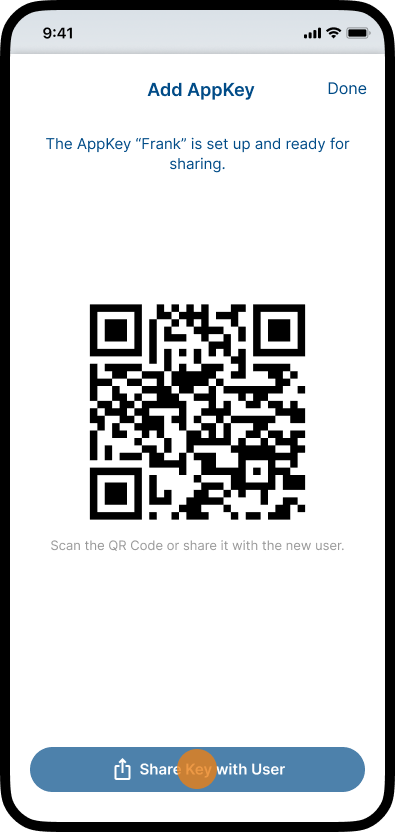
Note: As long as a user has not yet accepted the invitation to use an AppKey or the QR code has not yet been scanned, the key is assigned the status “pending”. You can resend the invitation at any time or display the QR code for scanning by selecting the corresponding key under Manage Keys.
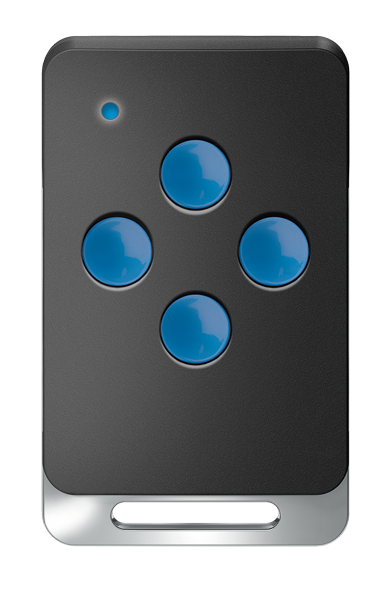
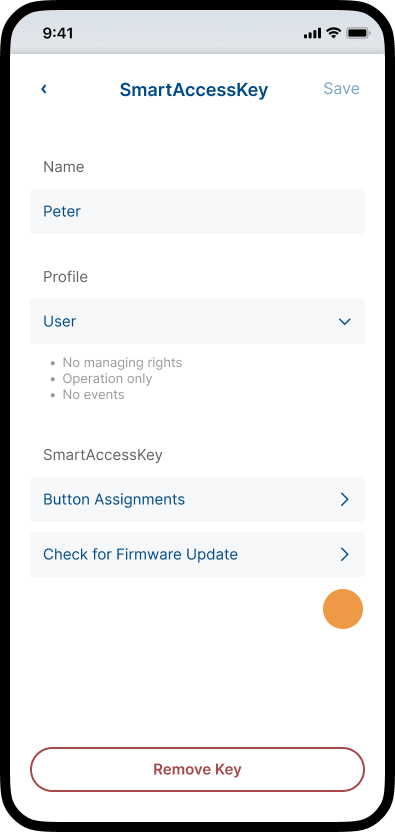
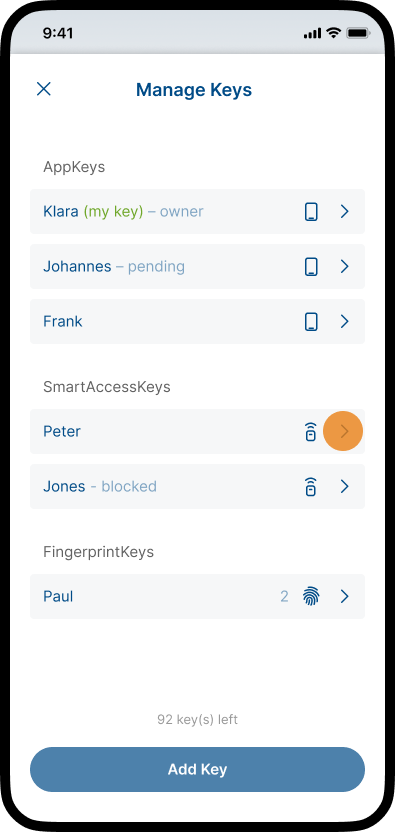
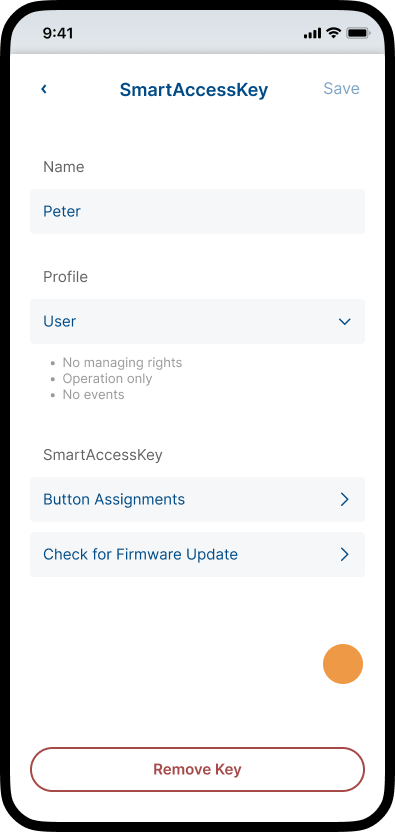
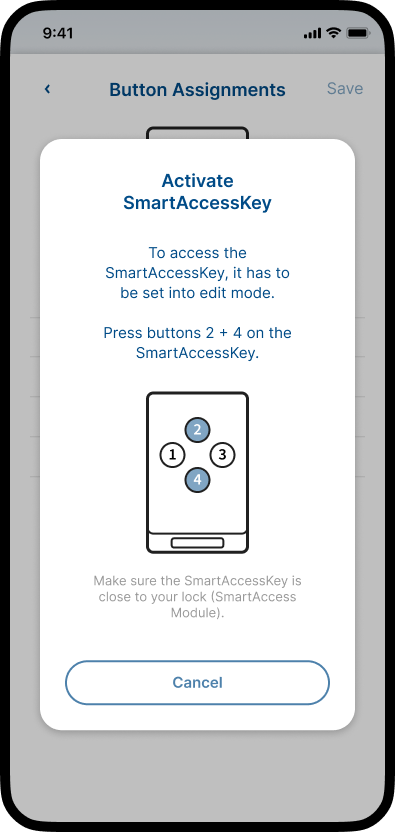
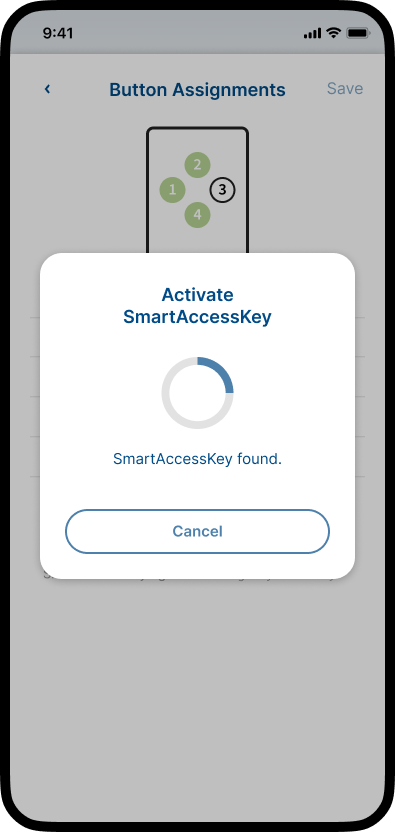
SmartAccessKeys are battery-powered electronic keys for remote control and access authorization. SmartAccessKeys enable manual opening of up to four doors via the transmit buttons. Individual access authorizations can be assigned for each of the four buttons.
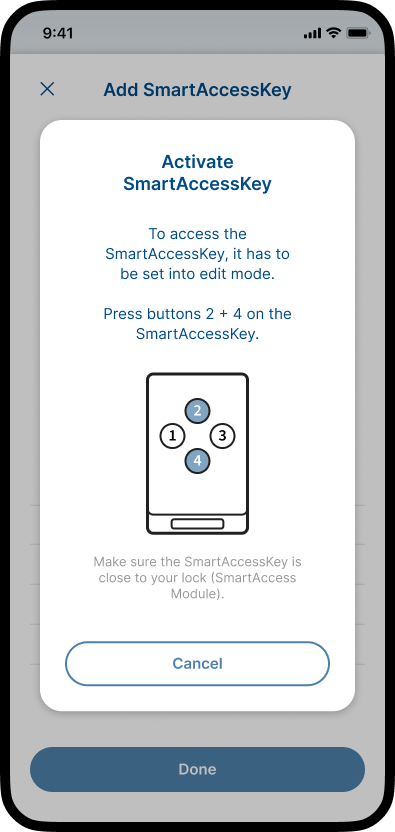
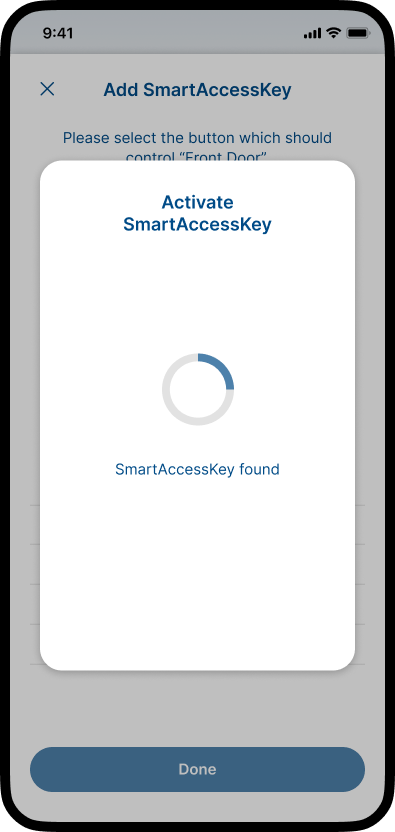
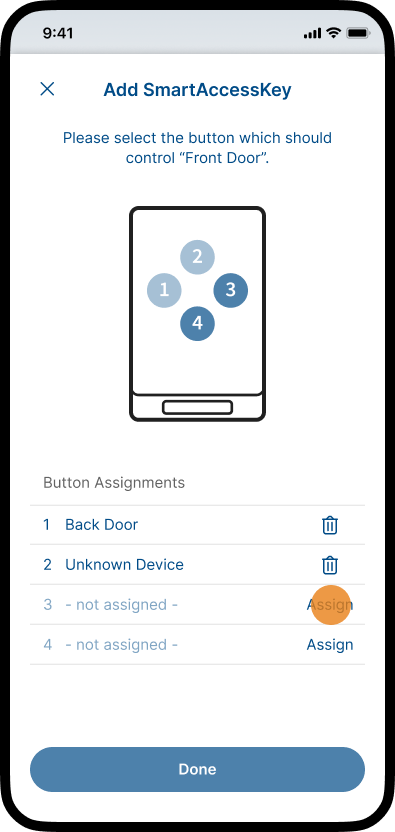
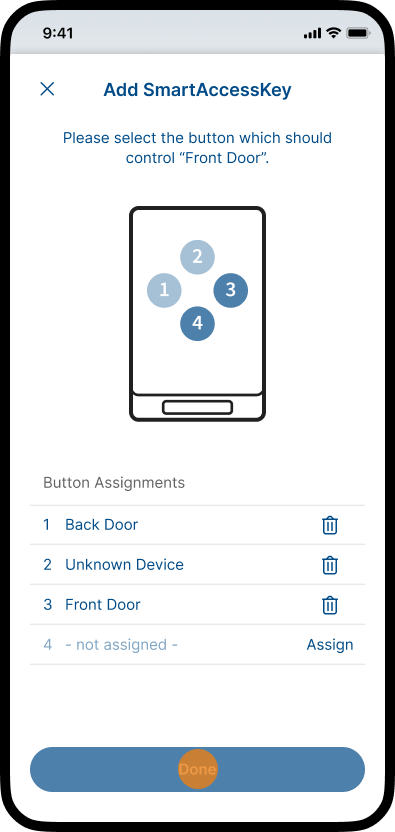
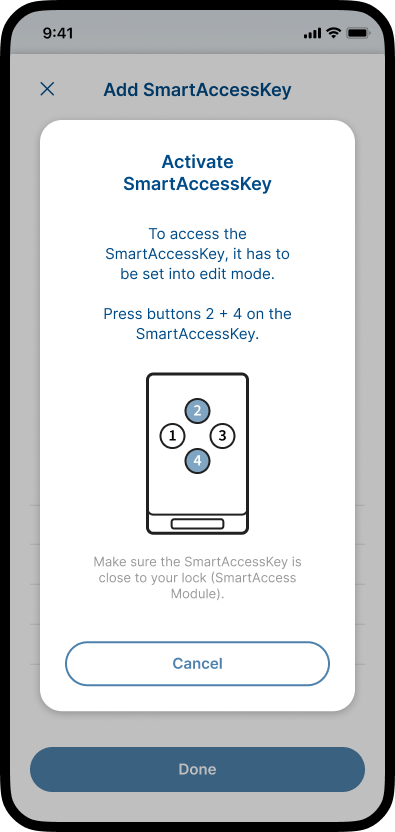
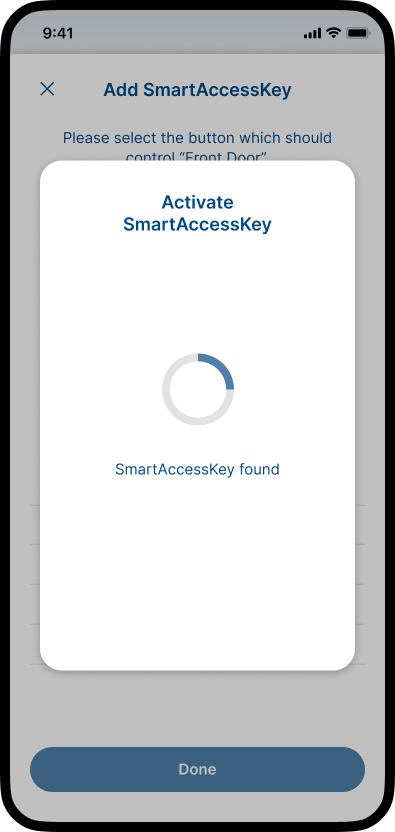
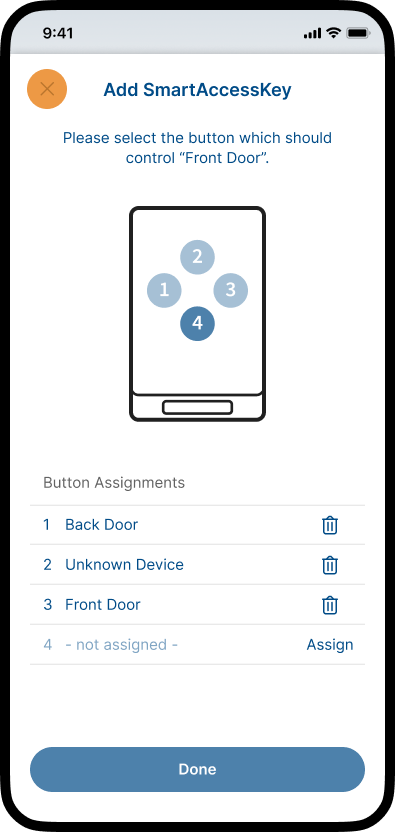
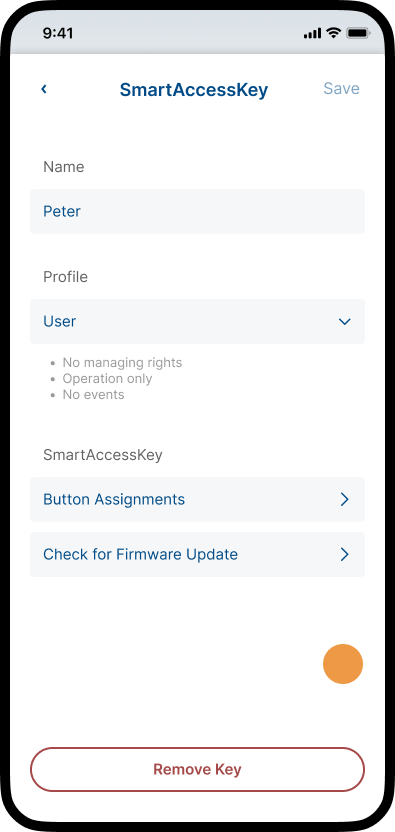
Note: The button assignments of SmartAccessKeys can be individually adjusted. For more information about SmartAccessKeys, see chapter SmartAccessKeys.
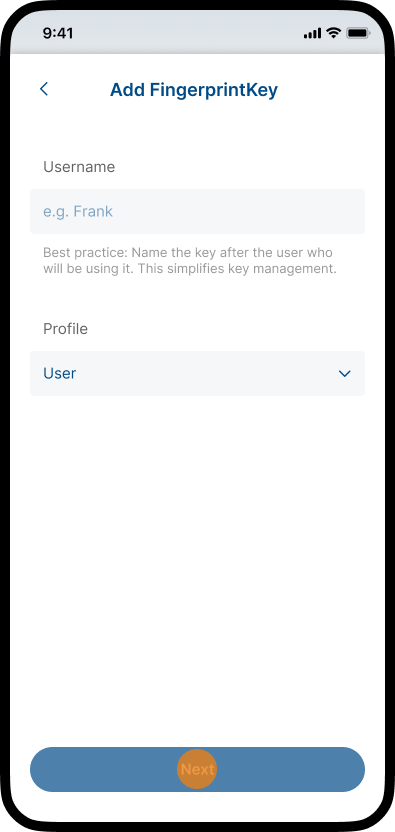
FingerprintKeys are biometric access authorizations that allow users to open a door with an enrolled finger via the SmartAccess multiscan fingerprint sensor. Individual FingerprintKeys can be assigned to users and managed through the SmartAccess app. The fingerprint sensor can also act as a SmartTouch trigger for KeylessGo.
Note: A FingerprintKey can only be added when a multiscan SmartAccess sensor is paired and connected. If no sensor is paired, the FingerprintKey type is hidden. You need at least 2 free key slots to add a FingerprintKey (each enrolled finger uses one slot).
For more information about FingerprintKeys, see chapter multiscan & FingerprintKeys.
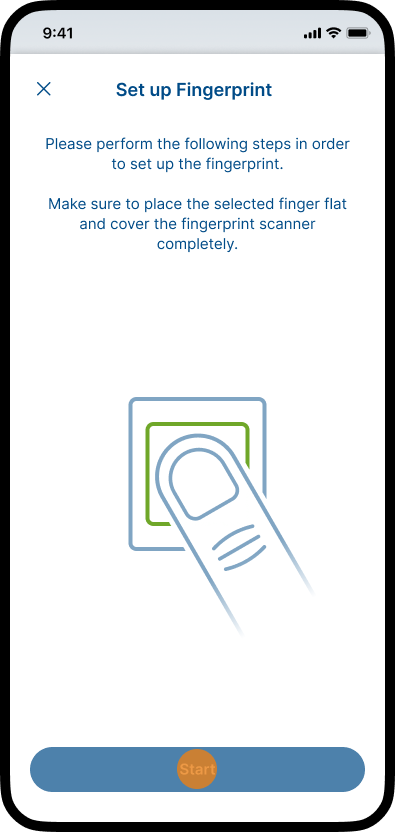
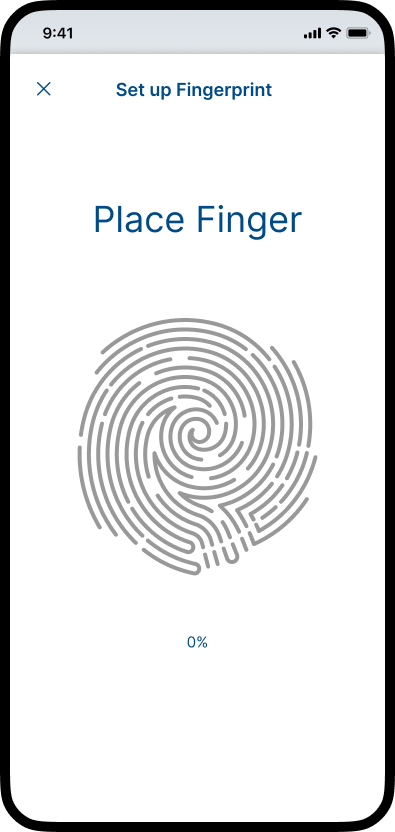
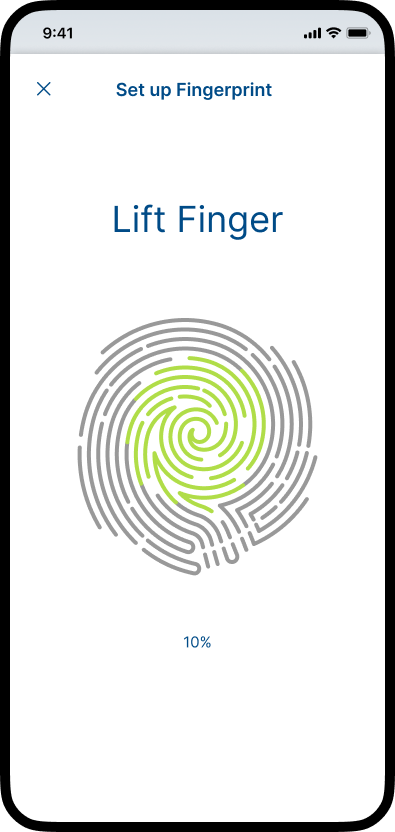
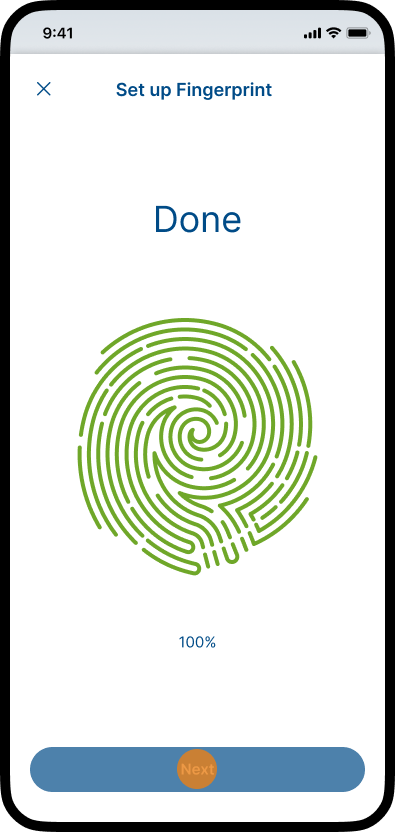
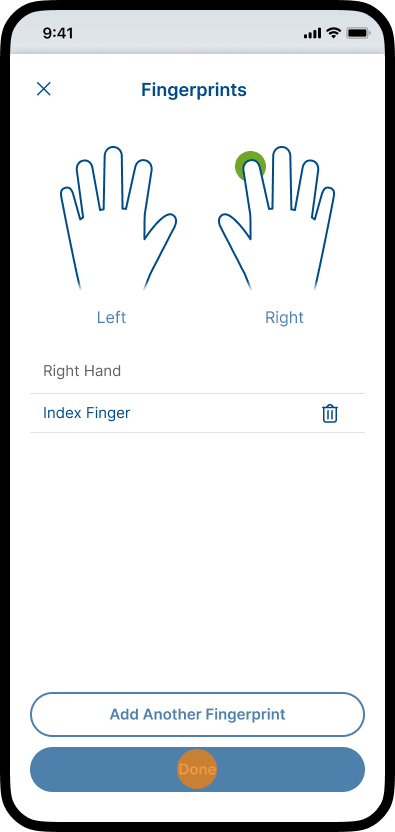
Note: If scanning fails, the app shows a clear reason (e.g. finger too small, finger too wet, change finger position) so you can try again.
For more information about FingerprintKeys, see chapter multiscan & FingerprintKeys.
Note: For more information about FingerprintKeys, including adding, editing, and managing enrolled fingerprints, see chapter multiscan & FingerprintKeys.
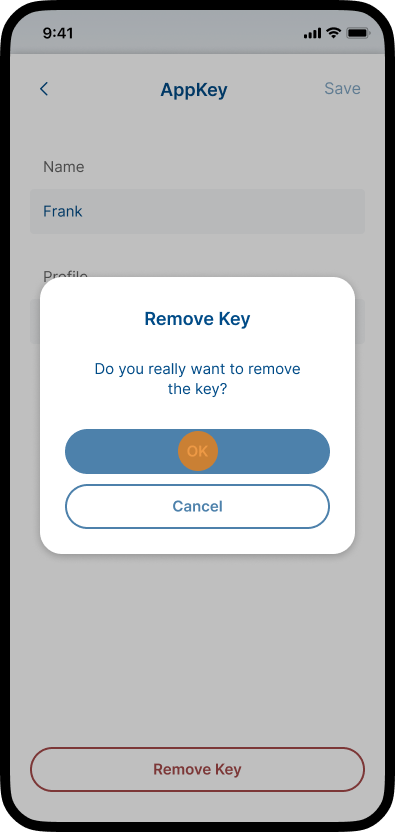
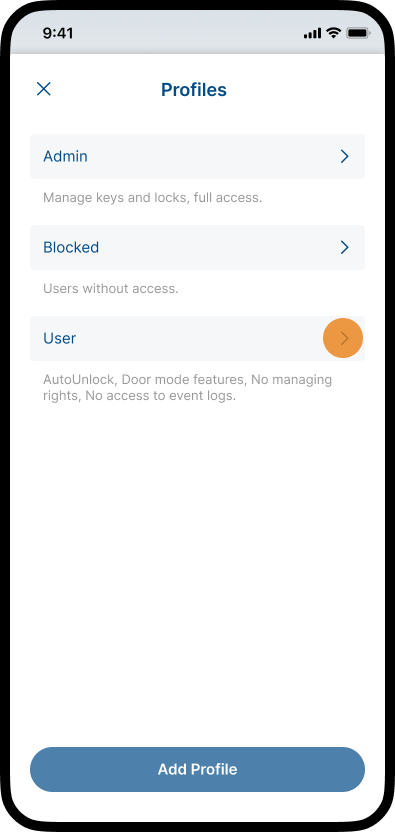
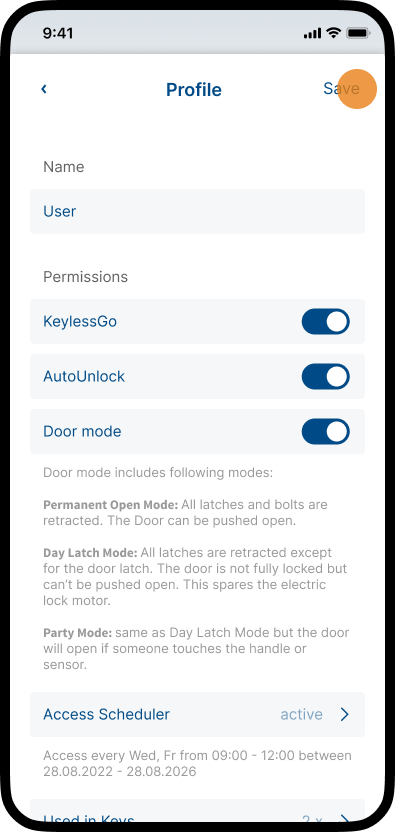
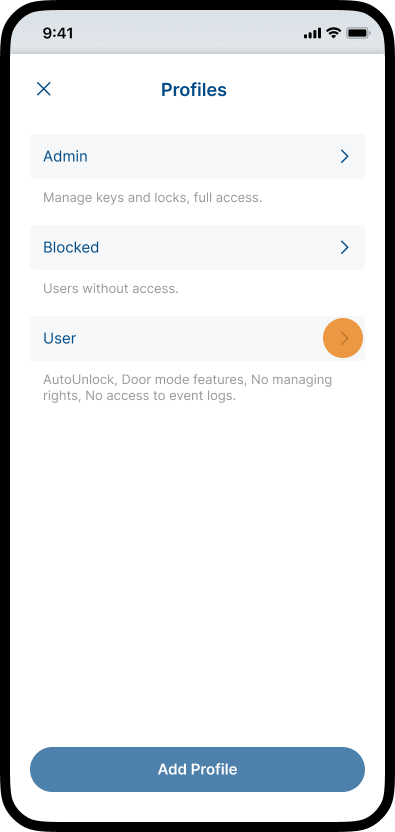
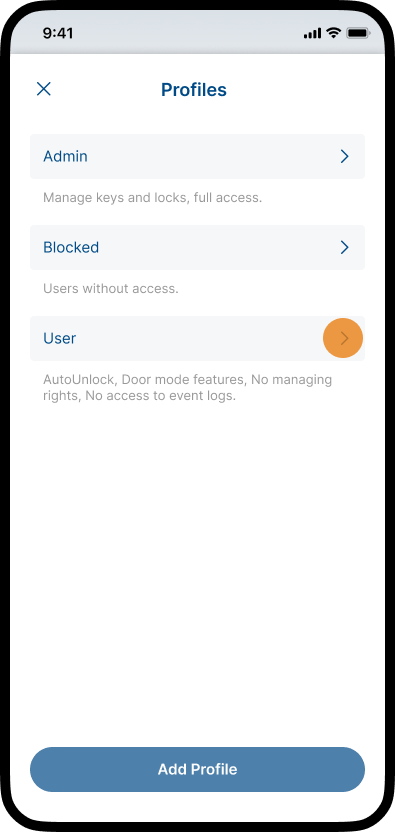
As an administrator, you have the option to assign different types of access permissions for your SmartAccess Module or door. By creating and assigning individual profiles with different access permissions, you have full control over the access permissions of different users.
For more information on how to assign a profile to a user, see chapter Manage Keys.
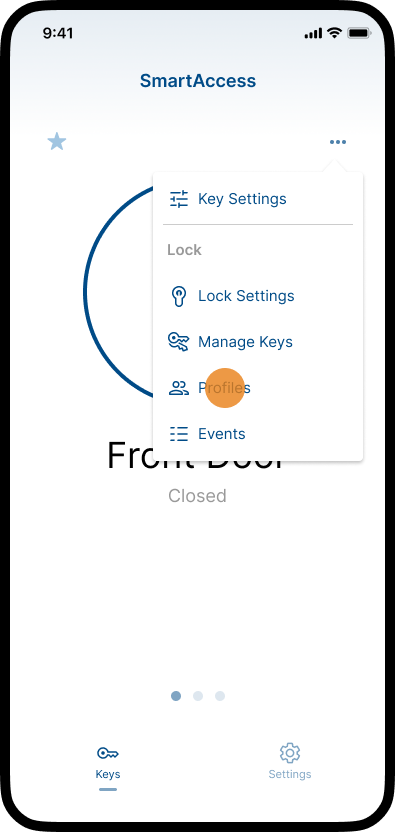
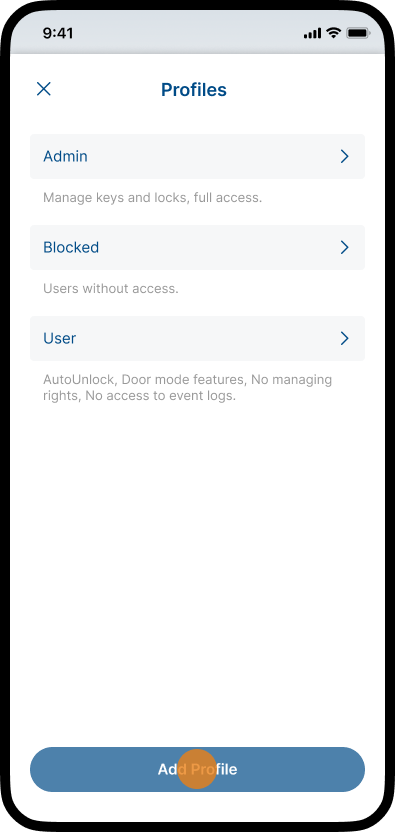
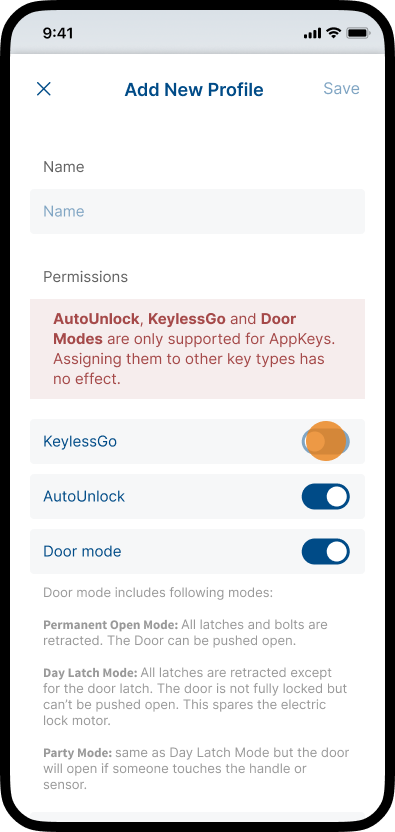
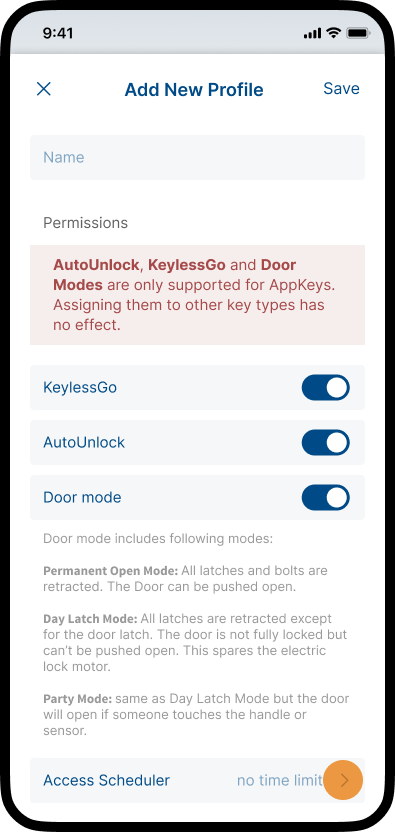
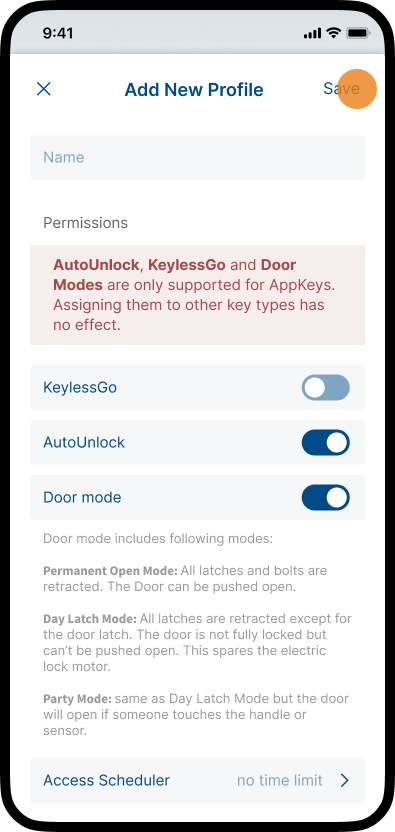
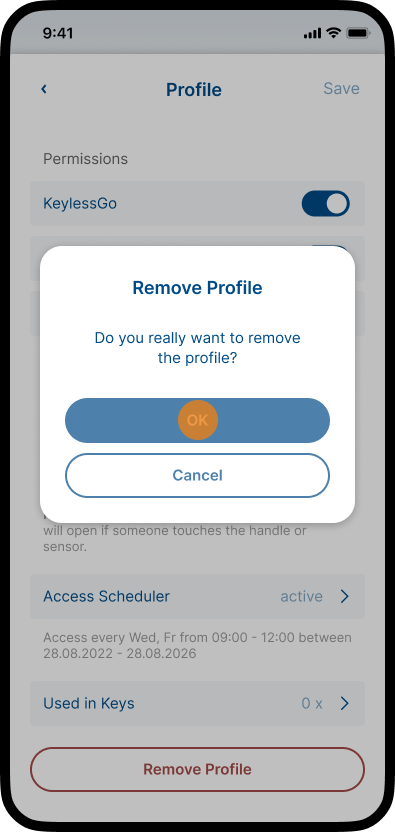
Note: A maximum of eight individual profiles can be created.
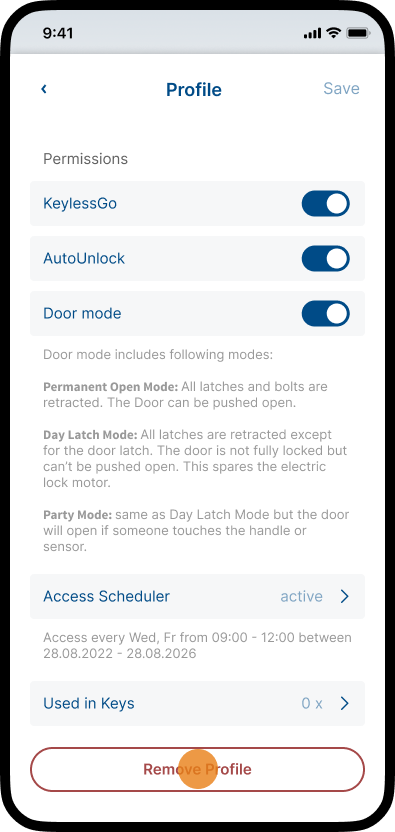
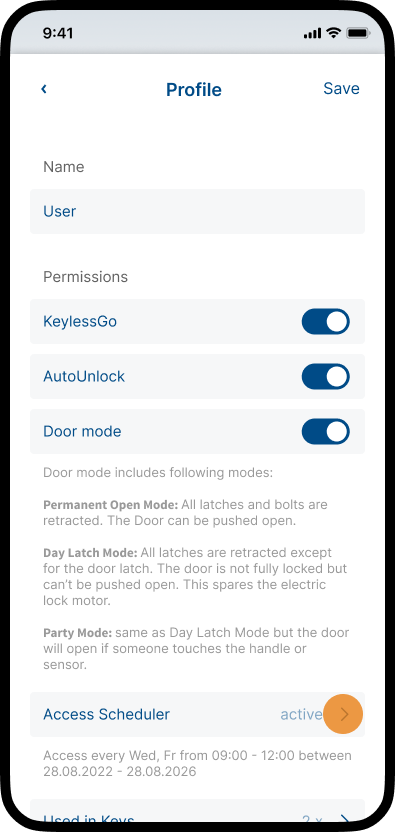
KeylessGo
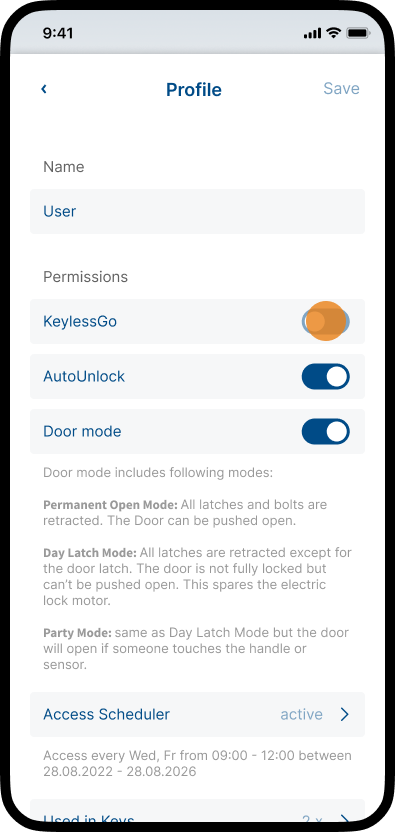
Activate the toggle switch if you want to assign the use of KeylessGo to the profile.
For further information on how KeylessGo works, see chapter KeylessGo & AutoUnlock.
Auto Unlock
Activate the toggle switch if you want to assign the use of Auto Unlock to the profile.
Note: If Auto Unlock is enabled, the door is opened as soon as an authorized key is within the Bluetooth range of the SmartAccess Module. The door can be pushed open without touching the door handle or sensor. Make sure that you actually enter the door after entering the Bluetooth range of the SmartAccess Module, otherwise the door will remain open!
Door Modes
Activate the toggle switch if you want to assign the use of different door modes (Day Latch Mode, Permanent Open Mode and Party Mode) to the profile.
For further information about the individual door modes, see chapter Door Modes.
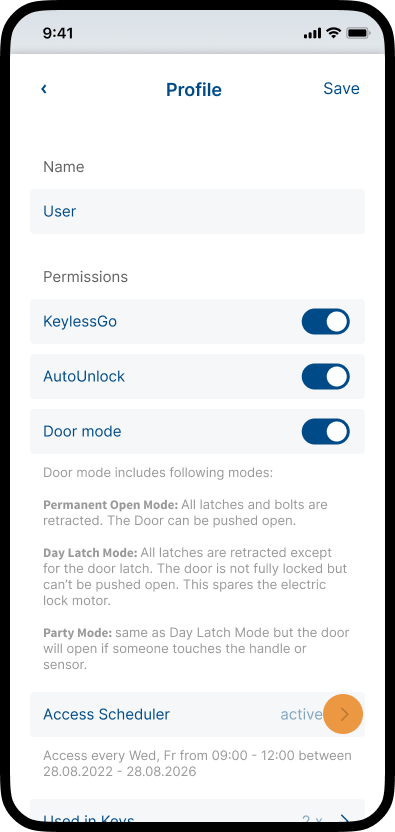
As an Administrator you can decide whether, when, and for which time frames users can use the SmartAccess Module. You can assign time limited permissions which are only active at certain days or at certain times of the day by setting up access schedulers (e.g. for cleaning staff or employees).
Access schedulers are always linked to a profile. In order to grant a user time restricted permission, the time restricted permission must be set up via the corresponding profile.
For more information on how to assign a profile to a user, see chapter Add and manage Keys.
Note: If you set up a time restricted permission to a profile, this time restricted permission applies to all users to whom this profile has been assigned.
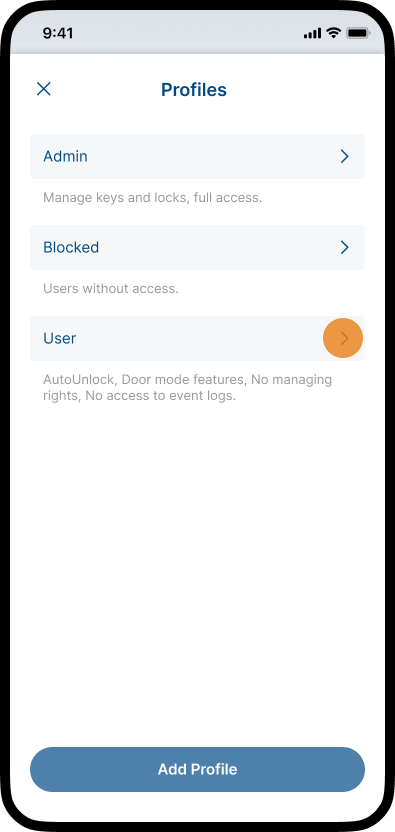
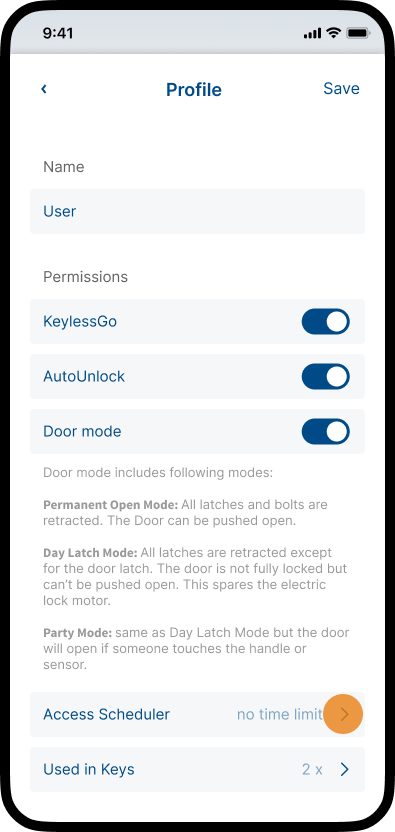
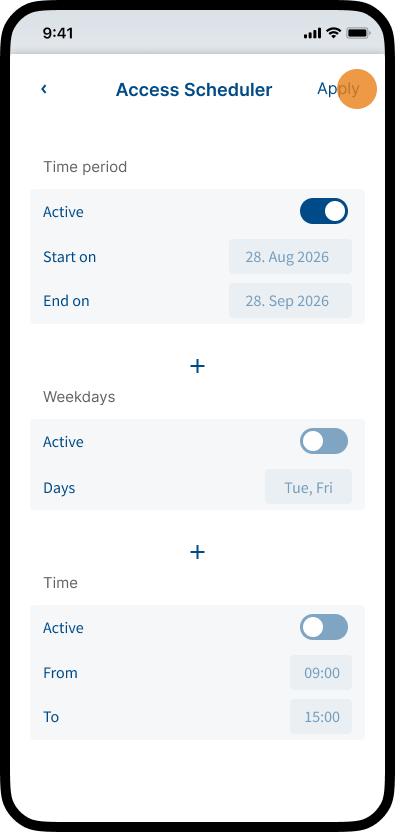
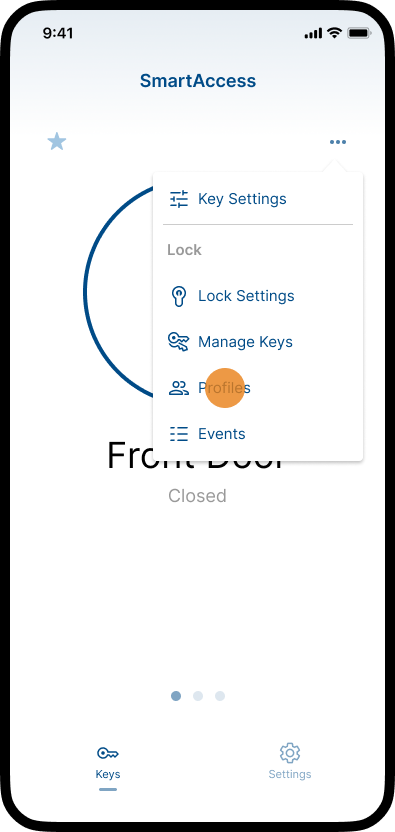
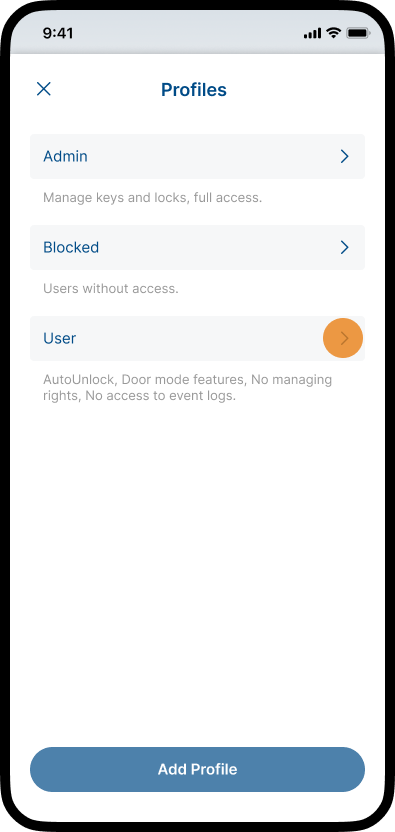
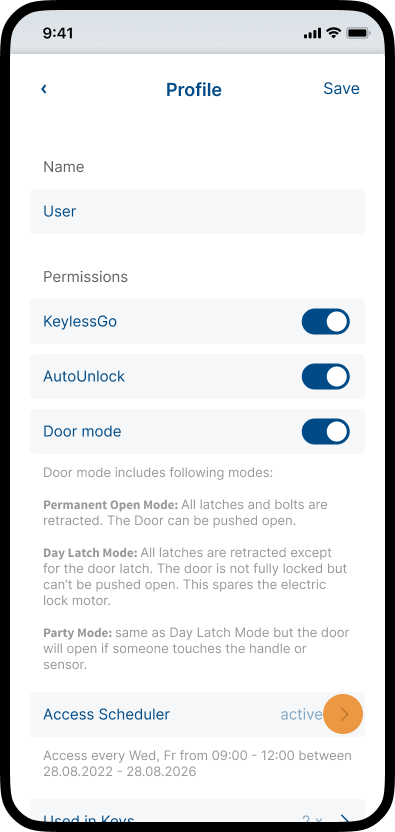
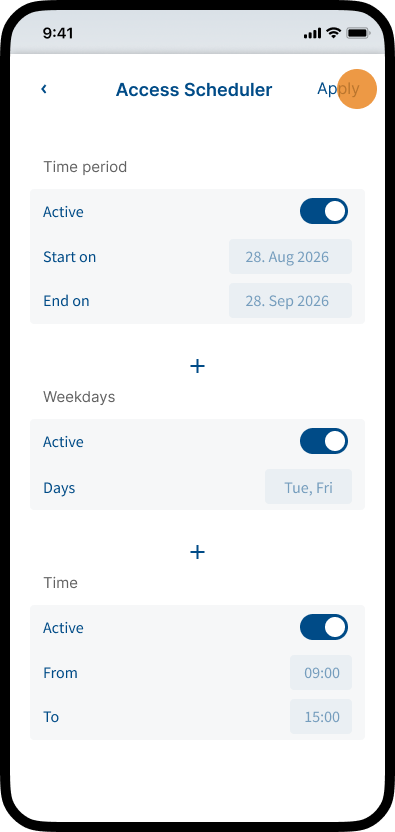
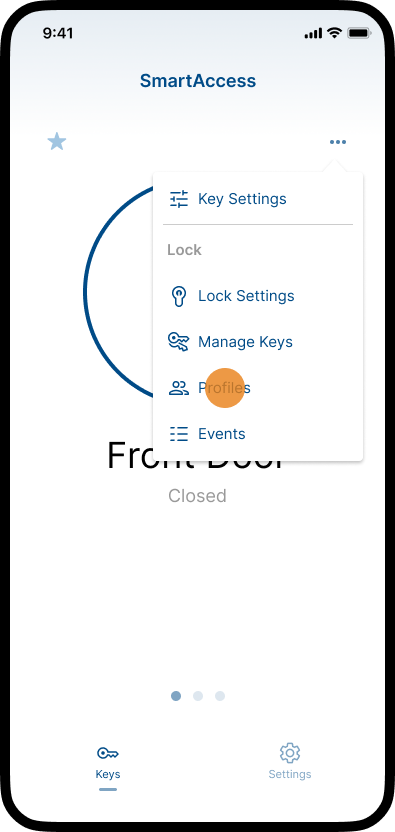
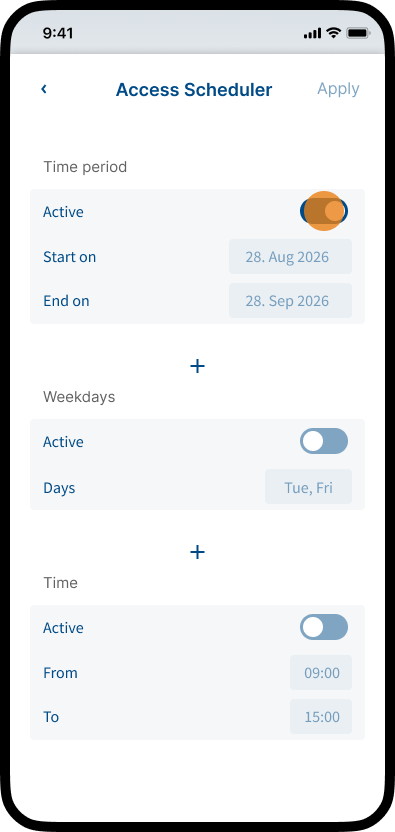
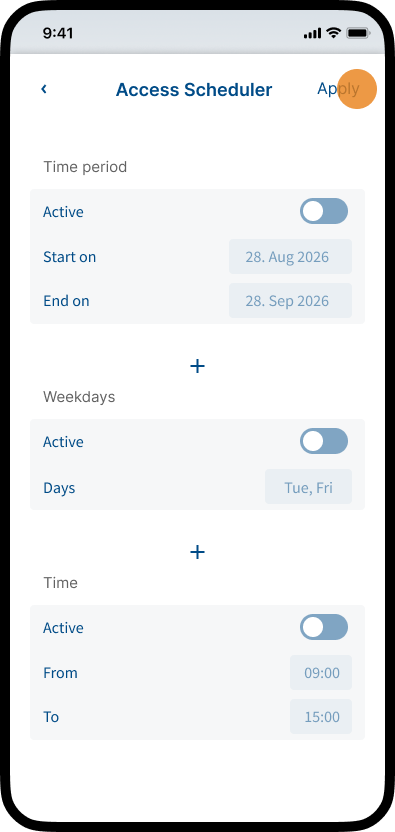
You can create completely individual access schedulers by activating the corresponding switches and adjusting the parameters Time Period and/or Weekdays and/or Time according to your wishes.
For example, you can only set the time period or define more precisely on which days of the week and at what times the access scheduler should be active.
Time Period
The time period defines from and to which date an access scheduler should be active.
Weekdays
You can use weekdays to specify the days of the week on which the schedule should be active.
Time
You can use time to specify certain times of day when the schedule should be active.
All actions performed by the SmartAccess Module are recorded in the Events area. This means you can see which user opened or closed the door at what time.
Note: The entries in the Events area can only be accessed if the smartphone is within the Bluetooth range of the SmartAccess Module.
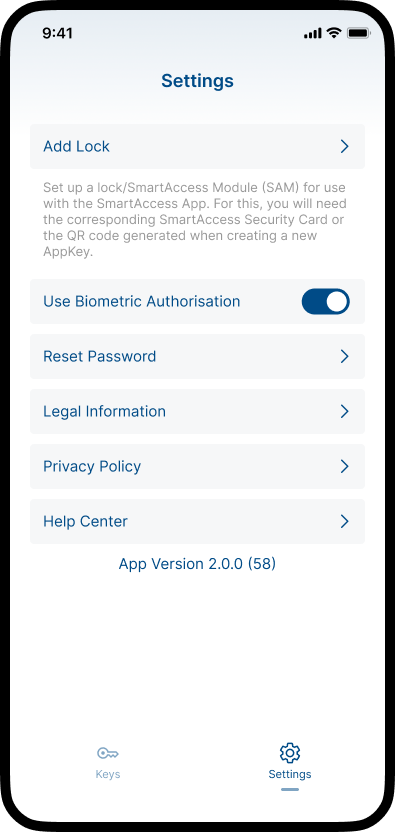
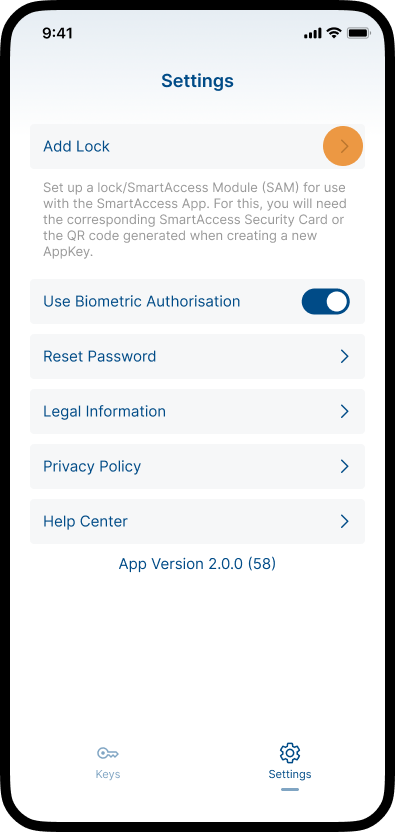
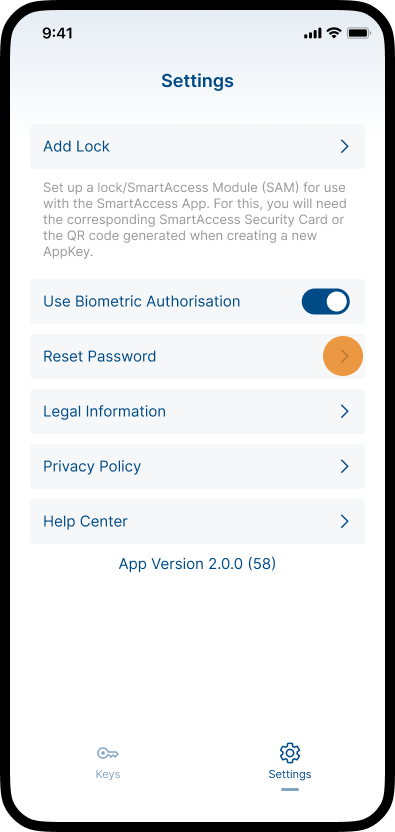
Add Lock
Add a new lock (SmartAccess Modul) and set it up.
For more information on setting up a new lock (SmartAccess Module), see the following chapter.
Biometric Authorisation
Activate biometric authorisation for identity verification and convenient login.
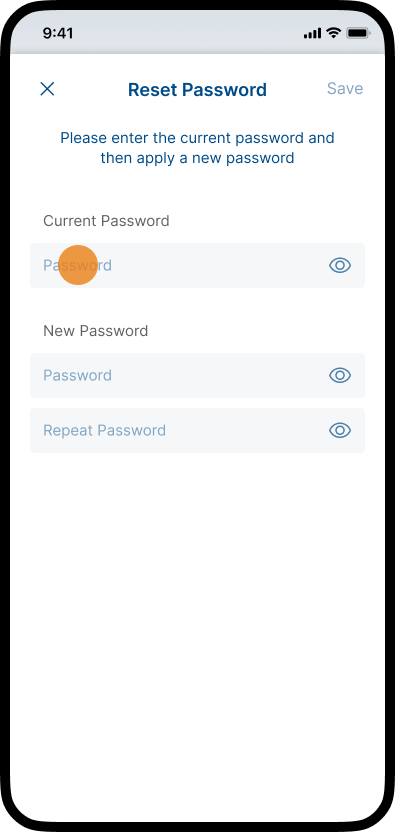
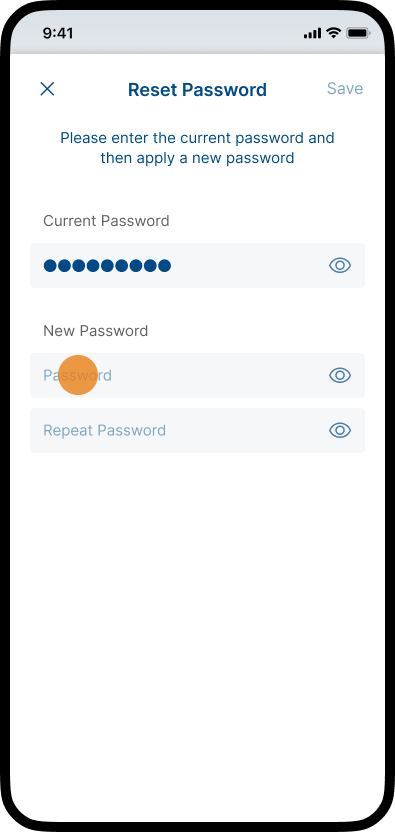
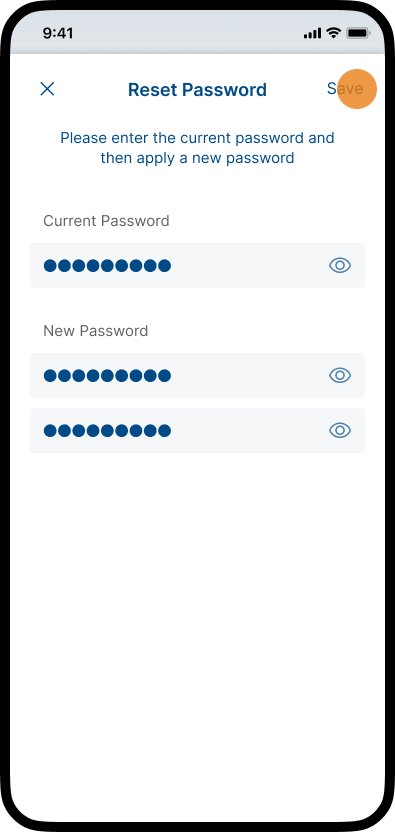
Reset Password
You can set up a new password if you want to change your old one for security reasons.
Legal Information
Display the legal information.
Privacy Policy
Display the privacy policy.
Help Center
The integrated Help Center provides answers to questions and problems with your lock (SmartAccess Module). Among other things, you will find a video tutorial on setting up a new lock, information on how KeylessGo and AutoUnlock work, and you can access the detailed SmartAccess user manual directly in the app.
App Version
Version of the SmartAccess App.
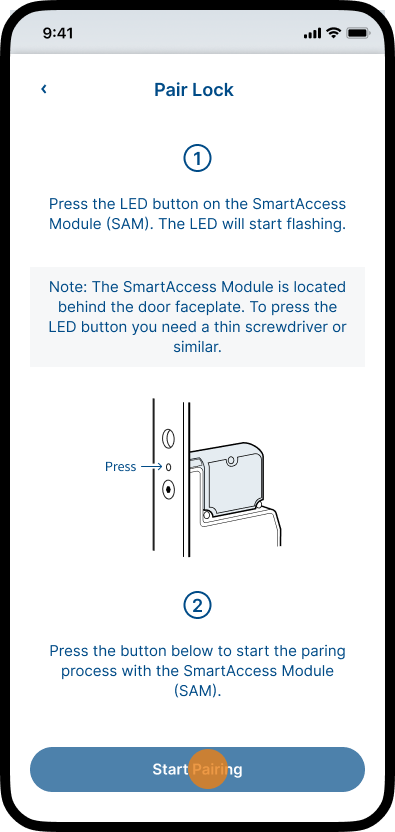
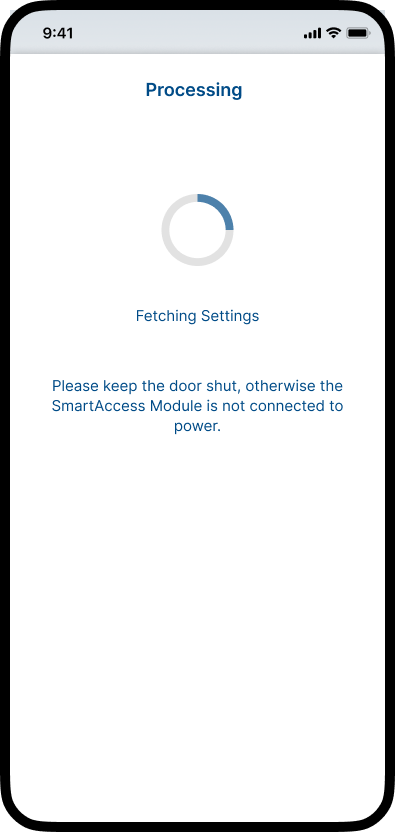
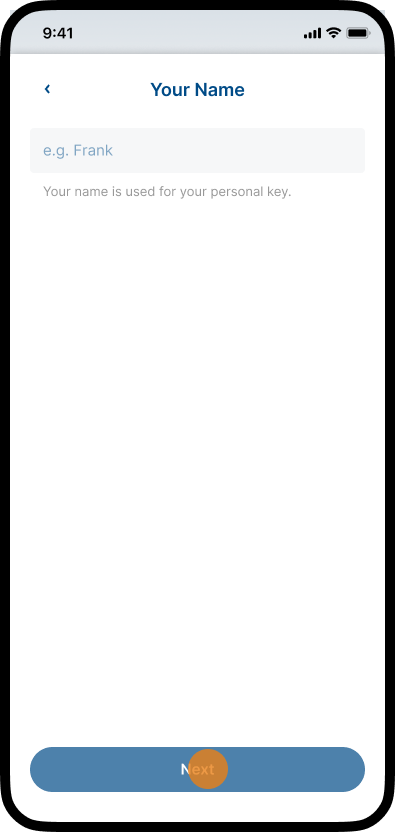
Commissioning and pairing
Lock Settings


Entering Geofence area
The Geofence area is a like fence drawn around the SmartAccess Module. When entering KeylessGo/AutoUnlock get’s armed. The SmartAccess App starts scanning for a SmartAccess Module.
If KeylessGo or AutoUnlock is not activated within 15 min after entering the Geofence area you need to leave the Geofence and reenter to enable the Keyless Entry features again.
Nevertheless opening the door manually via the SmartAccess App still works.
Note: The geofence area may vary slightly depending on reception, surroundings, and device and may not always be detected precisely. As a result, there may occasionally be slight delays in push notifications.
Approaching door
entering Bluetooth area
The Bluetooth area is the area in which the SmartAccess Module can communicate with the smartphone via Bluetooth. When entering this area the SmartAccess App establishes a connection to the SmartAccess Module or door. Inside this area the door can be opened via the SmartAccess App.
If KeylessGo is not used within 1 min after activation you need to leave the Geofence area and reenter to enable this Keyless Entry features again. The automatic deactivation of KeylessGo after 1 minute is a security feature that prevents potential unintentional door opening.
Nevertheless opening the door manually via the SmartAccess App still works.


Note: The transmission power and reception characteristics of the SmartAccess Module depend heavily on constructional and environmental conditions. Thus, the range in the open field differs from that in buildings. Also, the signal is transmitted differently at high humidity than at lower humidity.
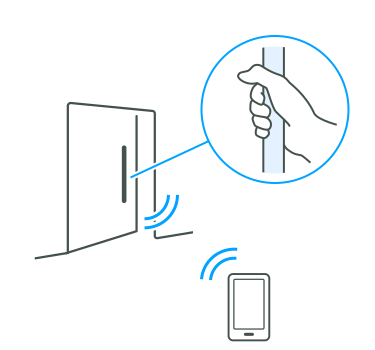

Grabbing the door handle or touching the sensor
KeylessGo: The SmartAccess Module checks access permissions and unlocks the lock. The door can then be pushed open.
AutoUnlock: The SmartAccess Module checks access permissions and unlocks the lock as soon as the key is within Bluetooth range. The door can then be pushed open.
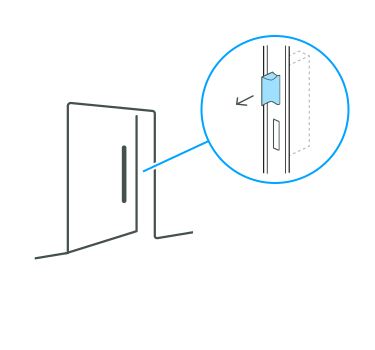
After opening the door
The latch gets extracted immediately after opening the door.
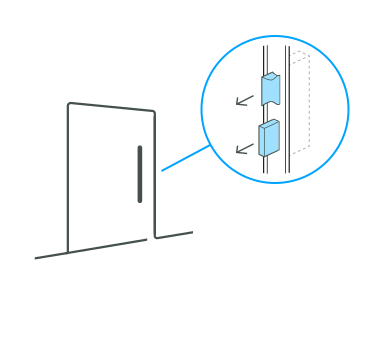
Closing the door
After closing the door get’s fully locked again.
Safety Note: After closing the door, a 15-second safety timeout is activated, which prevents the door from being opened again during this time.1
1Functionality depends on lock type (All motorised FUHR locks supports this feature).
When multiple users approach the same door with KeylessGo or AutoUnlock enabled, SmartAccess opens the door for the first smartphone that establishes a connection.
To prevent unintended reopening, a 15-second safety timeout starts when the door closes. During this period, the SmartAccess Module blocks further keyless opening attempts. This prevents the door from being reopened unintentionally when multiple users with active KeylessGo or AutoUnlock access are nearby.
Manual opening via the app remains available during this period.
Note: Door Status Feedback Required
This safety feature requires door status feedback to determine whether the door is open or closed. Door status feedback is integrated in FUHR autotronic and FUHR multitronic locks.
For Pulse Control locks, a functional door status sensor must be wired to the SmartAccess Module and the Status Sensor Installed option must be enabled.
Without a door status sensor and with the option disabled, KeylessGo and AutoUnlock continue to operate normally. However, the multi-user safety feature is not available.
If the Status Sensor Installed option is enabled without a correctly wired and functional sensor, KeylessGo and AutoUnlock will not work. For more information, see the Lock Settings chapter.
If AutoUnlock is enabled, the door unlocks as soon as the key is within Bluetooth range. Make sure you actually enter, otherwise the door remains unlocked.
If you do not have a SmartTouch handle or a SmartTouch sensor, AutoUnlock can be used to enable similar door behavior to KeylessGo.
SmartAccess offers the option of activating various door modes.
When the Day Latch Mode is engaged, only the latch secures the door. This spares the electric motor lock while still ensuring controlled access.
Ideally suited to heavily frequented doors such as commercial or apartment buildings.
Note: Supported by FUHR multitronic locks.
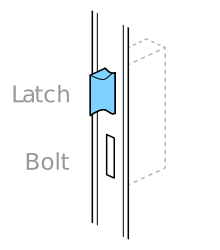
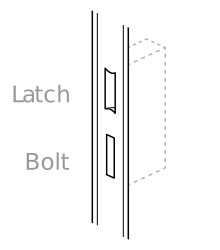
When the Permanent Open Mode is activated, the latch and all bolts are permanently retracted. Unrestricted access in both directions is possible. The door can be pushed open without access control.
Ideally suited for shops, surgeries or other buildings frequently visited by the public. In a residential setting this function is convenient if, for example, the user is working in the garden and keeps going in and out.
Note: Supported by FUHR autotronic locks and FUHR multitronic locks.
When the Party Mode is activated, only the latch secures the door (same as Day Latch Mode). By touching the SmartTouch handle or the SmartTouch sensor, the latch is retracted and the door can be pushed open without access control.
Ideally suited for a party where the door needs to be locked but guests can go in and out undisturbed.
Note: Supported by FUHR autotronic locks, FUHR multitronic locks and Pulse Control locks.
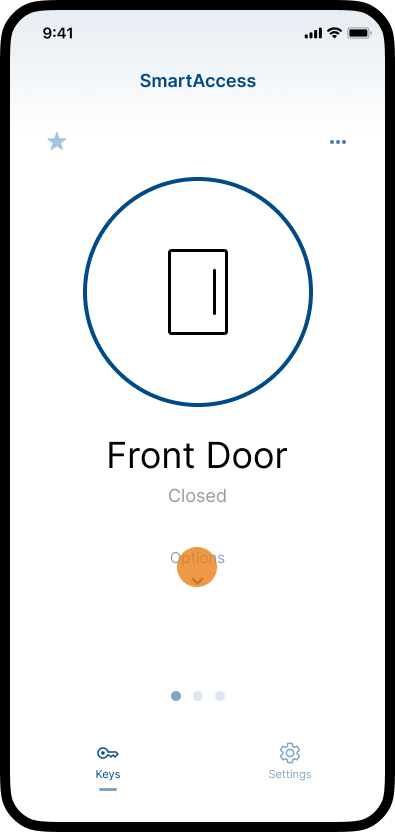
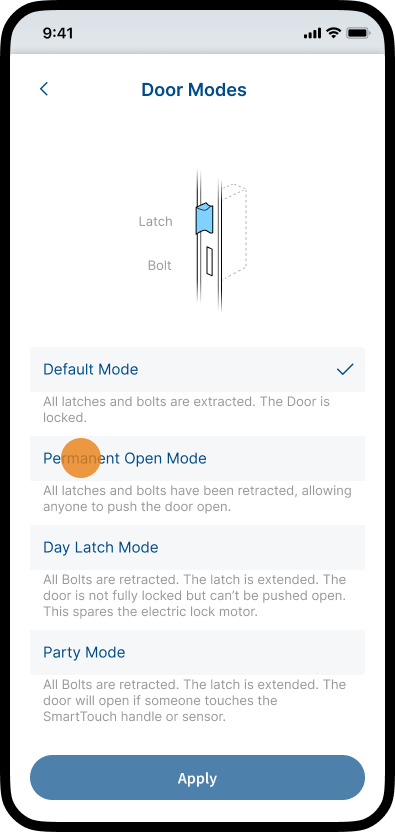
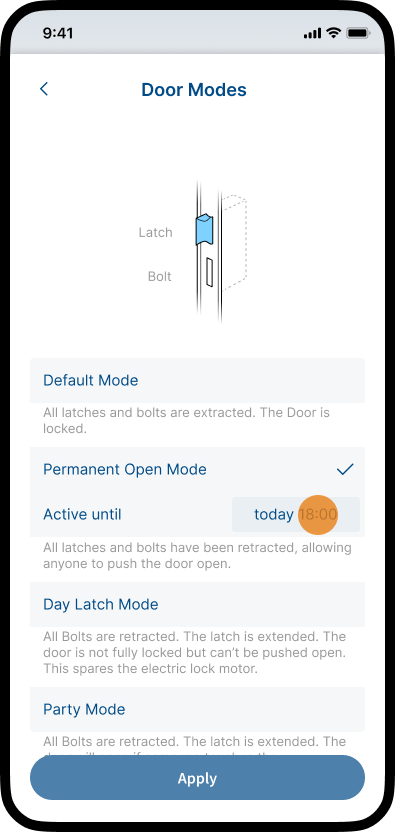
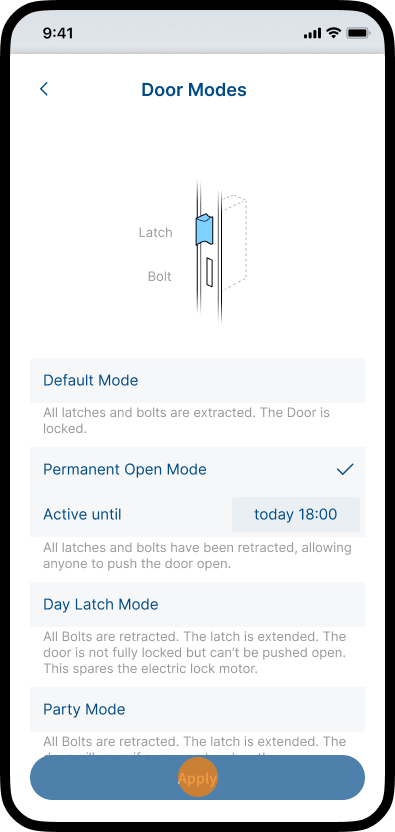
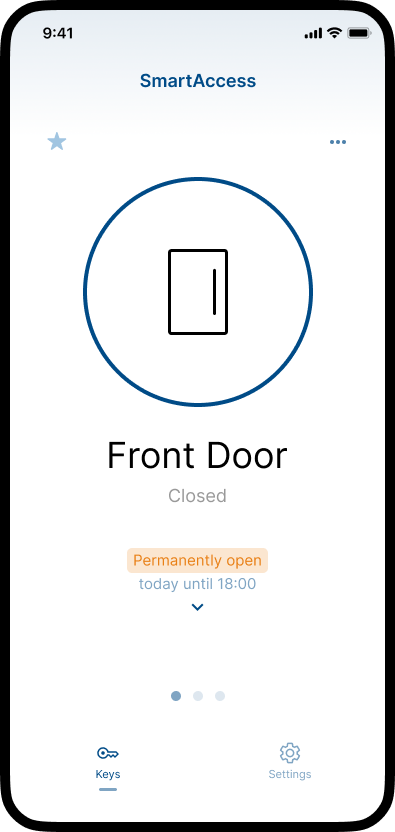
Note: The activation of door modes is only possible if the lock used supports the respective door modes, the administrator has enabled the use of door modes in the Lock Settings area and has granted you the permission to activate door modes. For further information on how to enable door modes, see chapter Lock Settings. For further information on granting permissions, see chapter Profiles and Manage Keys.
SmartAccess is designed to work seamlessly with a single SmartAccess Module and also supports installations with multiple modules. When several modules are installed near each other, the system automatically adjusts their behavior to ensure reliable and predictable operation.
Depending on their proximity, SmartAccess automatically combines SmartAccess Modules into a SmartAccess Group (shared geofence, one group notification, only one door per group unlocks via keyless entry) or keeps them operating independently with automatically adjusted settings (geofence).
Module Behavior Based on Proximity
SmartAccess automatically adjusts how modules behave based on their proximity to ensure reliable operation.
| Scenario | Behavior |
|---|---|
| SmartAccess Group | Modules are very close and are combined into a SmartAccess Group with a shared geofence. |
| Nearby SmartAccess Modules | Modules are close but operate independently with automatically adjusted geofence settings. |
If SmartAccess Modules are installed very close to each other and geofence overlap cannot be avoided, SmartAccess automatically combines them into a SmartAccess Group to ensure stable and secure operation.
In this setup, certain settings and behaviors are shared across all modules in the group.
This automatic grouping ensures predictable behavior and prevents devices from switching between nearby geofences.
Shared Geofence
The geofence areas of all doors in the SmartAccess Group are combined into a single shared geofence.
The size of this shared geofence is automatically determined by the system to ensure reliable detection and cannot be edited.
Notifications
When entering the shared geofence, you receive one group notification instead of multiple notifications for each door.
If geofence notifications are enabled or disabled for one module, the setting applies to all modules in the SmartAccess Group.
KeylessGo & AutoUnlock
For security reasons, only one door per SmartAccess Group can be unlocked using KeylessGo or AutoUnlock each time the shared geofence is entered.
The door that unlocks is the first one your smartphone connects to via Bluetooth. This may vary depending on environmental conditions and RSSI settings.
Once one door has been unlocked, keyless entry for the other doors in the group is blocked until the geofence is exited and entered again.
To keep control over which door unlocks automatically, enable KeylessGo or AutoUnlock on only one door in the SmartAccess Group.
Note: Unsupported Configurations
The following configurations are currently not supported and may not work as expected.
Time-Limited Access Profiles
Using keyless features in a SmartAccess Group together with time-limited access profiles (for example, a cleaner with access only on specific days) is not supported.
Pulse Control locks (Without Door Status)
For reliable multi-module safety logic, SmartAccess requires door status information (open/closed). Pulse Control locks without door status feedback cannot provide the same level of protection against conflicting signals in multi-user environments.
If SmartAccess Modules are installed near each other but not close enough to be grouped, they continue to operate independently, similar to single-module setups.
To ensure reliable operation, SmartAccess automatically adjusts the geofence settings to prevent overlapping detection areas.
When modules are used in close proximity:
These adjustments are applied automatically and cannot be overridden.
Why Is the Geofence Radius Locked or Limited?
If the geofence radius control is limited or hidden, another nearby SmartAccess Module has been detected.
To prevent overlapping detection areas, SmartAccess may automatically limit or set the geofence radius. This ensures reliable detection and prevents unintended unlocking.
Geofence Adjustments
When modules are close to each other:
Limited Geofence Radius Adjustment
When another SmartAccess Module is nearby, SmartAccess limits the adjustable geofence radius to prevent overlapping geofence areas.
You can still adjust the geofence radius, but only within a restricted range (for example 400m instead of 500m).
Geofence Radius set by System
When SmartAccess Modules are very close to each other, SmartAccess automatically sets the geofence radius to the minimum safe size to prevent overlap.
In this case, the geofence radius cannot be adjusted, and the control is hidden in the app.
SmartAccess multiscan is a biometric fingerprint sensor (area sensor) wired to the SmartAccess Module. It lets users open the door with an enrolled finger, and can additionally act as a SmartTouch trigger for KeylessGo. The app never talks to the sensor directly — all data flows through the SmartAccess Module.
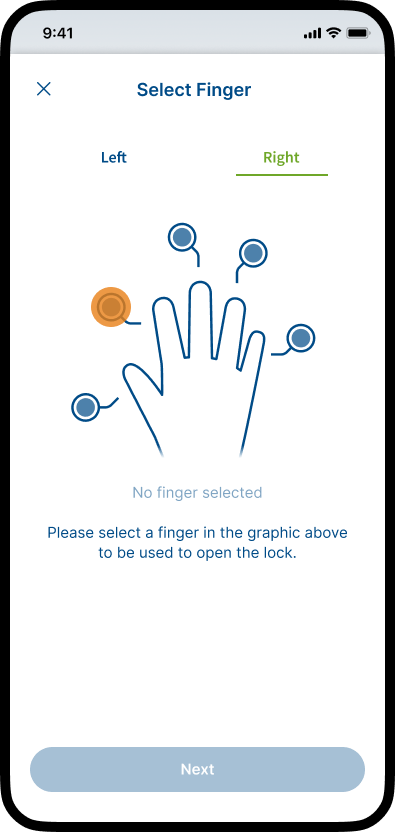
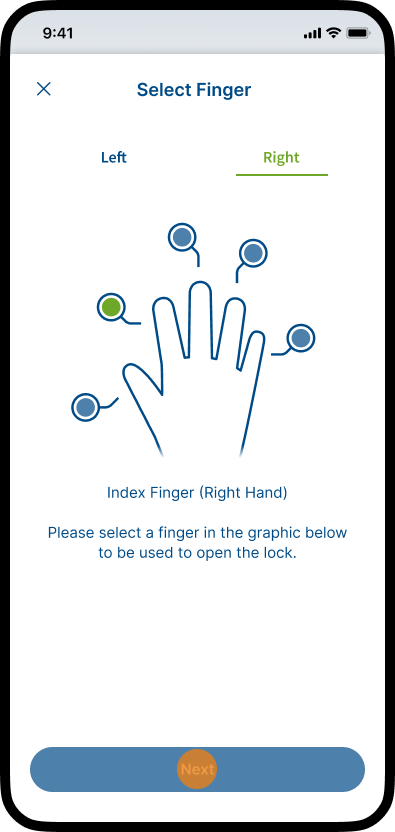
Enrol fingers from Manage Keys → Add Key → FingerprintKey (max 10 fingers per key). During scanning the sensor gives live feedback; if a scan can’t be used, a clear message explains why.
After a FingerprintKey has been created, it can be edited at any time. Go to Manage Keys, tap the FingerprintKey, and select Edit.
From the Edit Key screen, you can:
If finger enrolment is interrupted—for example, because you leave the screen, close the app, or the scan cannot be completed—the enrolment is not discarded. The FingerprintKey remains stored on the SmartAccess Module, and the incomplete finger is marked as Pending (yellow) on the Edit Key screen.
You can either:
A pending finger continues to occupy a key slot until the enrolment is completed or the pending finger is removed. The Resume option is only available while the multiscan SmartAccess fingerprint sensor is connected.
For a quick, reliable enrolment — and for everyday unlocking afterwards:
Avoid:
If a scan can’t be used, the sensor shows a clear message. There are two kinds, told apart by the button offered:
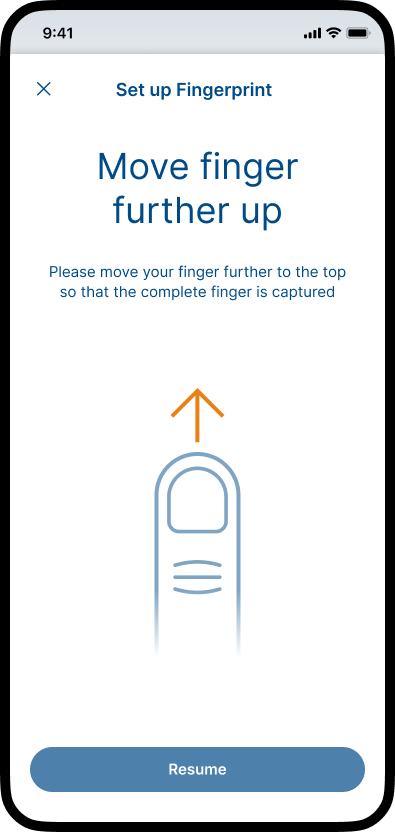
Reversible — tap Resume and carry on. The enrolment keeps the progress you already have and returns you to the Place Finger screen.
| Message | What it means | How to fix it |
|---|---|---|
| Sensor dirty | The sensor surface is dirty. | Clean the sensor, then tap Resume. |
| Move finger further up | Only part of the fingertip reached the sensor (or you drifted onto another finger), so the top of the print is missing. | Slide the finger toward the top of the sensor so the whole tip is read, then tap Resume. |
| Finger too cold / dry | Too little moisture for a clear ridge pattern. | Warm the finger or breathe on it, then tap Resume. |
| Finger too wet / pressed too firmly | Moisture or heavy pressure blurs the ridges. | Dry the finger and press gently, then tap Resume. |
| Change finger position | The same area was scanned repeatedly; the edges are missing. | Shift the finger slightly on each touch, then tap Resume. |
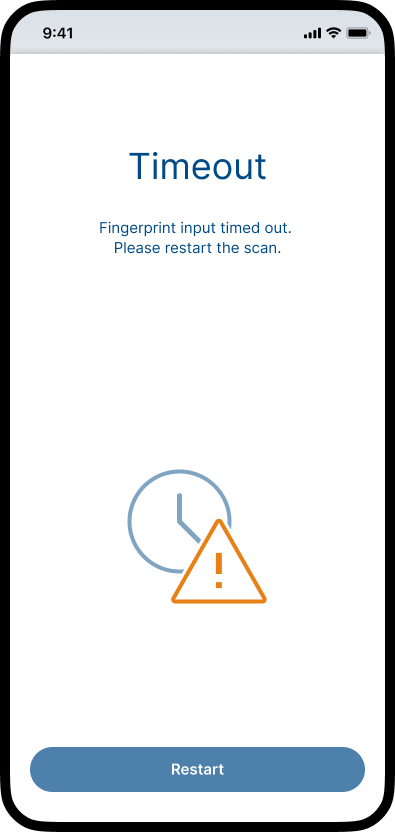
Unrecoverable — tap Restart and enrol again. The part-finished finger is discarded and enrolment starts over from Select Finger.
| Message | What it means | How to fix it |
|---|---|---|
| Finger too small | Too little contact area to read enough ridges. | Tap Restart and choose a different, larger finger. |
| Fingerprint already exists | The finger you scanned is already saved as a key. | Tap Restart and pick a different finger. |
| Timeout | No usable input arrived in time; the scan was cancelled. | Tap Restart and place the finger promptly, holding it flat until prompted to lift. |
Note: Closing an error returns you to Manage Keys. An incomplete enrolment can be resumed later from Manage Keys → the FingerprintKey, and an errored enrolment can be removed there too.
A door has either SmartTouch hardware or the multiscan SmartAccess fingerprint scanner — never both. Enable Use as SmartTouch Device in Lock Settings and the fingerprint scanner does everything a SmartTouch handle or sensor would do — triggering KeylessGo and Party Mode — in addition to reading fingerprints. So fitting the fingerprint scanner instead of SmartTouch costs you no functionality.
SmartTouch hardware and the multiscan SmartAccess fingerprint scanner are interchangeable on a door (a door has one or the other). What you need to do depends on the swap:
| You change… | What you do | What happens |
|---|---|---|
| SmartTouch → another SmartTouch | Nothing | Automatic — the Module keeps working with the new SmartTouch. |
| SmartTouch → fingerprint scanner | Nothing | Automatic — the new fingerprint scanner pairs with the Module on its own. Then enrol fingers to use fingerprint unlock. |
| fingerprint scanner → SmartTouch | Fit the SmartTouch first, then reset | First wire / fit the SmartTouch sensor or handle. Then open the app and run Lock Settings → Reset multiscan SmartAccess. The Module keeps the fingerprint-scanner pairing until you reset it — so if the wiring is loose or a cable is damaged you can re-wire and recover without losing the setup. (The Module can’t detect SmartTouch hardware on its own, so you clear the old pairing manually once the new hardware is in place.) |
| fingerprint scanner → another fingerprint scanner | Nothing | Automatic — the Module deletes the pairing it held for the old scanner, then pairs and resets the new one (any data already on the new scanner is erased). The fingerprint keys are removed from the Module, so re-enrol the fingers you want. |
How fingerprint data is stored. The fingerprint scanner holds the biometric data; the Module stores only the references (IDs) to those fingerprints — never the biometric data itself. A fingerprint scanner works only with the Module it is paired to. When you swap one scanner for another, the Module deletes the pairing it held for the old scanner, then pairs and resets the new one.
What happens to the removed scanner. Removing a scanner removes the fingerprint keys (the IDs) from the Module — the biometric data physically stays on the removed scanner, but it can no longer be read by anyone. Wiring that scanner to another Module (or back to the same one after the pairing is gone) reads nothing from it, and the scanner is reset automatically. SmartTouch hardware stores no personal data, so swapping it needs no reset.
Manual reset: Reset multiscan SmartAccess in Lock Settings removes the scanner pairing and the fingerprint keys/fingers from the Module. It is available even while the scanner is disconnected.
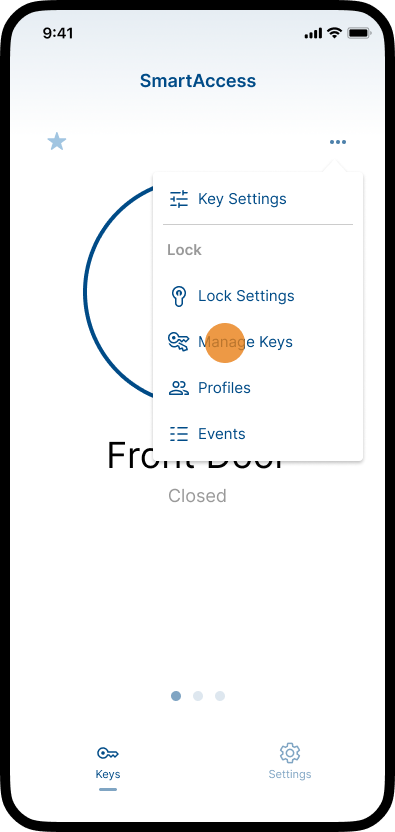
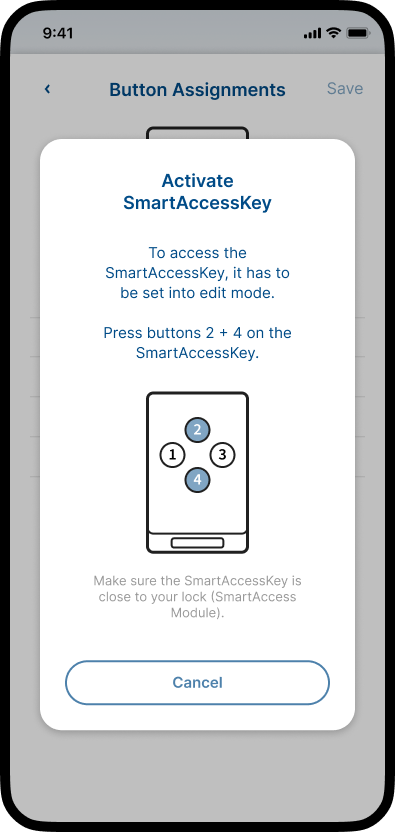
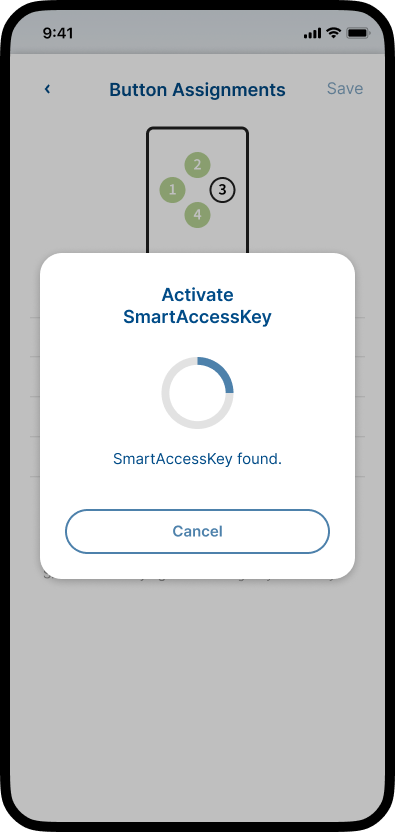
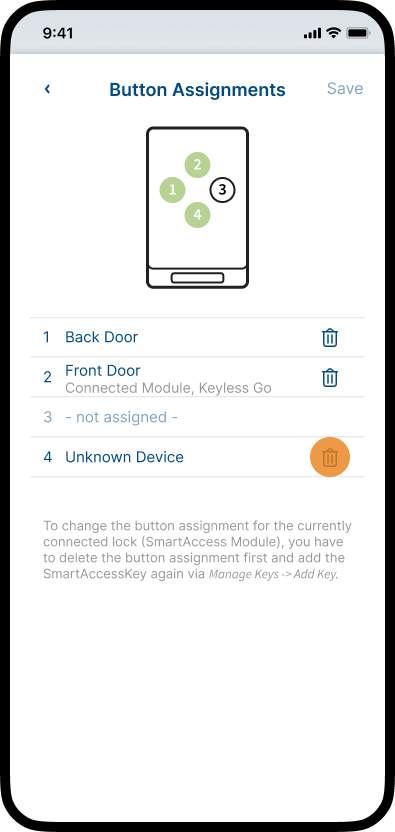
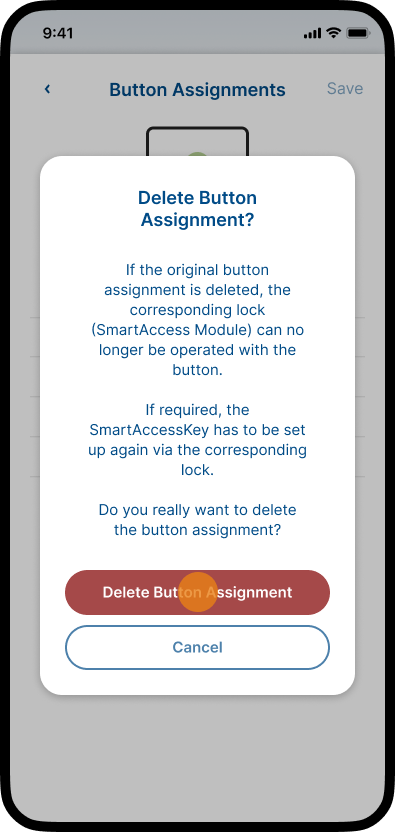
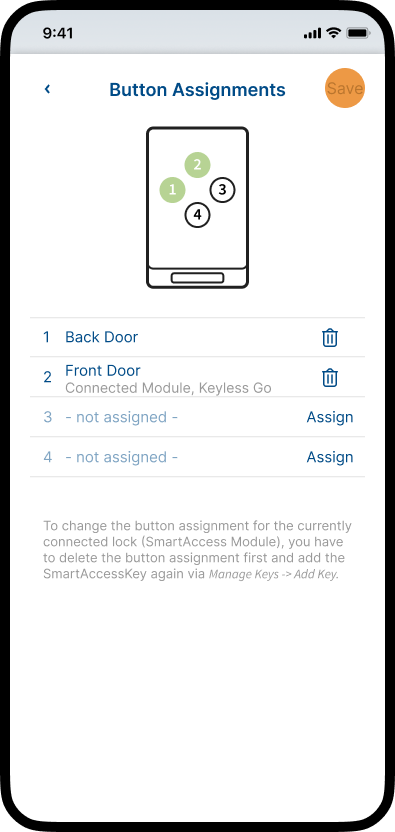
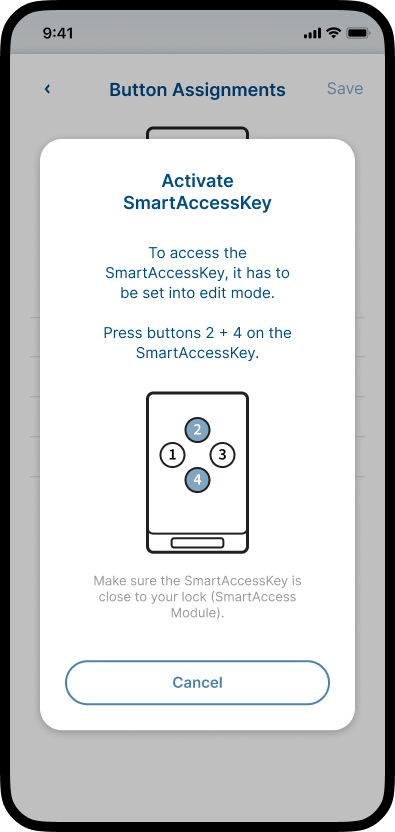
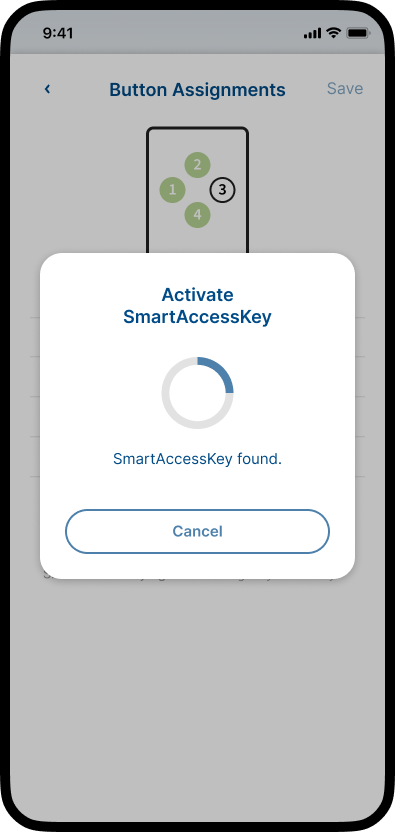
Note: If you delete the button assignment for a SmartAccess Module that is currently not connected, the corresponding SmartAccess Module can no longer be operated with the button.
If required, the SmartAccessKey has to be set up again via the corresponding SmartAccess Module.
Note: If you delete the button assignment for the currently connected SmartAccess Module, the SmartAccessKey is automatically removed.
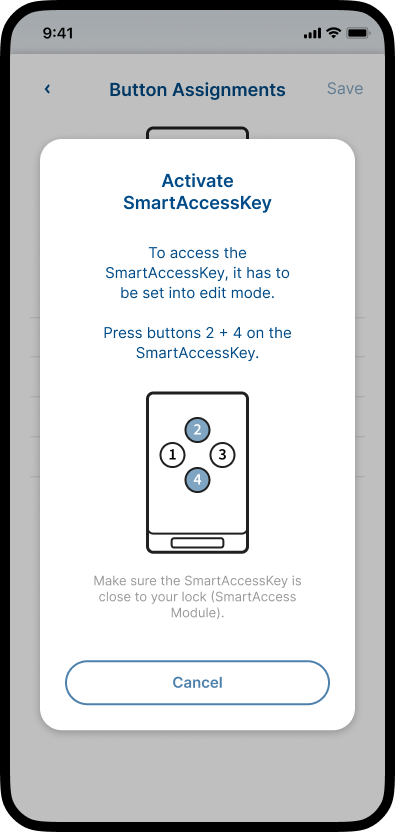
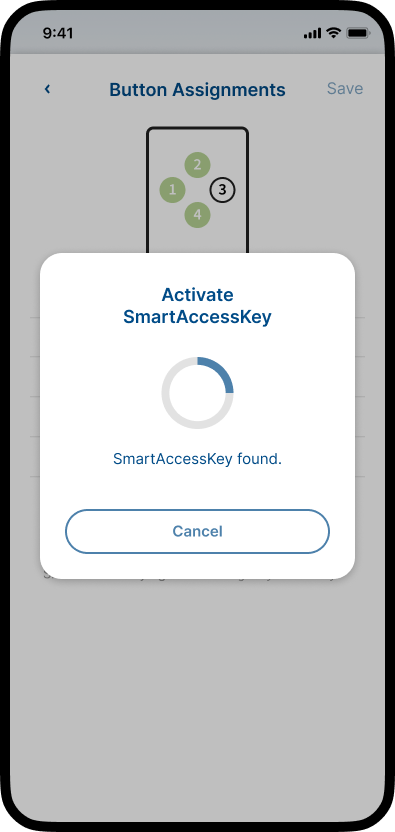
To use the SmartAccessKey again with the currently connected SmartAccess Module, you have to add the SmartAccessKey again via Manage Keys -> Add Key. Further information on how to add keys, see chapter Manage Keys.
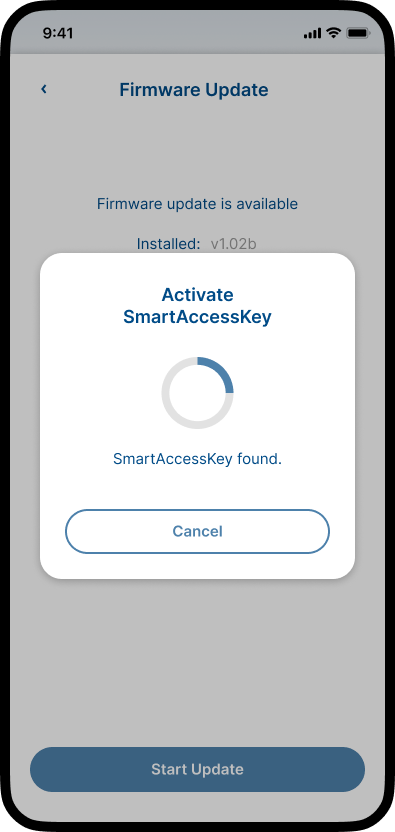
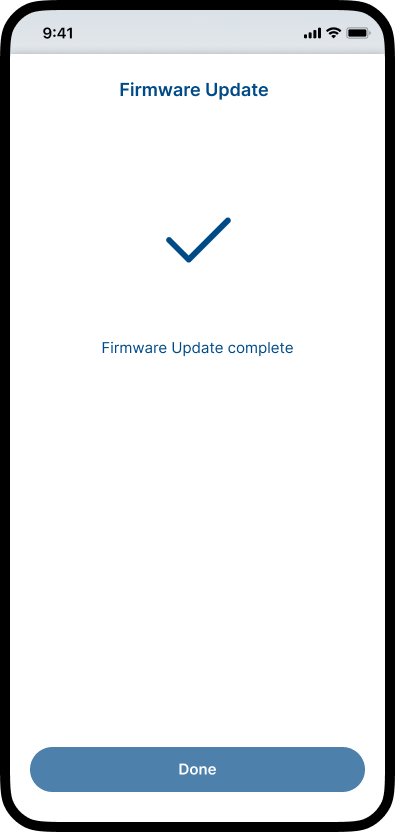
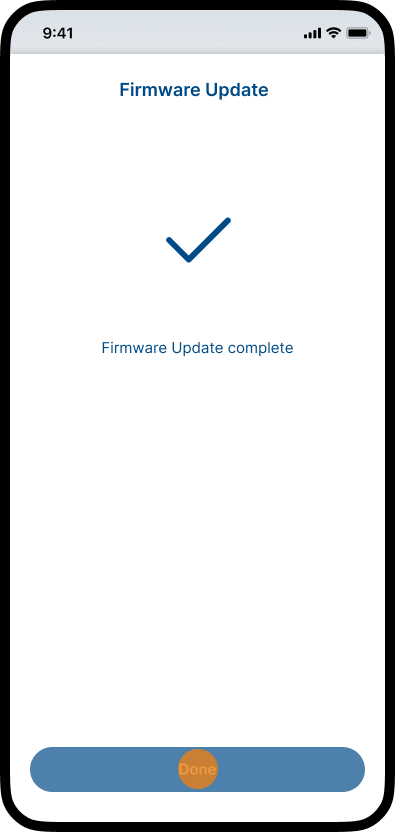
If SmartAccessKey batteries are low, this will reduce the radio range. The SmartAccessKey measures the amount of charge remaining in the battery by pressing its transmit button. If the battery is too low, the LED of the SmartAccessKey flashes 3 times when its transmit button is pressed. If this happens, please replace the battery promptly. All stored data remain saved when changing the battery.
Note: Please change the batteries in time, if the batteries are completely empty you cannot open the door with the SmartAccessKey anymore.
The SmartAccessKey is operated by a battery type CR2032. Immediately it is ready for use just after changing the battery.
Please proceed as follows when changing the batteries:
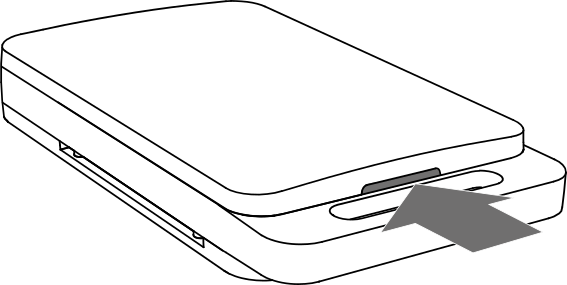
1. Insert a narrow object (such as a flat-head screwdriver) into the slot at the back of the SmartAccessKey and gently lever the cover up.
2. Replace the battery, making sure the polarity is correct (the positive pole must be visible).
3. Close the case.
1.
2.
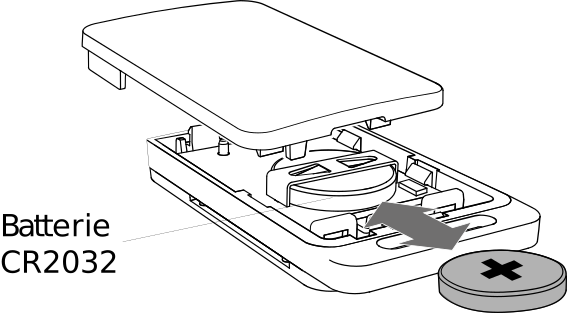
The range of the radio signal within which a SmartAccessKey can communicate with the SmartAccess Module varies significantly with environmental conditions. If the SmartAccessKey is significantly further away than 1 meter from the door, communication is generally not possible. Electrically conductive objects can increase this distance, for example. For successful communication with the SmartAccess Module, the SmartAccessKey must be in motion in all cases.
SmartAccessKeys comply with the requirements and regulations of Directive 2014/53/EU (RED).
If your SmartAccess Module stops responding or does not function correctly, you can restart it using the LED button to rectify the malfunction.
Note: All settings and keys are retained during a restart. No data is lost.
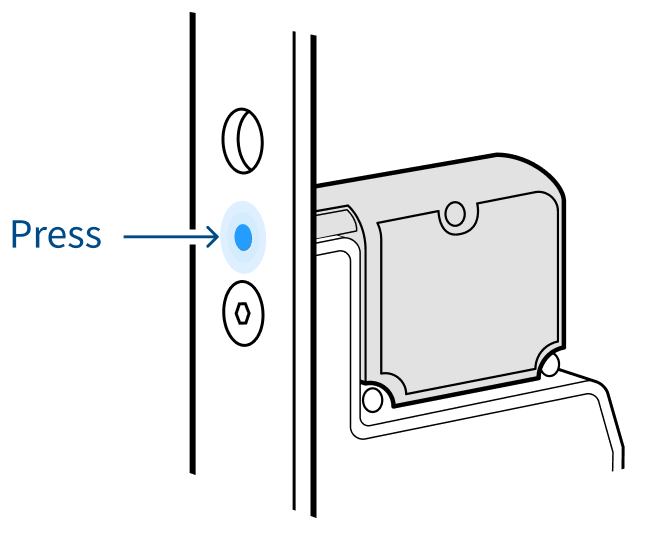
If restarting does not resolve the malfunction of the SmartAccess Module, you can reset the SmartAccess Module to the factory settings to eliminate possible malfunctions.
Note: If you perform a reset, the SmartAccess Module is set to the factory settings. All settings and keys will be lost.
In the following cases, it may be necessary to reset the SmartAccess Module to its factory settings:
Transfer of Ownership
When transferring the SmartAccess Modul to a new owner, a reset ensures that all previous user data, settings, and keys are completely erased, providing a clean slate for the new owner.
Troubleshooting
As a last resort for resolving persistent connectivity issues, unexpected behavior, or other severe malfunctions that cannot be fixed by simpler troubleshooting steps.
Firmware Issues
In rare cases, a reset might be necessary to recover from a failed or corrupted firmware update that renders the device inoperable.
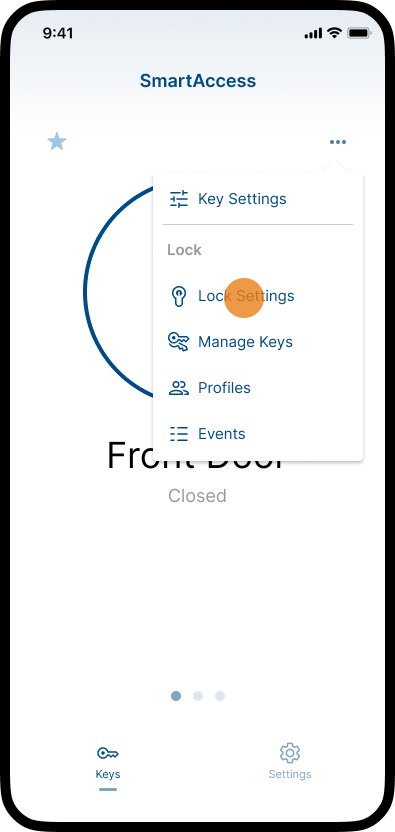
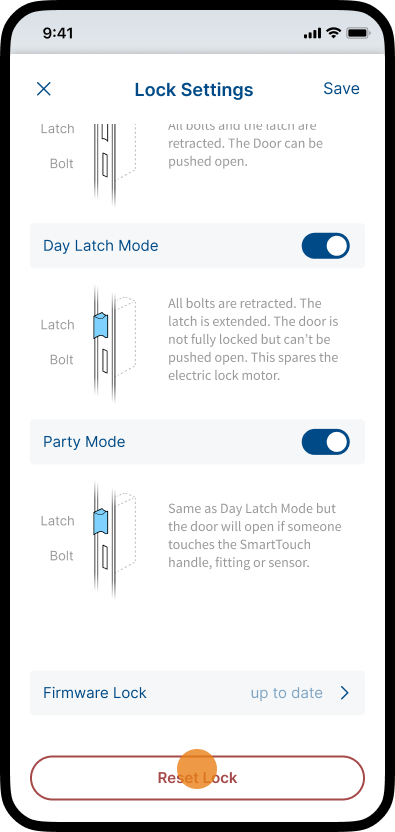
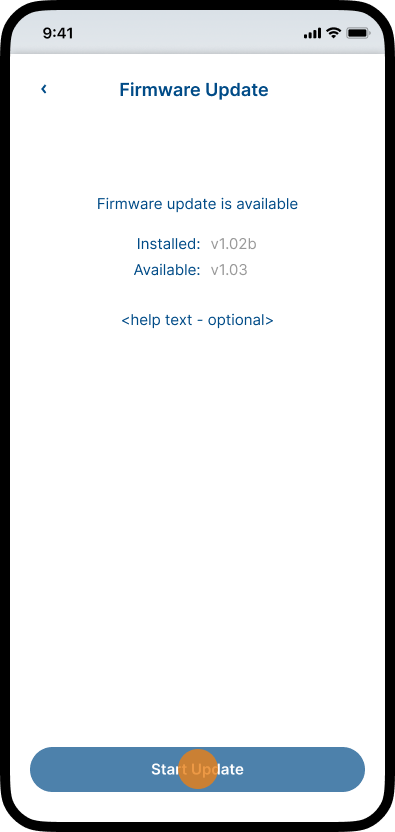
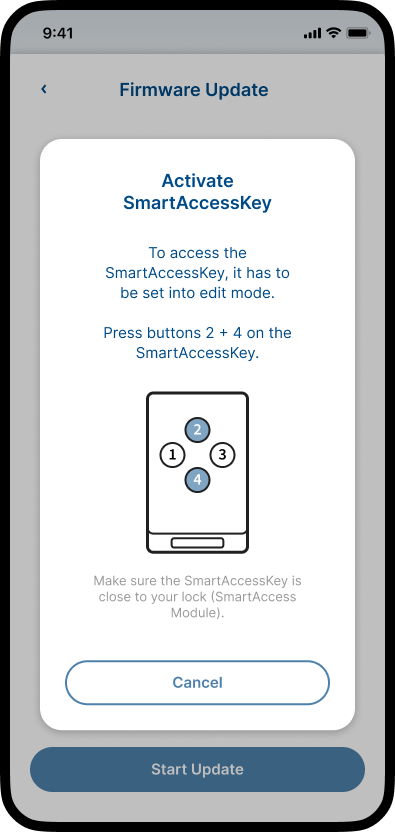
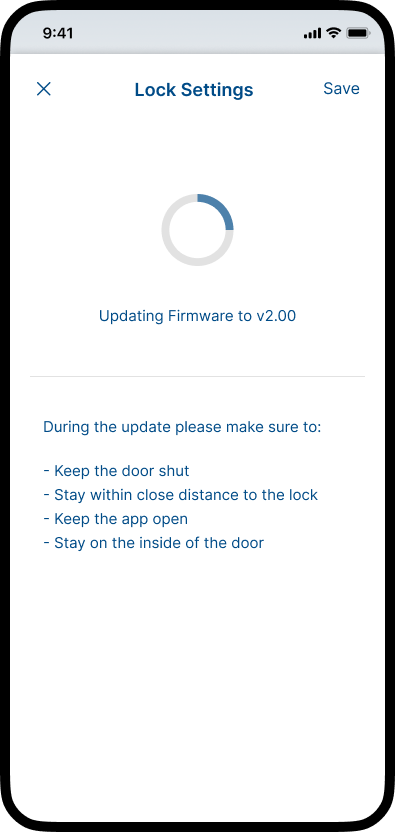
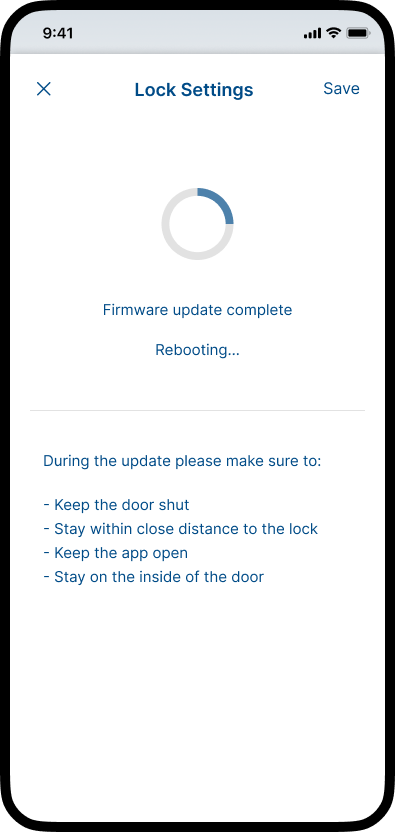
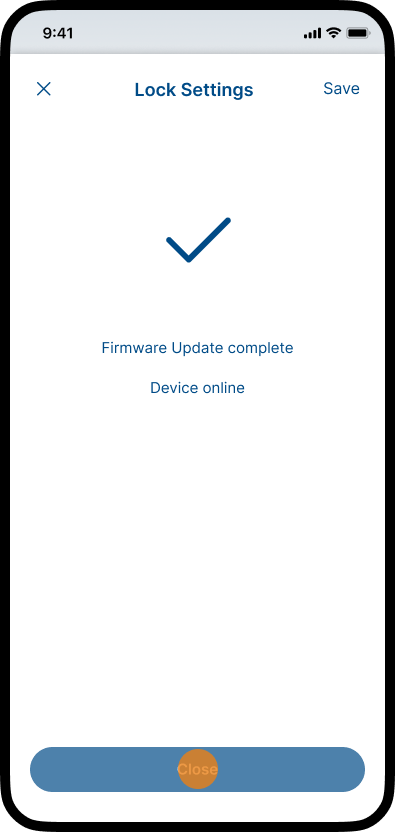
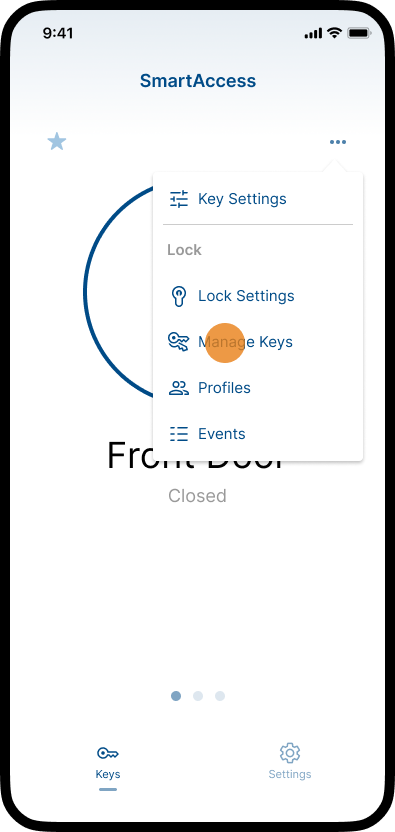
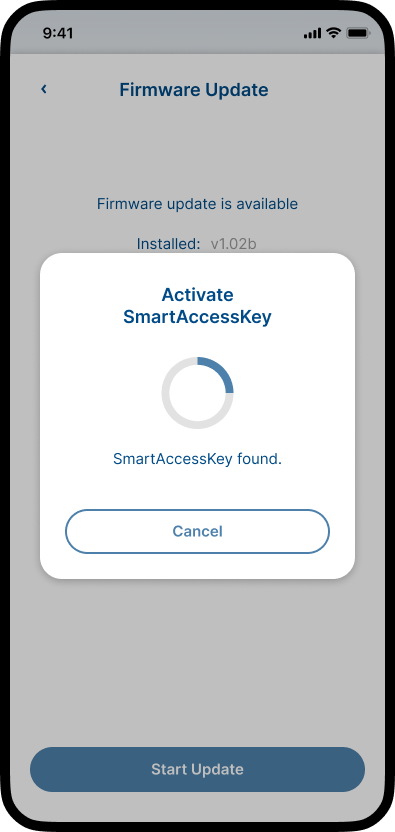
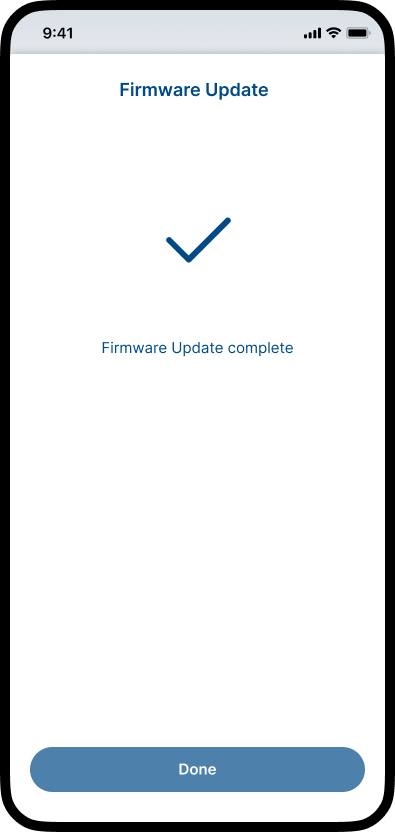
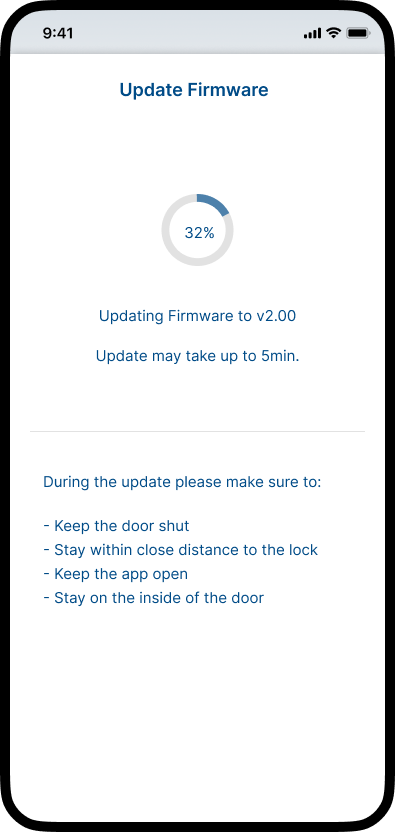
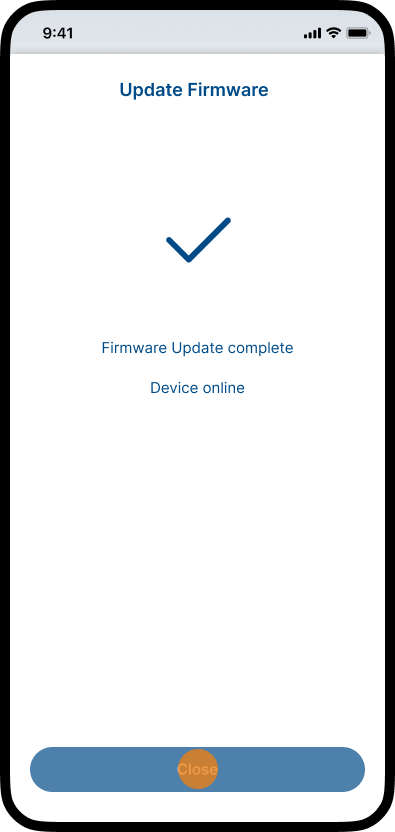
Keep the firmware up to date for maximum security and best compatibility. Updates are performed via Bluetooth and require the smartphone to be within Bluetooth range of the SmartAccess Module.
Three devices update independently:
Note: Please keep the door closed during the entire update process, otherwise the SmartAccess Module will not be supplied with power and the update cannot be carried out properly.
Note: The SmartAccess App is usually by default automatically updated via the App Store / Google Play Store.
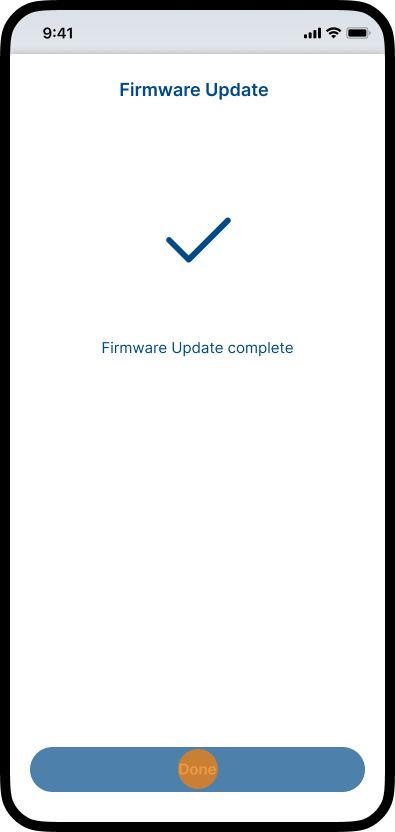
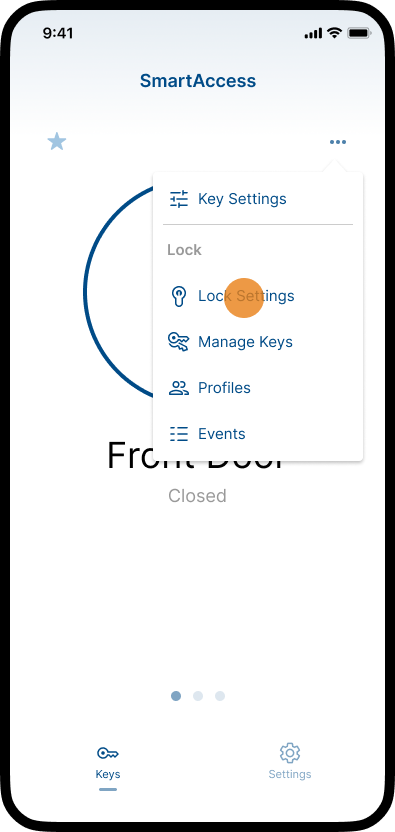
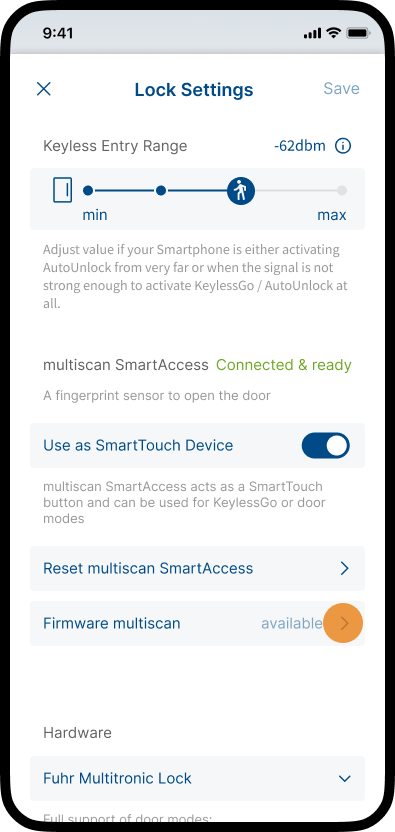
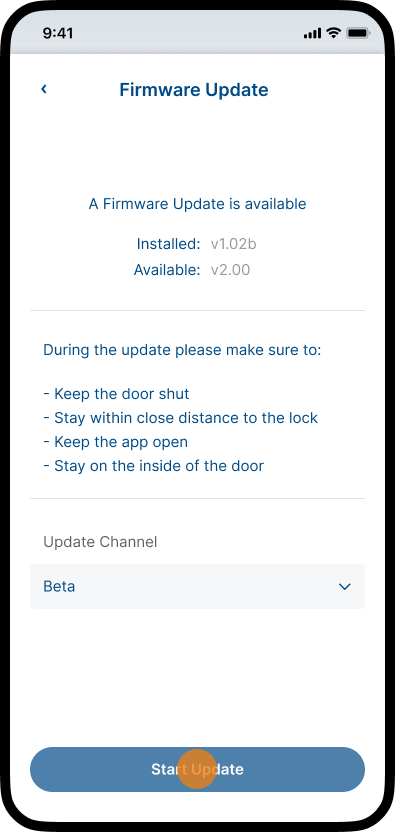
Note: Compatibility
The sensor firmware must be compatible with the SmartAccess Module firmware. If the Module firmware is outdated, the app prompts you to update the SmartAccess Module before updating the sensor.
Bluetooth radio key for communication with SmartAccess Module.
| Dimensions I x w x h: | ~ 61mm x 37mm x 11mm |
| Radio Transmitter: | Bluetooth 2.4 GHz |
| Battery: | CR2032 |
| PCB Material: | FR4 UL 94 V0 |
| Case Material: | PA6 GF25 |
| Protection Class: | IP20 |
| Operating temperature range: | -10°C to +60 °C |
| Operating humidity range: | 10% to 90%, non-condensing |
Radio module with bluetooth communication for FUHR locks.
| Dimensions I x w x h: | ~ 45mm x 50mm x 15mm |
| Supply voltage: | 12V – 26V DC |
| Supply current: | Startup: max. 60 mA Idle: ~ 5 mA @ 12 V (60 mW) ~ 3 mA @ 26 V (78 mW) |
| Communication ports: | RS485 Open Collector Input Data Bus for FUHR locks Relais Output for 3rd Party locks Reed Contact Inputs |
| Relais Output Capability: | Max: 2 A @32 V |
| Cryptographic methods: | AES128-GCM, ECDH (secp256r1), HKDF |
| RTC: | Capacitor buffered, ~5 days run time |
| PCB Material: | FR4 UL 94 V0 |
| Case Material: | PA6 GF25 |
| Protection Class: | IP20 |
| Operating temperature range: | -10°C to +60 °C |
| Operating humidity range: | 10% to 90%, non-condensing |
For further information on pin assignments and wiring, please refer to the datasheet available in the download section.
