The SmartConnect door offers different possibilities for integrating a doorbell. In the following, three options are presented how the SmartConnect door can be expanded to include a doorbell or how the SmartConnect door can be integrated into an existing doorbell system.
Connecting a Plug-in radio gong
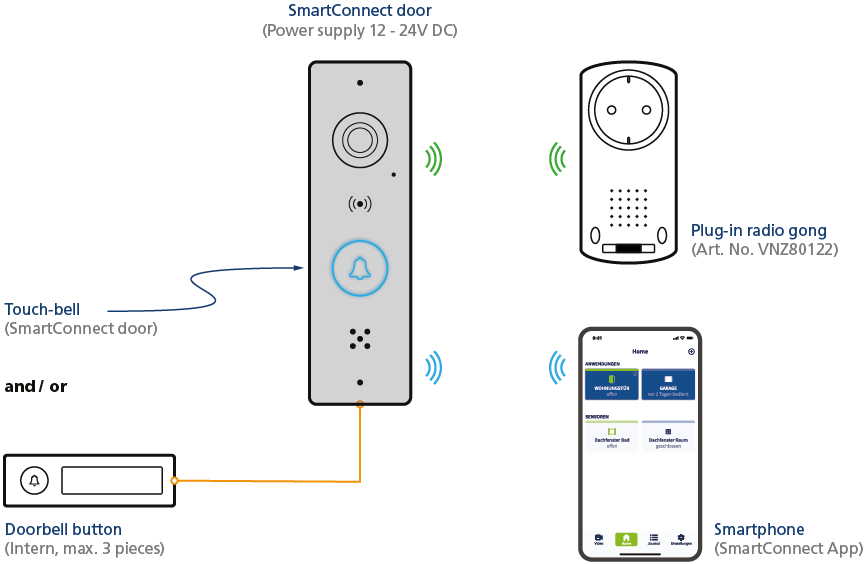
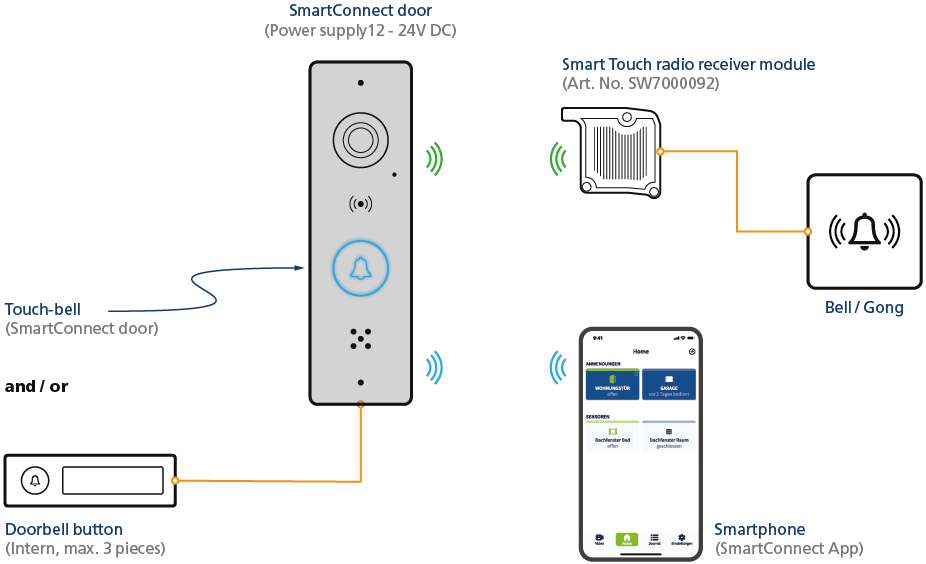
The easiest way to connect a doorbell to the SmartConnect door is to use the plug-in radio gong VNZ80122. If the touch bell of the SmartConnect door or a bell button connected to the SmartConnect door is pressed, a radio signal is sent to the radio gong and it “rings”. To do this, it is necessary to pair the radio gong VNZ80122 with the SmartConnect door and link it as an action with the touch bell. To connect a radio gong, connect it to a suitable power supply (110 – 230V AC (Schuko socket) and follow the steps below.
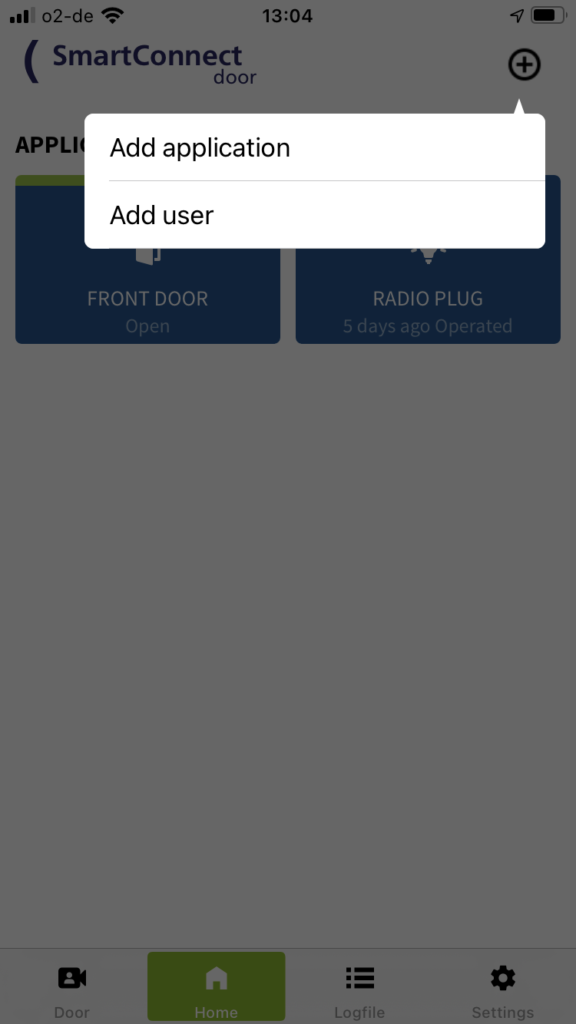


- Tap the Plus icon in the top right of the header and select Add application.
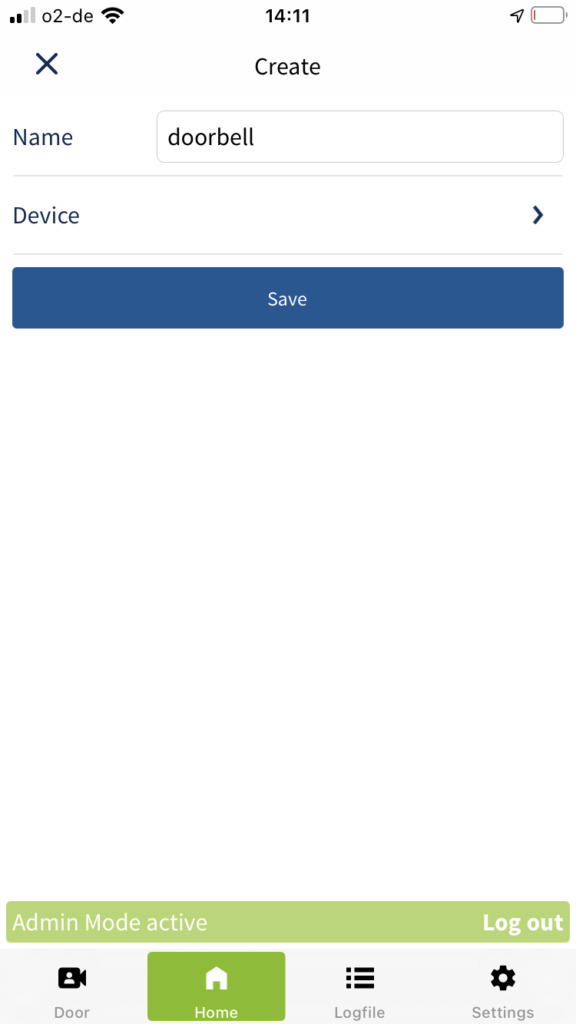
- Name your new application. The name can be up to 20 characters long and should be chosen to avoid confusion with other applications, e.g. doorbell or radio gong.
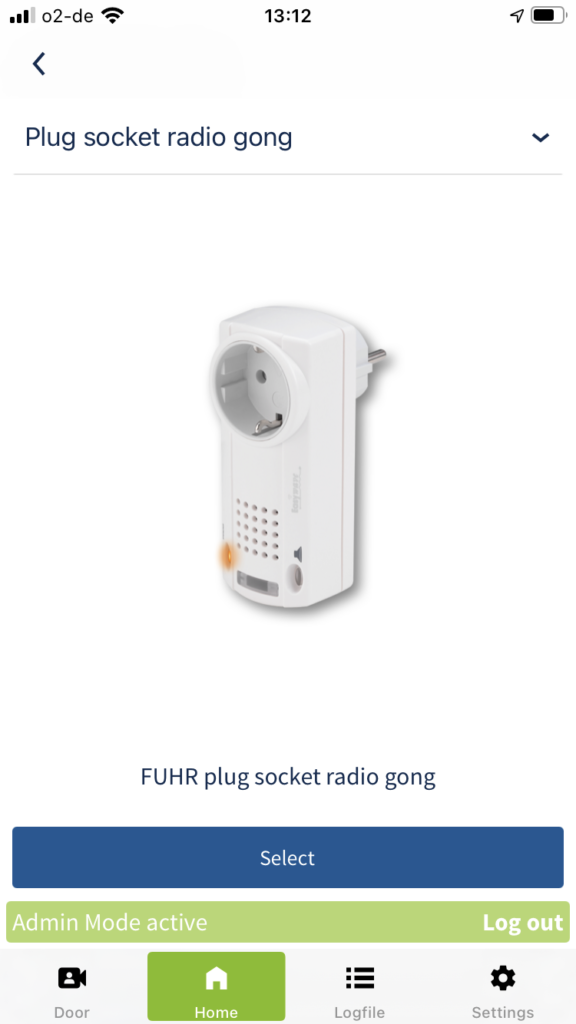
Then determine the product (Plug socket radio gong) which you want to use for the application. Tap Device. - Select the appropriate product (Plug socket radio gong) from the list and tap Select.
- Now save the application.
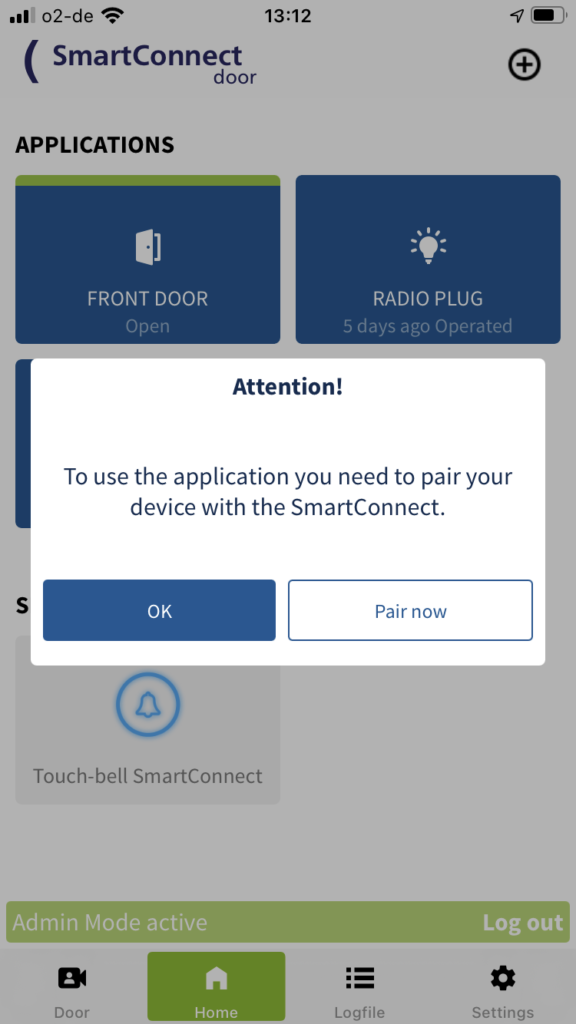
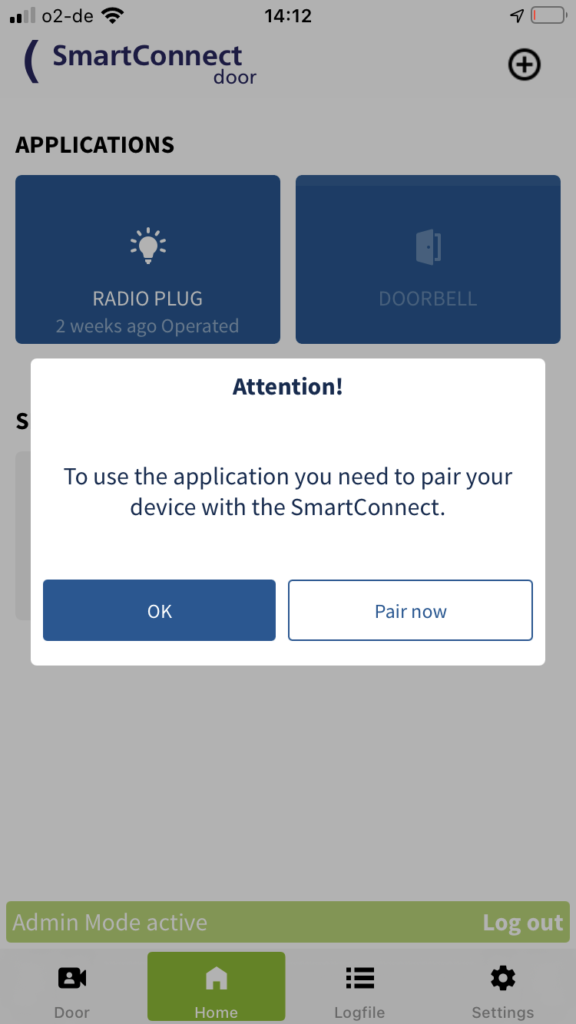
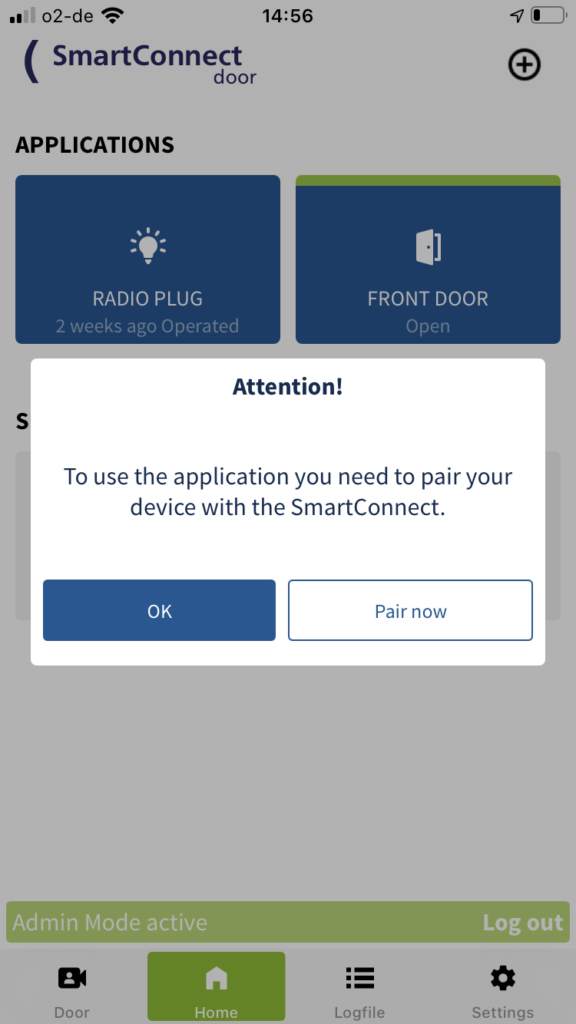
- To use the application you need to pair your device with the SmartConnect. To do this, tap Pair now in the pop-up.
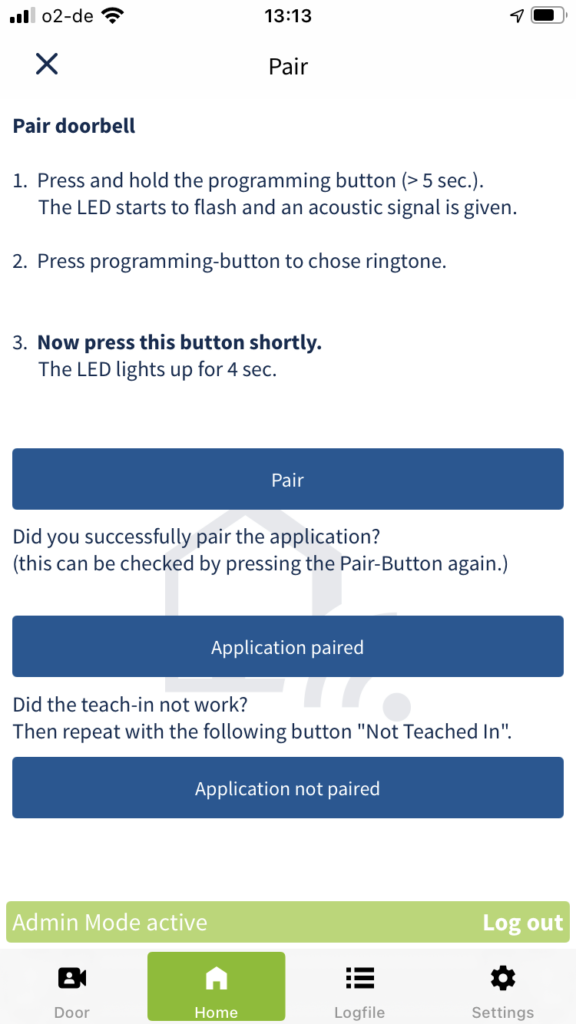
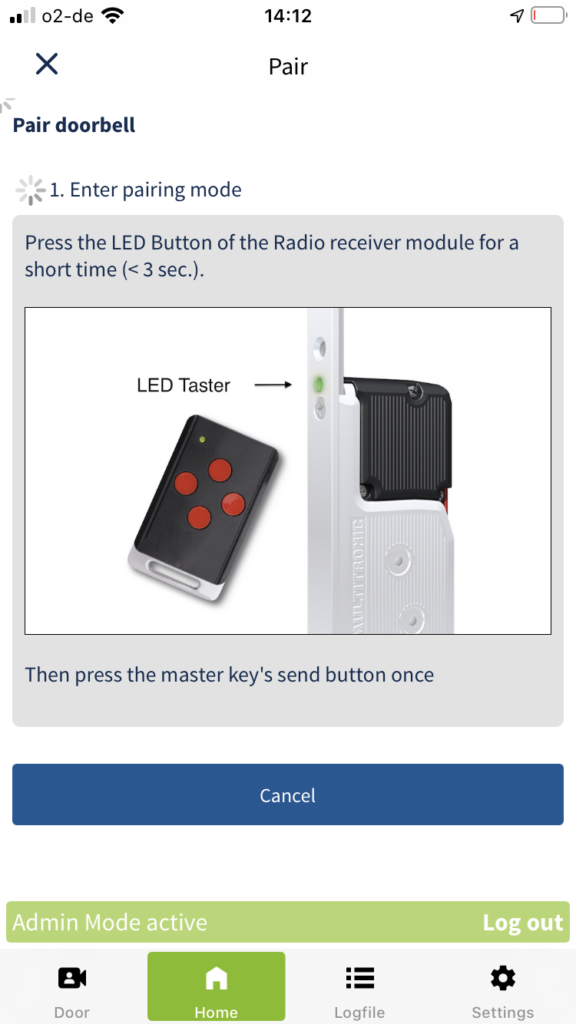
- Now please follow the instructions described in the SmartConnect app exactly and complete the process by tapping Application paired.
- The application has now been successfully paired and must be connected to the touch bell as an action.
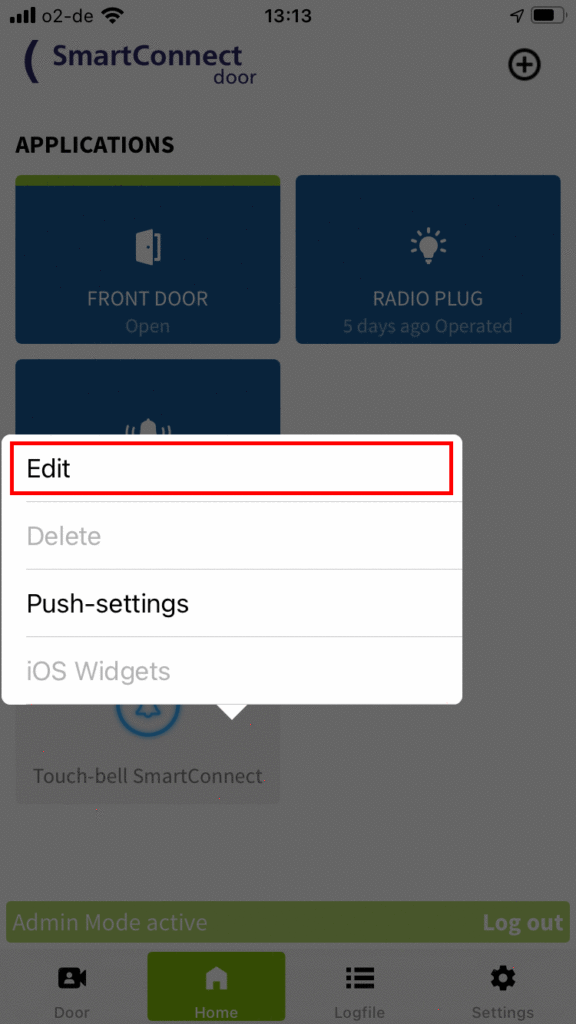
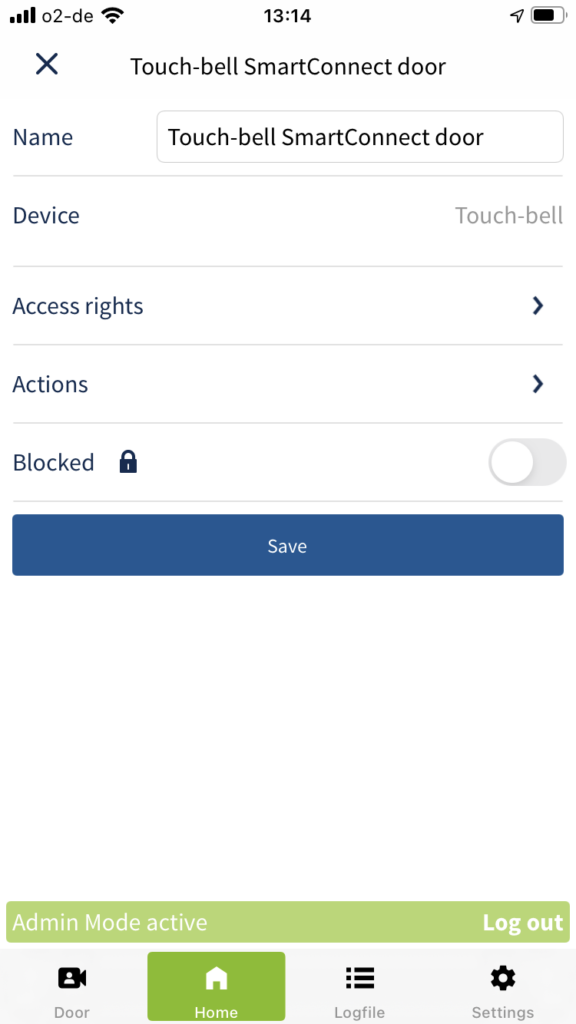
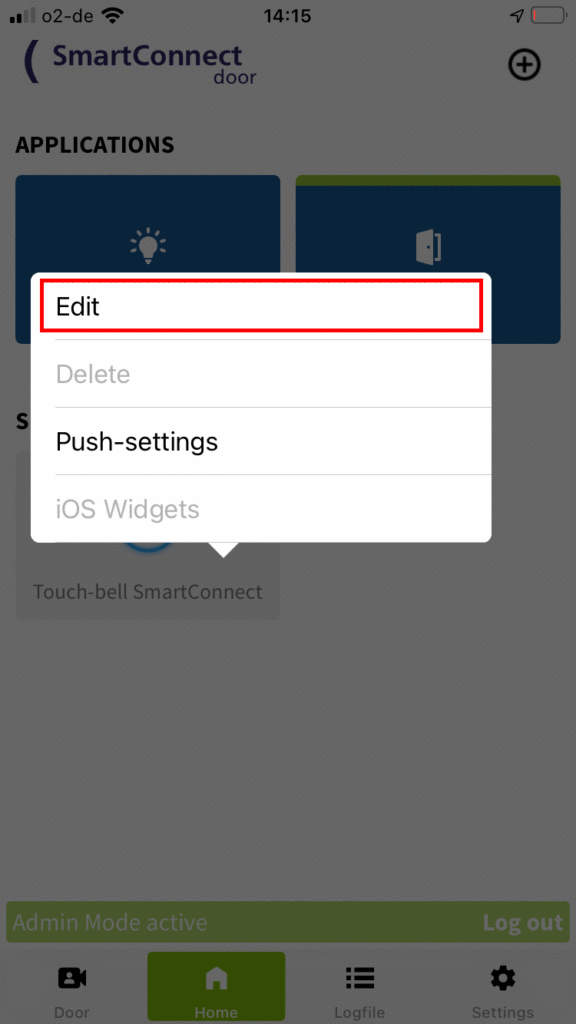
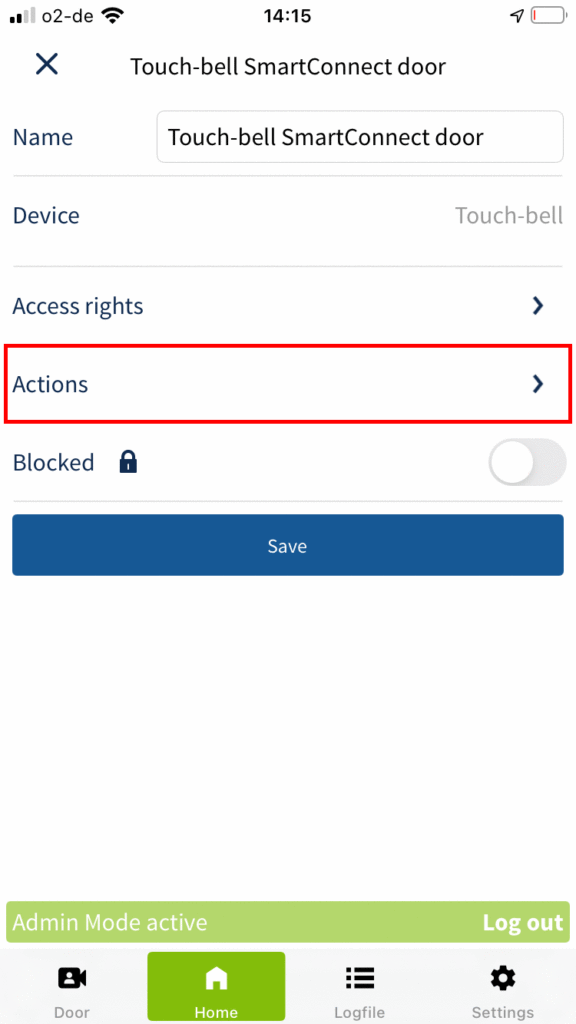
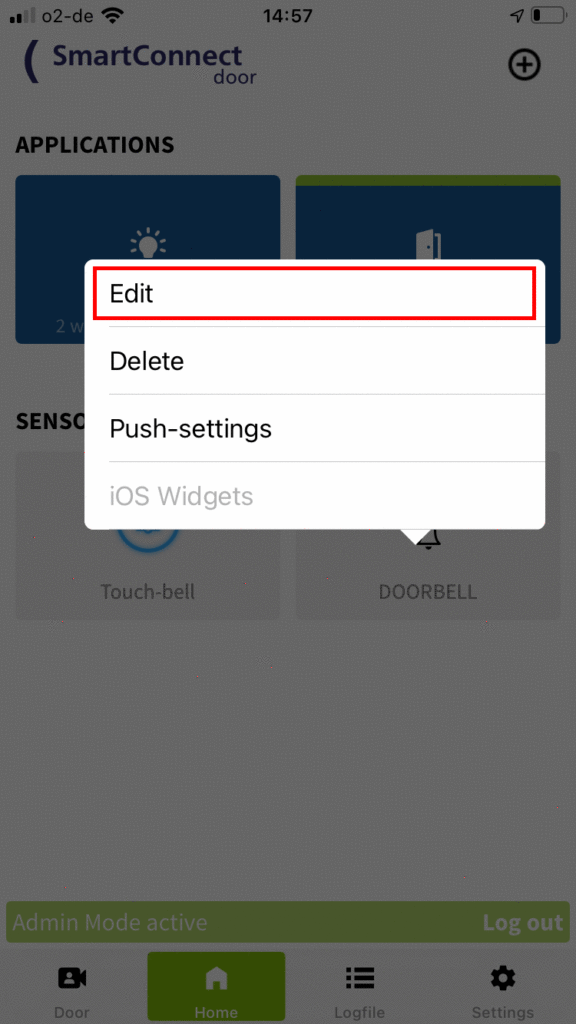
- Press and hold the button of the touch bell of the SmartConnect door and then release it. A dialog window will now open. Tap Edit.
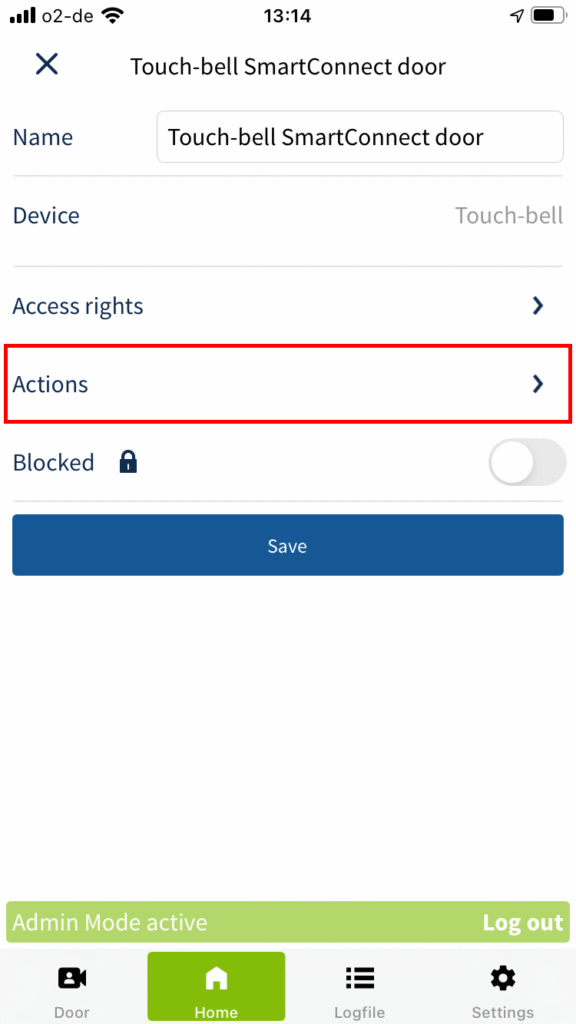
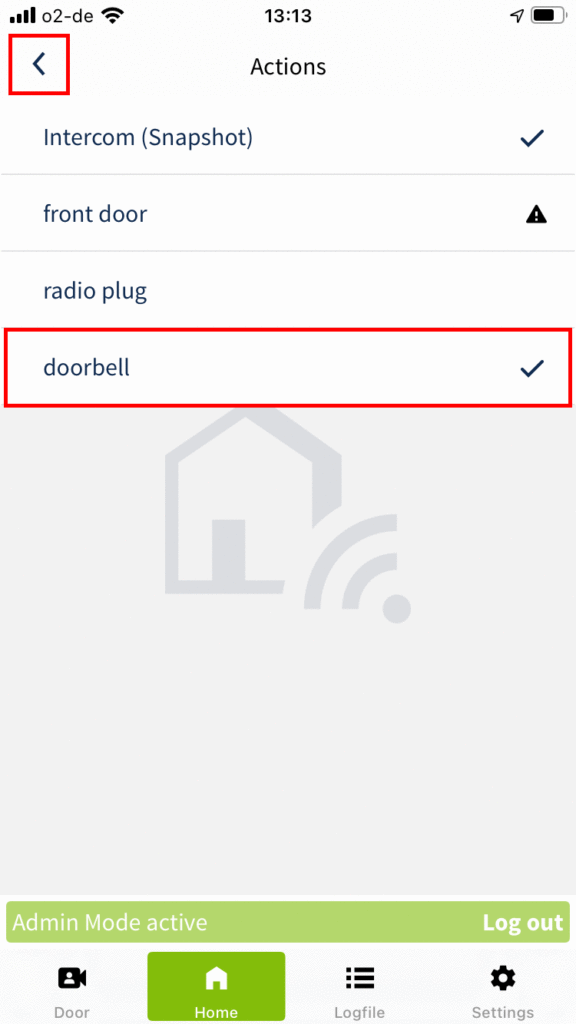
- Tap Actions.
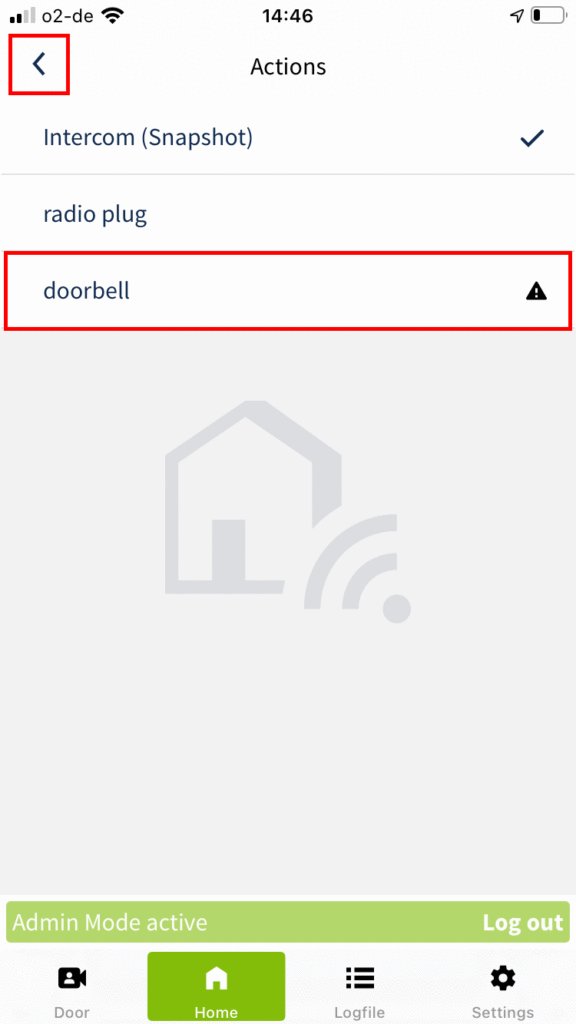
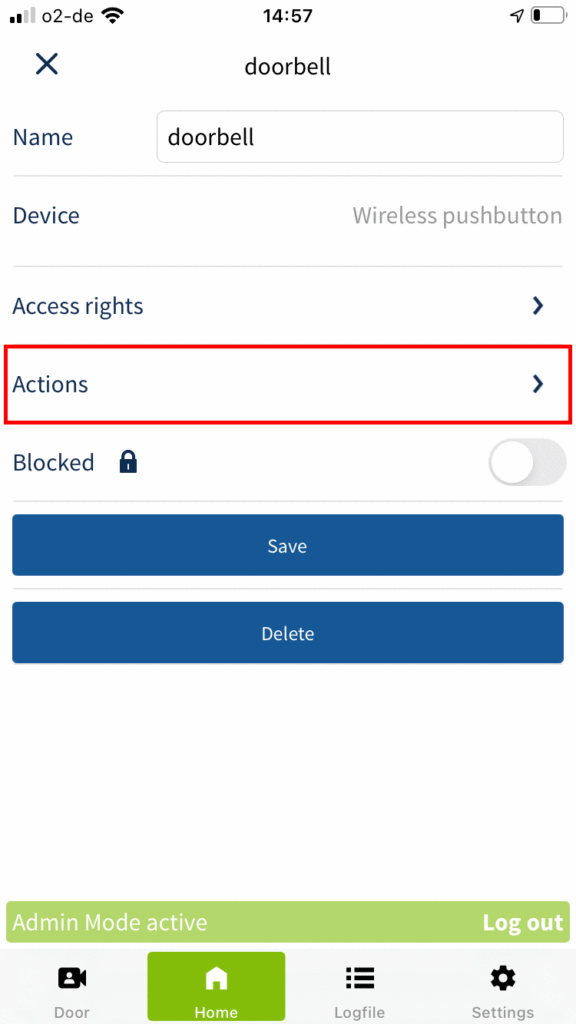
- Tap on the previously created application (doorbell/radio gong) to link it to the touch bell as an action. The check mark on the right indicates that the application is assigned as an action. Then tap the arrow in the upper left corner to return a level.
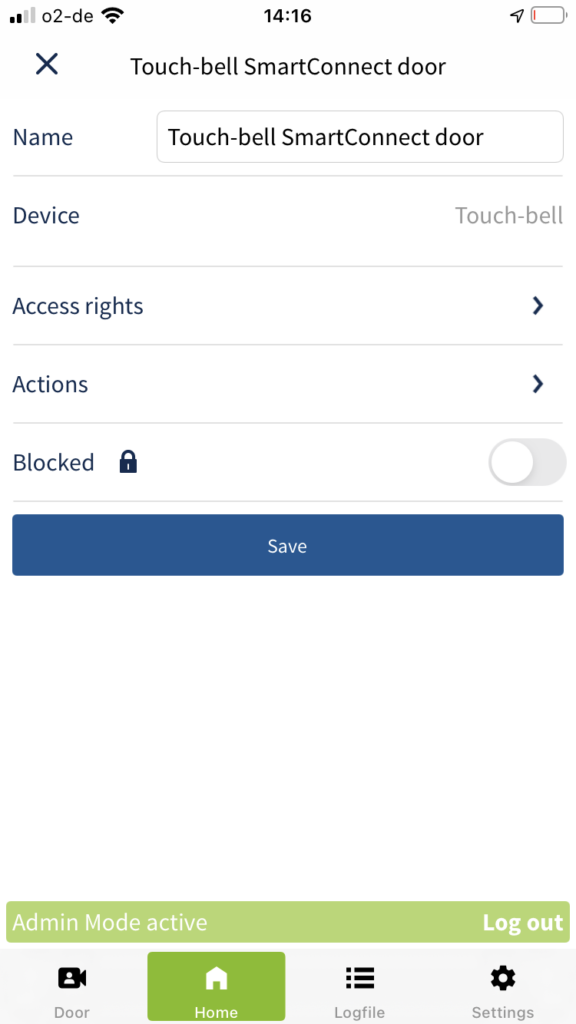
- Tap Save to save your changes.
Control of a bell that is not connected to an on-site doorbell button
Further installation instructions can be found in the download area.
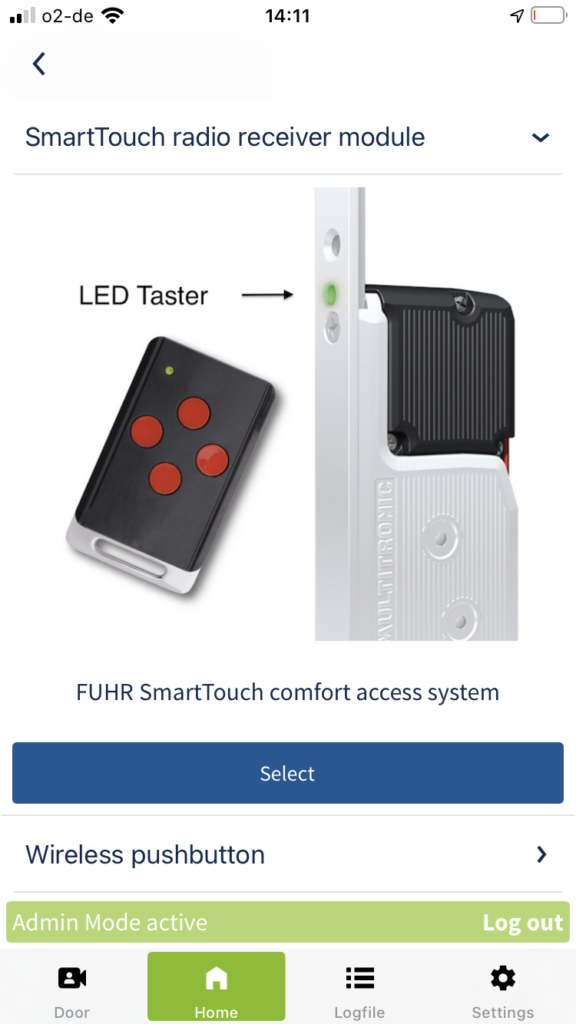
If an on-site bell (or gong) is to be controlled that is not connected to an on-site doorbell button, this can be achieved with the SmartTouch UNIVERSAL radio module. The switching input of the bell (or the gong) is switched with the SmartTouch UNIVERSAL radio module. You can ring either the touch bell of the SmartConnect door or an on-site doorbell button connected to the SmartConnect door. If the touch bell is not used, it can be deactivated in the settings of the touch bell, which also switches off the blue LED ring.
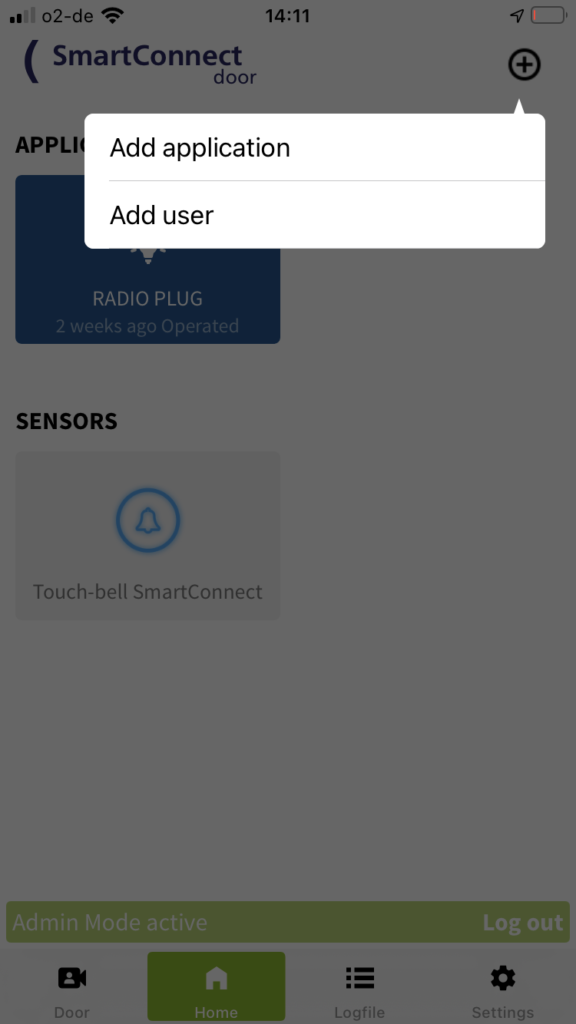


- Tap the Plus icon in the top right of the header and select Add application.
- Name your new application. The name can be up to 20 characters long and should be chosen to avoid confusion with other applications, e.g. doorbell or radio gong.
Then determine the product (SmartTouch radio receiver module) which you want to use for the application. Tap Device. - Select the appropriate product (SmartTouch radio receiver module) from the list and tap Select.
- Now save the application.
- To use the application you need to pair your device with the SmartConnect. To do this, tap Pair now in the pop-up.
- Now please follow the instructions described in the SmartConnect app exactly and complete the process by tapping Application paired.
- The application has now been successfully paired and must be connected to the touch bell as an action.
- Press and hold the button of the touch bell of the SmartConnect door and then release it. A dialog window will now open. Tap Edit.
- Tap Actions.
- Tap on the previously created application (doorbell/radio gong) to link it to the touch bell as an action.
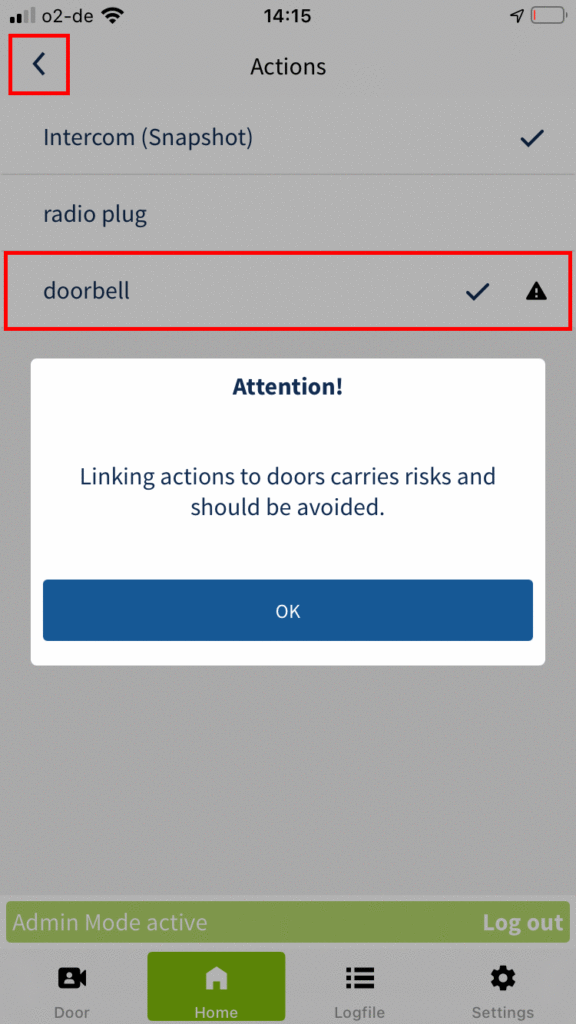
- Confirm the message by tapping OK. The check mark on the right indicates that the application is assigned as an action. Then tap the arrow in the upper left corner to return a level.
- Tap Save to save your changes.
Control of a bell that is connected to an on-site doorbell button
Further installation instructions can be found in the download area.
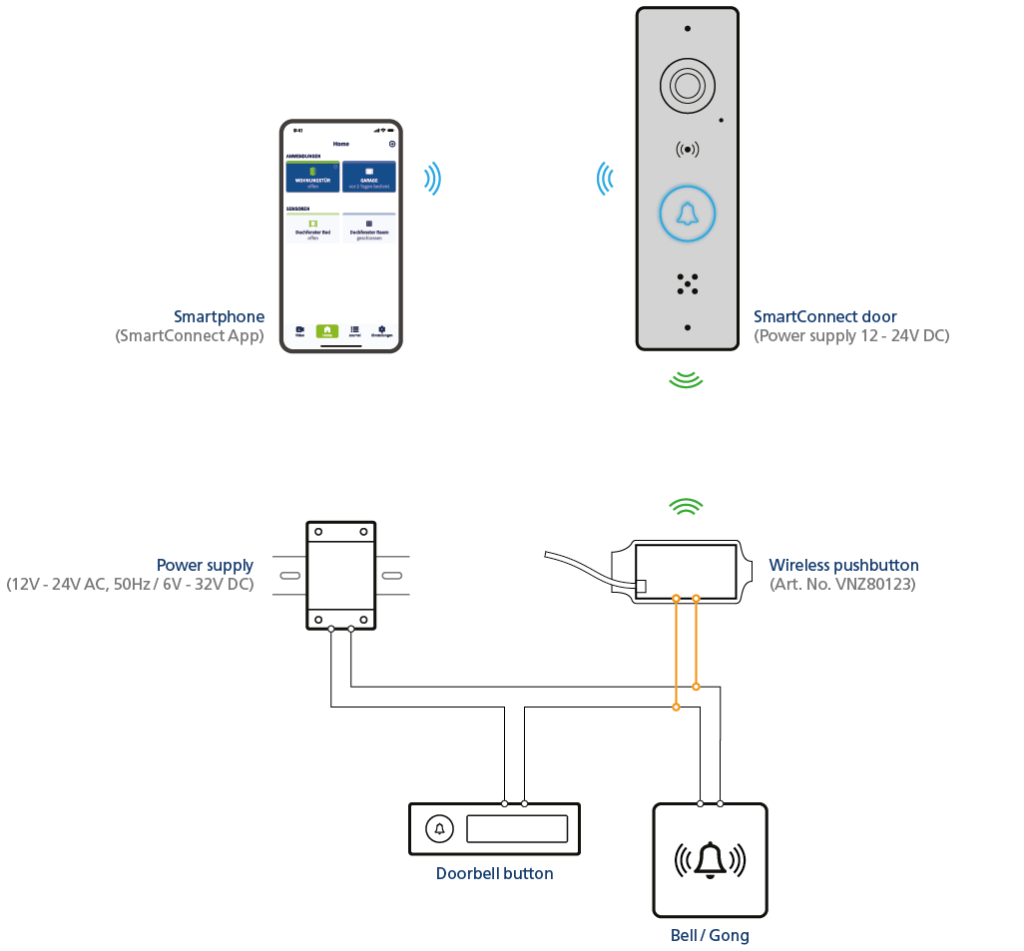
An “existing” doorbell system (= bell is already connected to an on-site doorbell button and bell transformer) can be integrated into the SmartConnect door using a VNZ80123 wireless pushbutton.
In an existing doorbell system, the doorbell is in most cases supplied by a doorbell transformer. The wireless pushbutton VNZ80123 is connected in parallel to the power supply for the bell; this works with AC and DC voltage between 6 and 24V. If the on-site bell button is pressed, the bell is supplied with power and “rings”. At the same time, the wireless pushbutton VNZ80123 receives power and automatically sends a signal to the SmartConnect door. The wireless pushbutton can be paired via the SmartConnect app and the action “Snapshot” can be assigned to it. As a result, the on-site bell button behaves like the integrated touch bell of the SmartConnect door and performs the same action when it is pressed (photo and push notification).
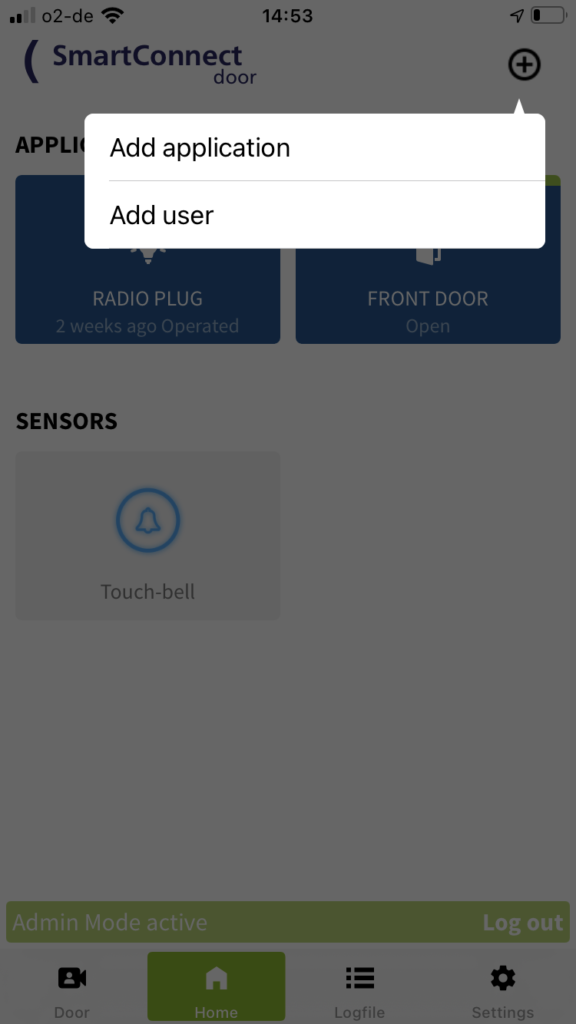


- Tap the Plus icon in the top right of the header and select Add application.
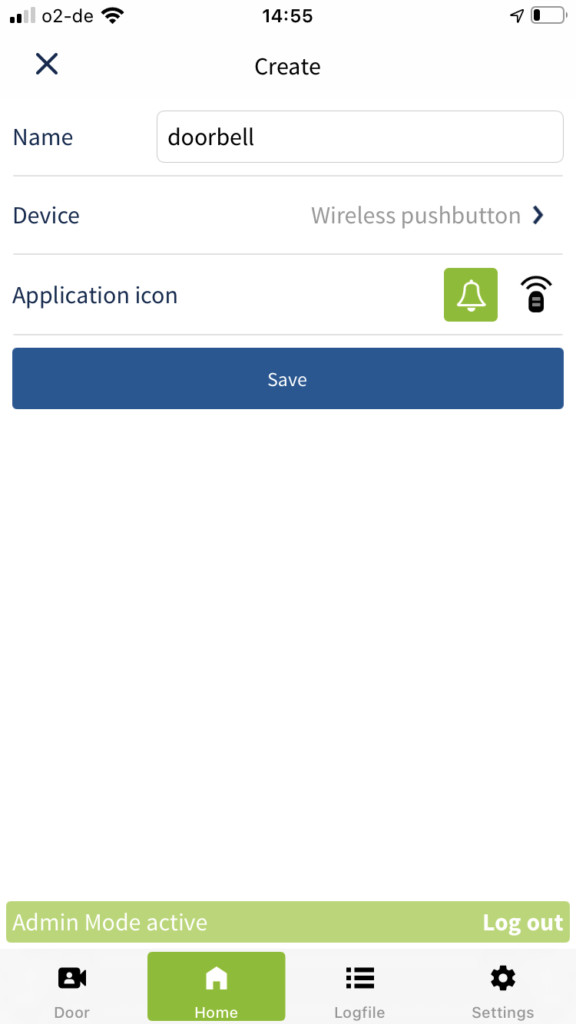
- Name your new application. The name can be up to 20 characters long and should be chosen to avoid confusion with other applications, e.g. doorbell or radio gong.
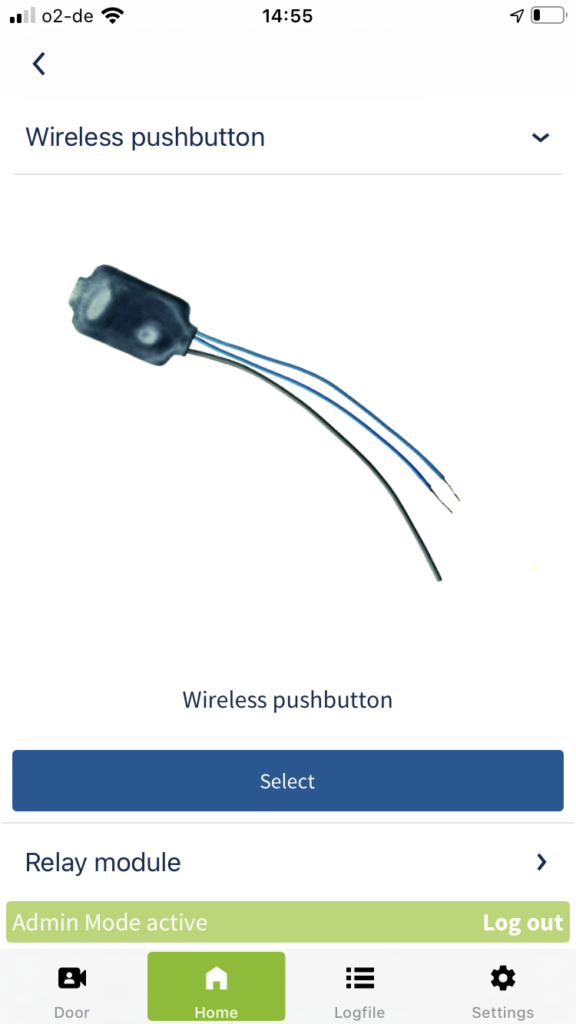
Then determine the product (Wireless pushbutton) which you want to use for the application. Tap Device. - Select the appropriate product (Wireless pushbutton) from the list and tap Select.
- Select the icon that should be displayed on the home screen for the application. Now save the application.
- To use the application you need to pair your device with the SmartConnect. To do this, tap Pair now in the pop-up.
- Now please follow the instructions described in the SmartConnect app exactly.
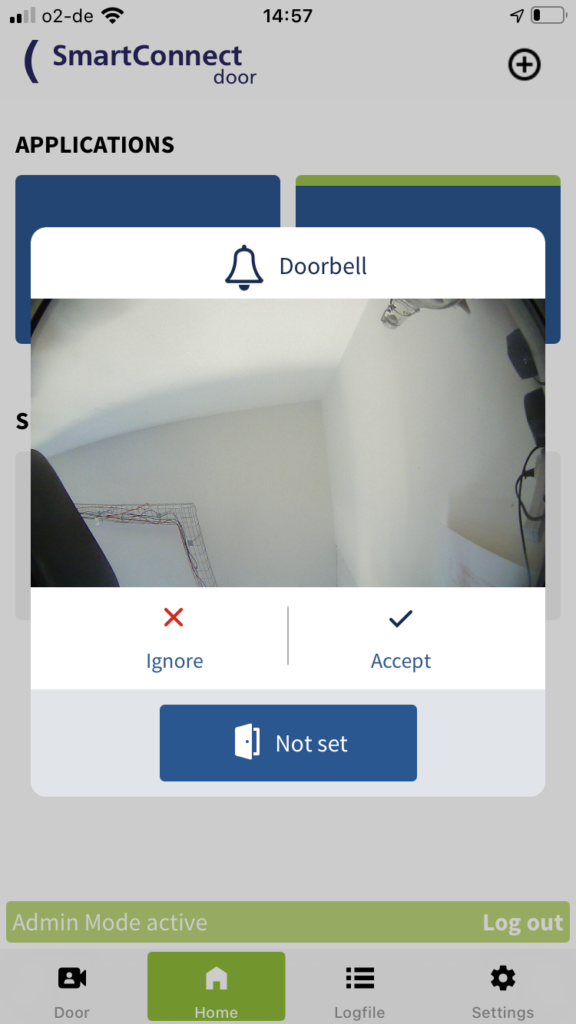
- A pop-up appears with a preview image of the intercom. Click Ignore to close the pop-up. The application has now been successfully paired.
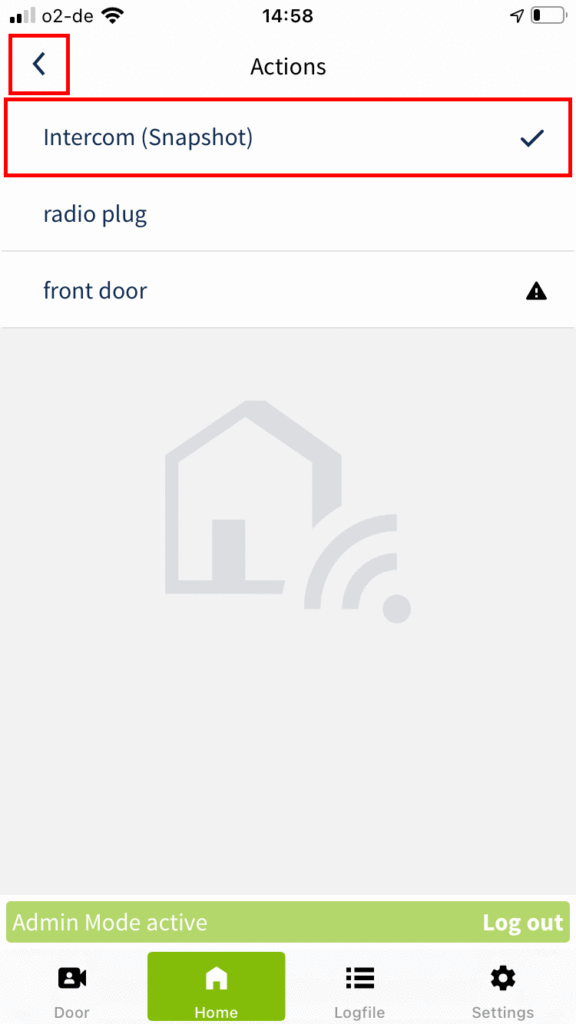
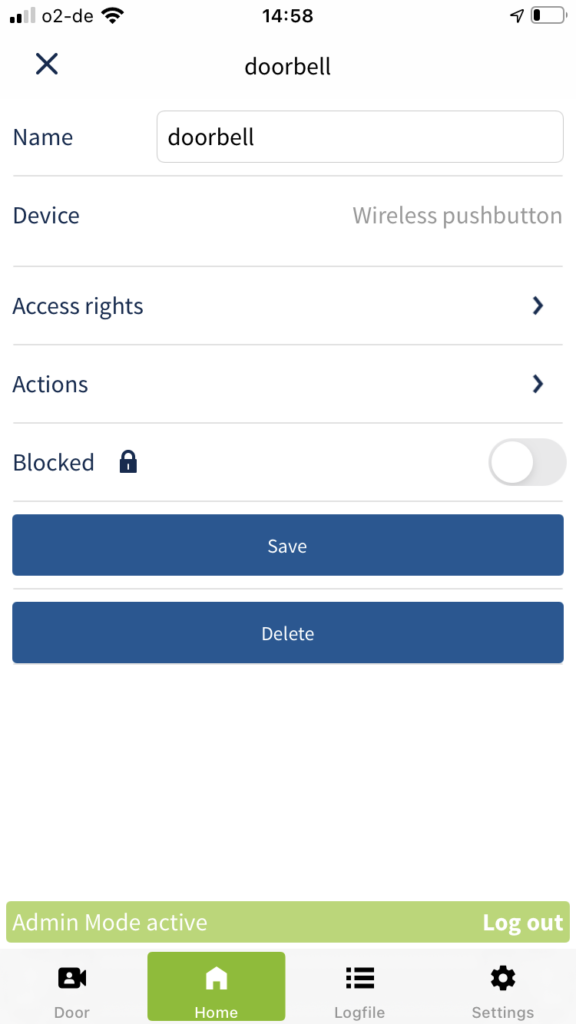
In order for the on-site doorbell button to behave the same way as the integrated touch bell of the SmartConnect door (photo and push notification), the action “Snapshot” must be assigned to it. - Press and hold the button of previously created application (doorbell) and then release it. A dialog window will now open. Tap Edit.
- Tap Actions.
- Tap Snapshot to assign the desired action to the Wireless pushbutton (and thus also to the on-site doorbell button). The check mark on the right indicates that the action is assigned as an action. Then tap the arrow in the upper left corner to return a level.
- Tap Save to save your changes.
In this scenario it usually makes sense to “lock” the touch bell, as this also deactivates the blue LED of the SmartConnect door. How the touch bell is locked is described below.
Lock the touch bell
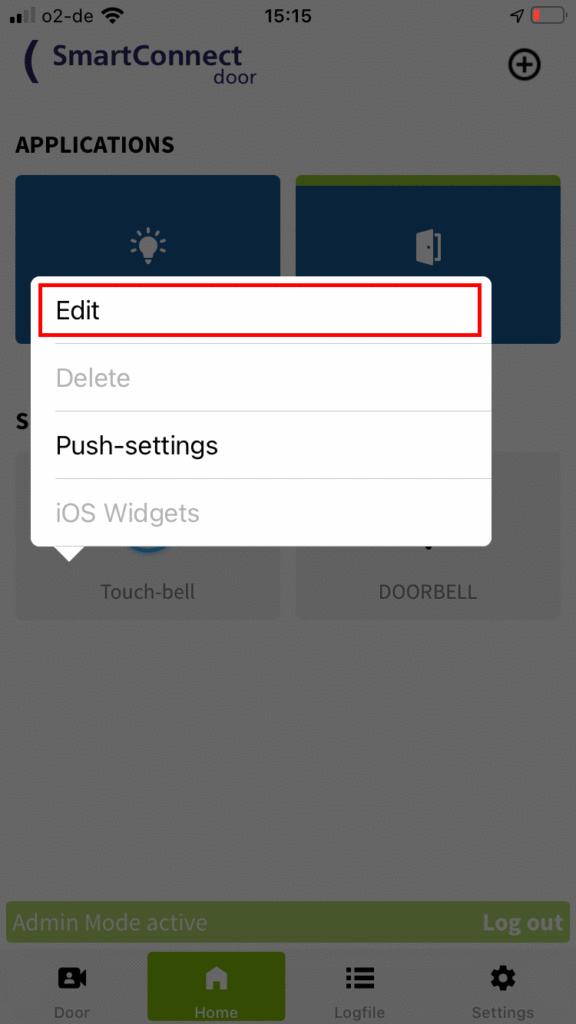
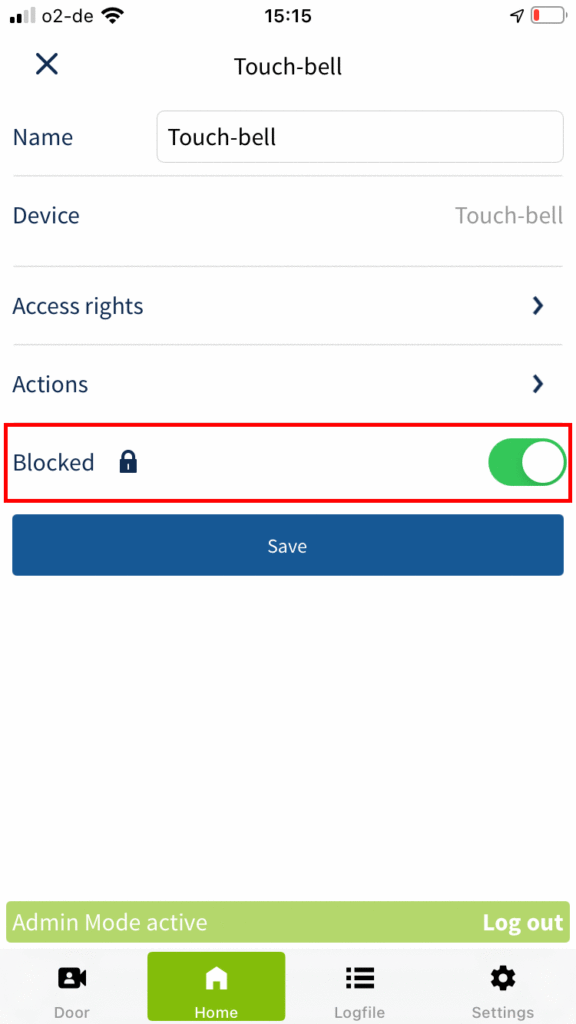
- Press and hold the button of the touch bell of the SmartConnect door and then release it. A dialog window will now open. Tap Edit.
- Activate the switch next to the Blocked menu item and then tap Save to save the change made.