Administrators can grant or revoke rights to users at any time. To manage the general rights of users, please follow the steps below. Rights include access to the camera of the SmartConnect door or the use of Alexa to operate applications.
General settings (rights)


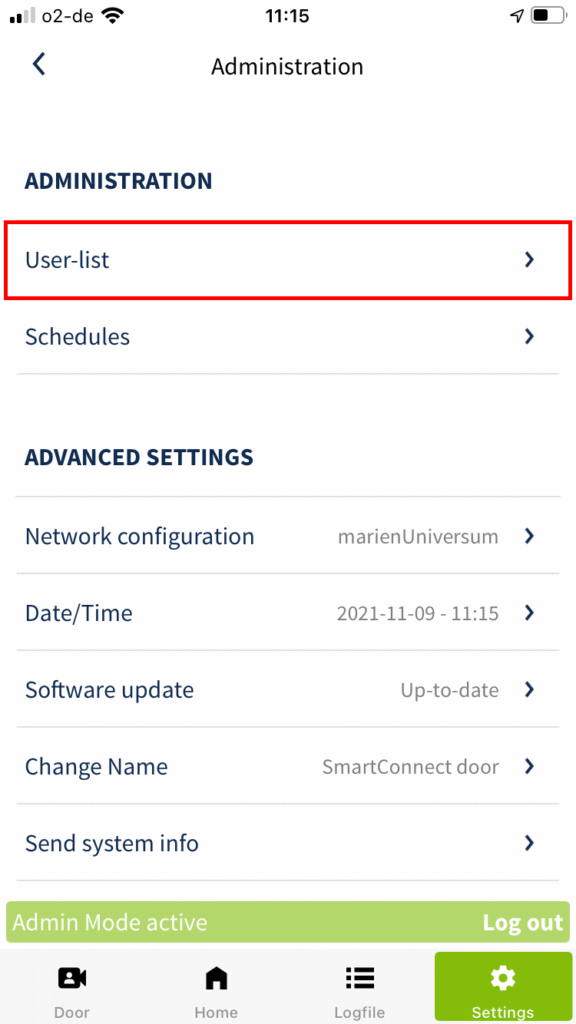
- Tap Settings in the main menu and then tap Administration.
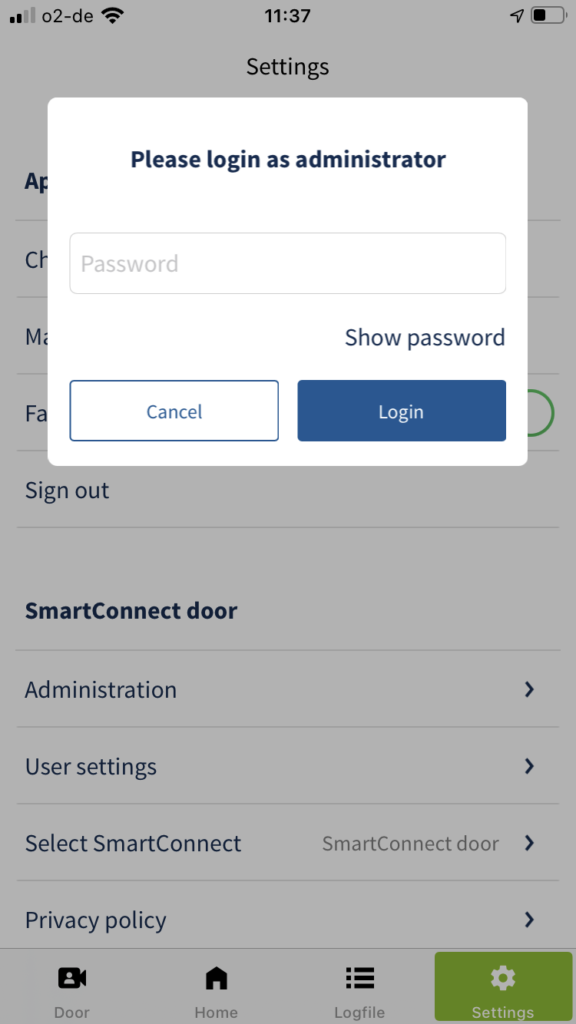
- Enter your administrator password and tap Login.
- Tap User-list.
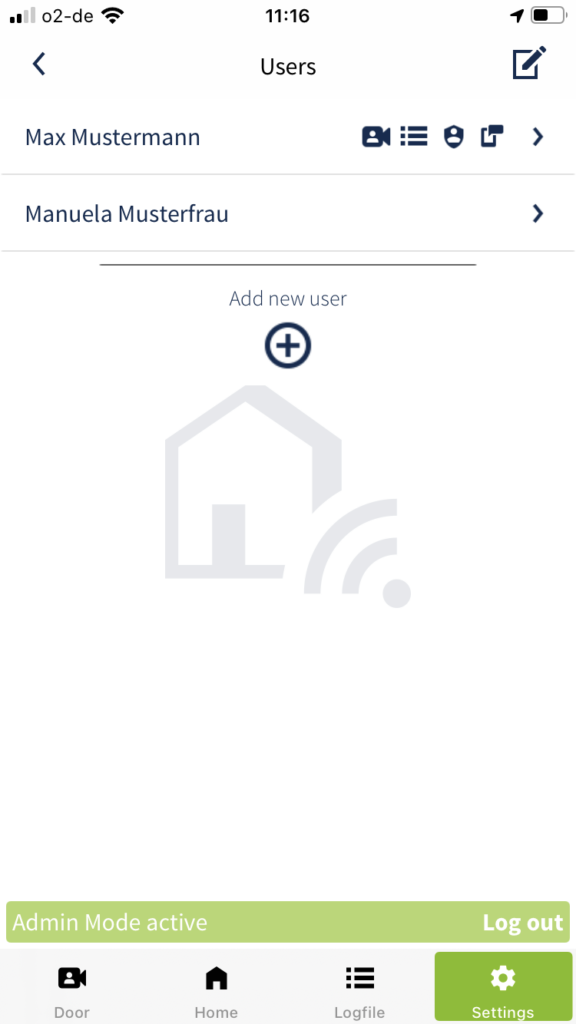
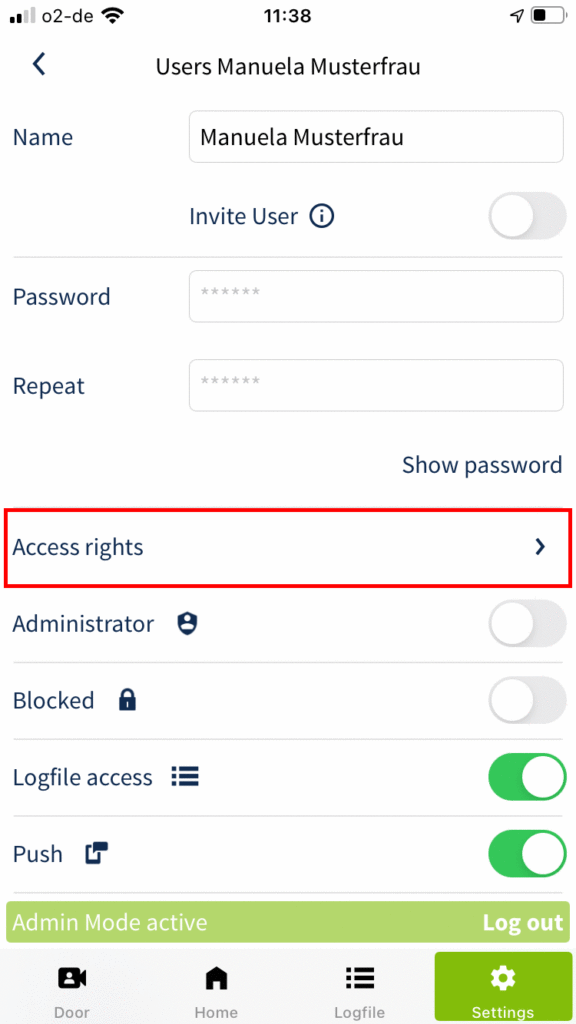
- Select the user whose rights you want to edit.
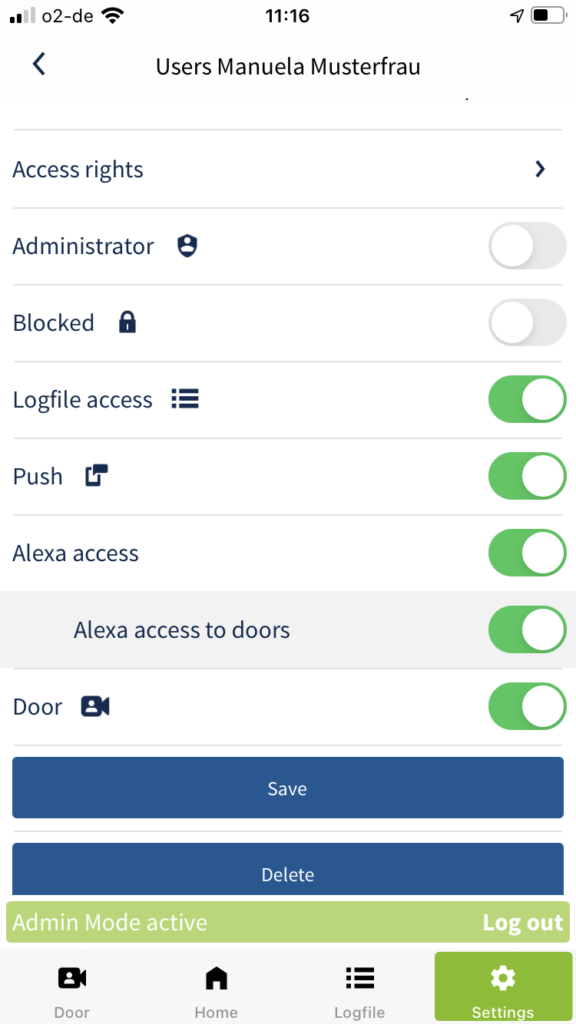
- Set the rights of the user by activating the corresponding switch. A list with explanations of the respective rights can be found below.
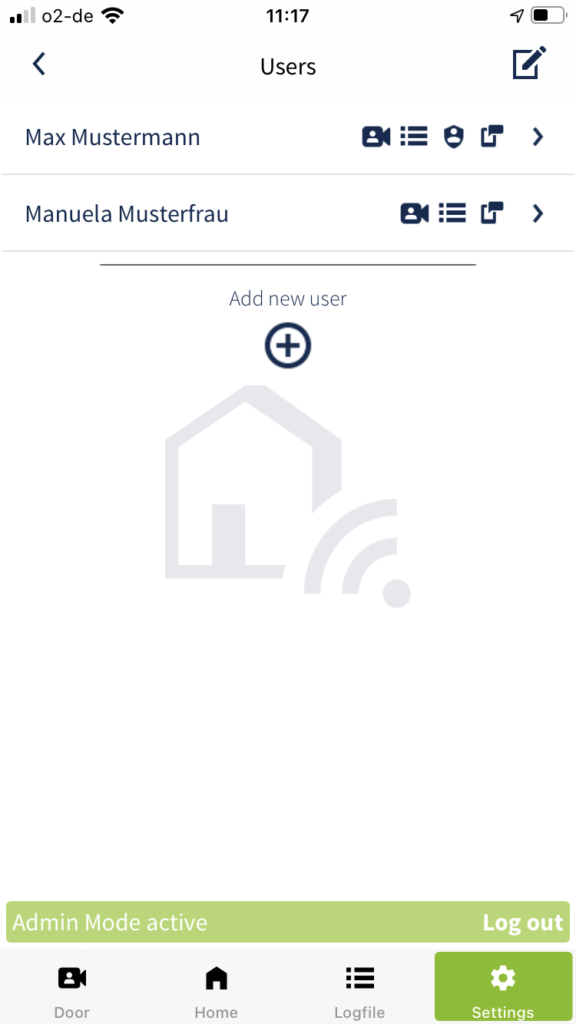
Confirm your selection by tapping Save. - You will now see the overview of the users again. The icons next to the username indicates which rights the user has.
In this area you also have the option to delete already created users. To do this, tap delete at step 5.
Administrators can set the following rights for each user:
- Administrator: Activate this switch if the user is to be granted administrator rights. These rights may be granted or withdrawn at any time.
- Blocked: Activate this switch if you want to temporarily lock the user. He can then neither log on nor operate applications.
- Logfile access: Activate this switch if the user is allowed to read the logfile entries.
- Push: Activate this switch if the user is allowed to receive push notifications.
- Alexa access: Activate this switch if the user is allowed to use Alexa.
- Door: Activate this switch if the user is allowed to access the camera.
Manage Access rights
In addition to the general rights, administrators can grant users permission to access specific applications at any time. This can be, for example, opening the front door or the possibility to switch a radio socket. To manage authorisations on user applications, please follow the steps below.
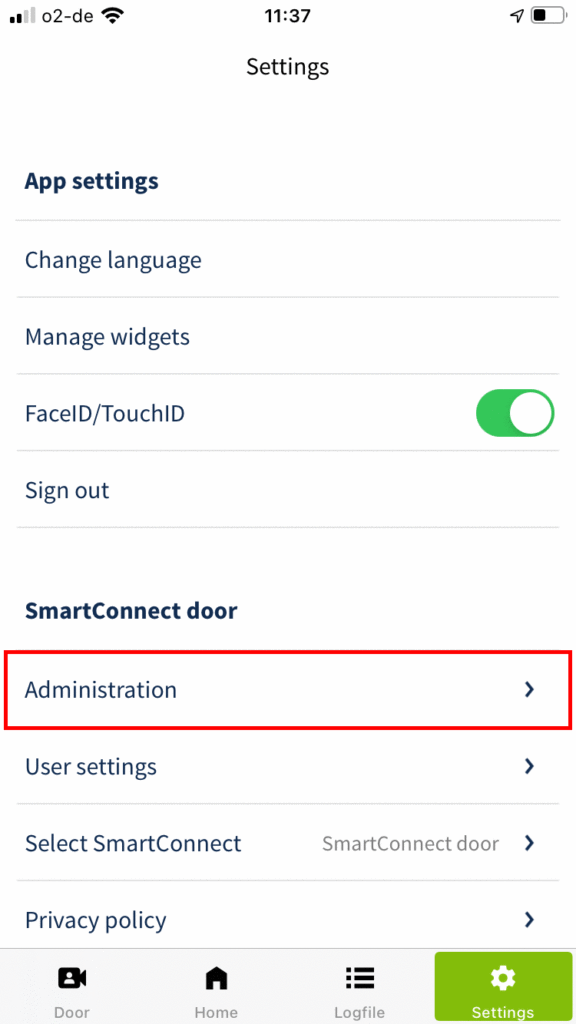


- Tap Settings in the main menu and then tap Administration.
- Enter your administrator password and tap Login.
- Tap User-list.
- Select the user whose rights you want to edit.
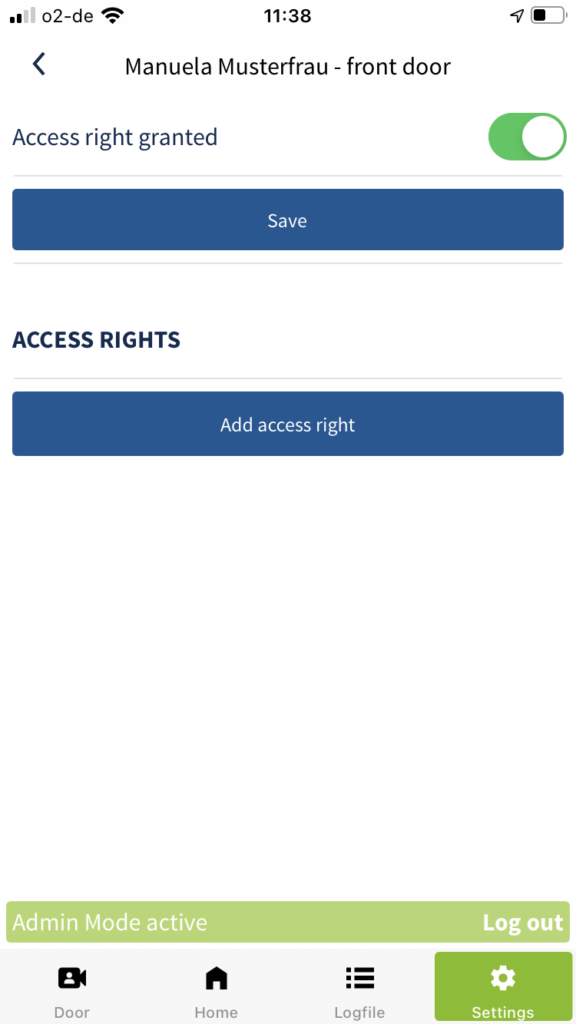
- Tap Access rights.
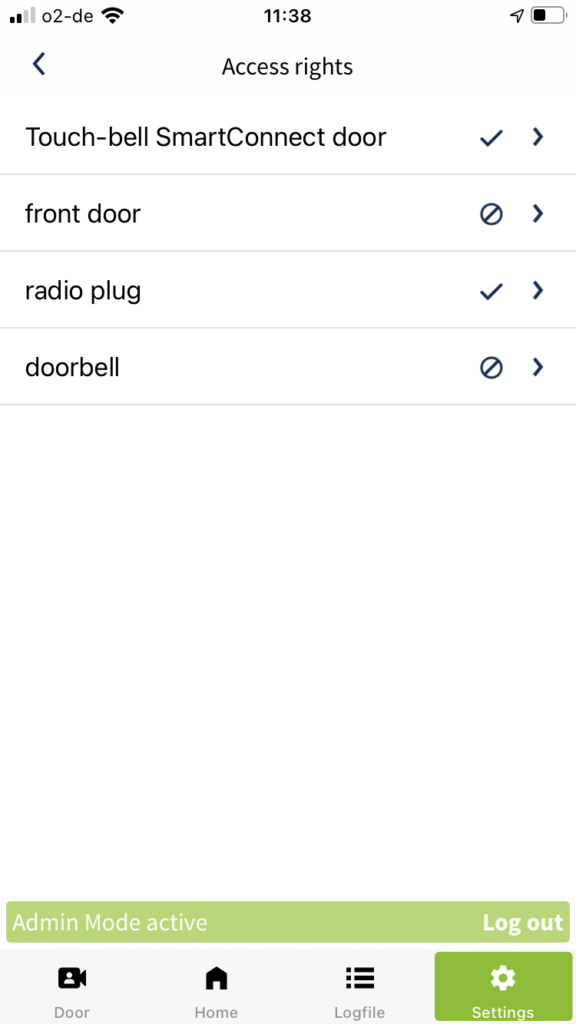
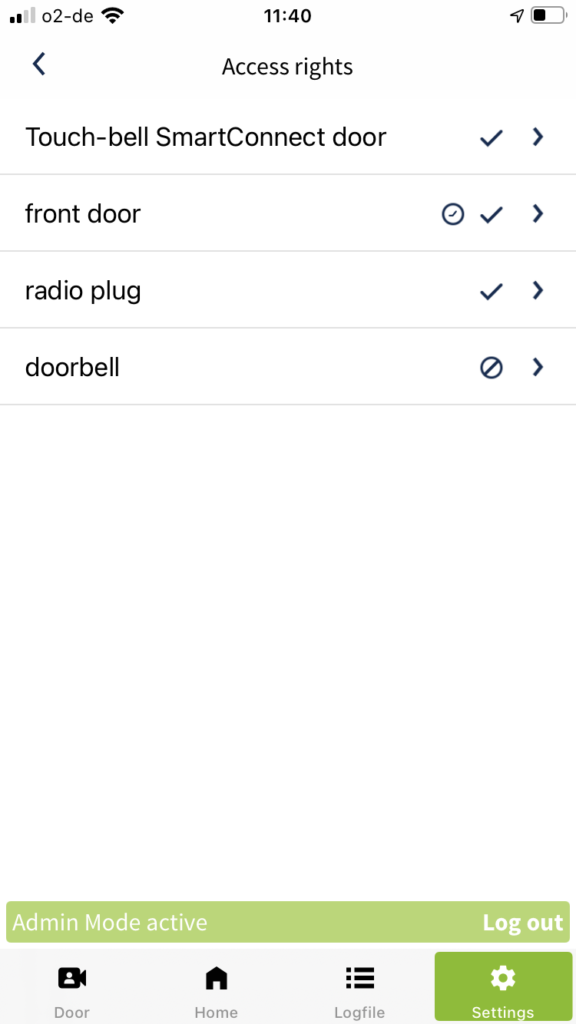
- Select the application for which you want to authorise the user.
- To grant the user permanent access to an application, activate the switch Access right granted and confirm your selection by tapping Save. To add a time-restricted authorisation, select Add access right.
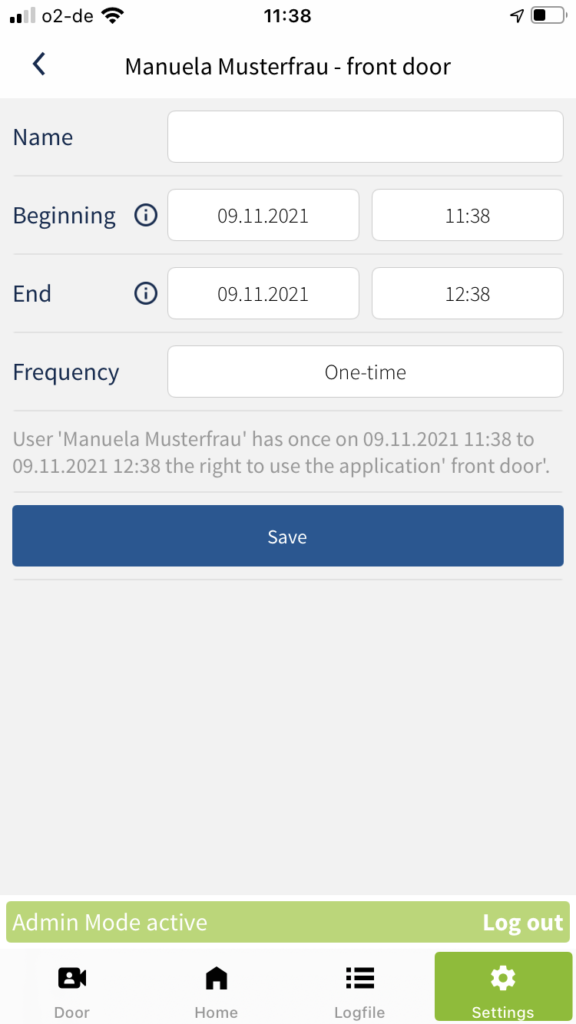
- Enter the conditions Name, Beginning, End and Frequency in the window and confirm your entries by tapping Save. Further information on the different terms and conditions is provided below.
- Tap Save again.
- You will now see the overview of the users again. A check mark and clock icon indicates that the user now has time-restricted authorisation to use the application.
Note: Make sure that the Access right granted switch at the top is always active. If this switch is disabled, the time-restricted rights are also inactive and the user cannot switch applications.
Terms and conditions of time-restricted rights:
- Name: Unique name of the separate authorisation, e.g. “Cleaning lady”.
- Beginning: Time from which the user is authorised to use this application.
- Ende Time when the user no longer has rights to use the application.
- Frequency: Interval of how often the user is authorised to use this application: once in the set time window, repeated weekly, monthly or annually.
You can also assign authorisations through the application itself. To do this, follow the instructions described in the chapter Authorisations for Applications.