We recommend that you add users in a secure environment (the home network), as this requires the extended rights of an administrator. For everyday use, a user without administrator rights is recommended. This way, abuse can be avoided as best as possible.
Only an administrator is authorised to create users. Therefore, log in with your administrator access data (see chapter Administrators and Users) and follow the steps below.
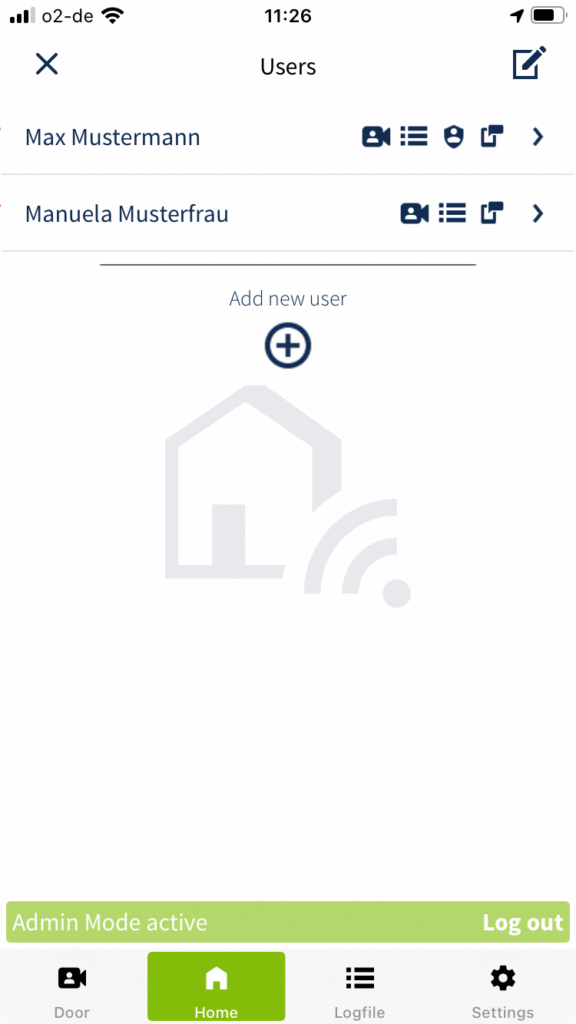
You have two options to add users:
On the one hand, you can create users. Set the username and password for the new user. Afterwards, you inform the new user of the access data and of which SmartConnect he or she has access to.
On the other hand, you can also invite users via a link. The invitation provides the new user with information on how to install the SmartConnect app and the corresponding link allows the user to set his or her personal password.
Create users
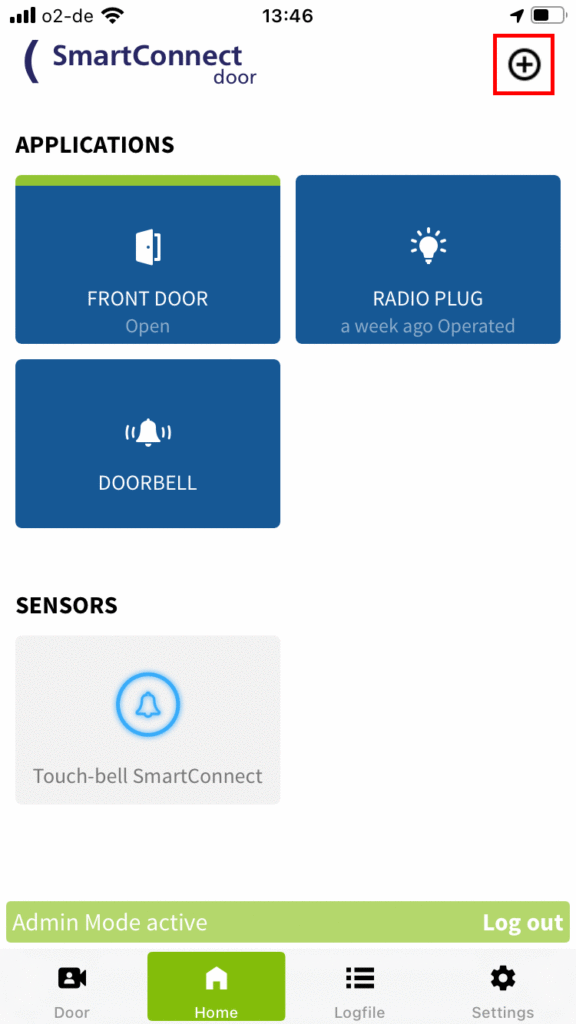

- Tap the Plus icon in the top right of the header.
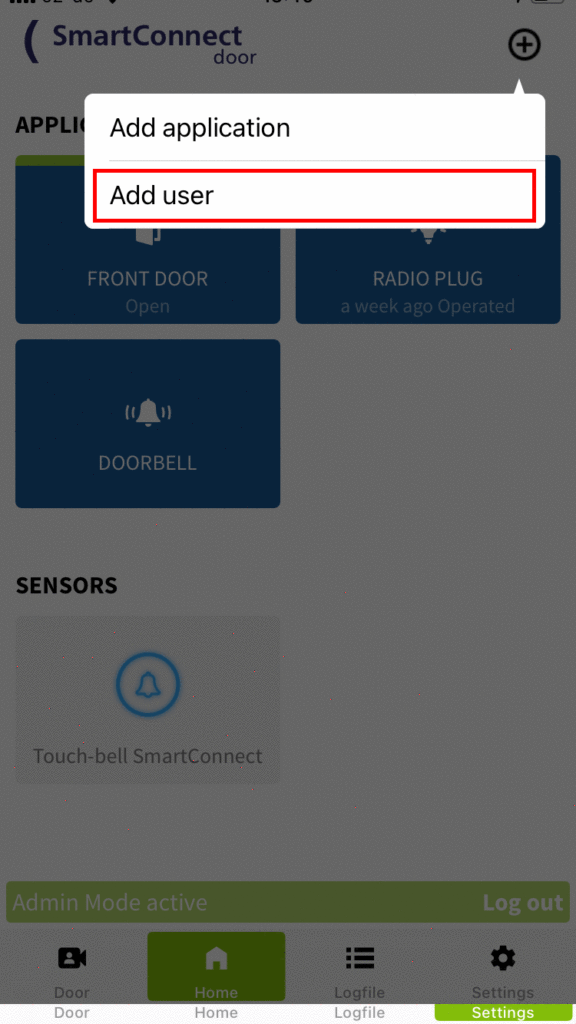
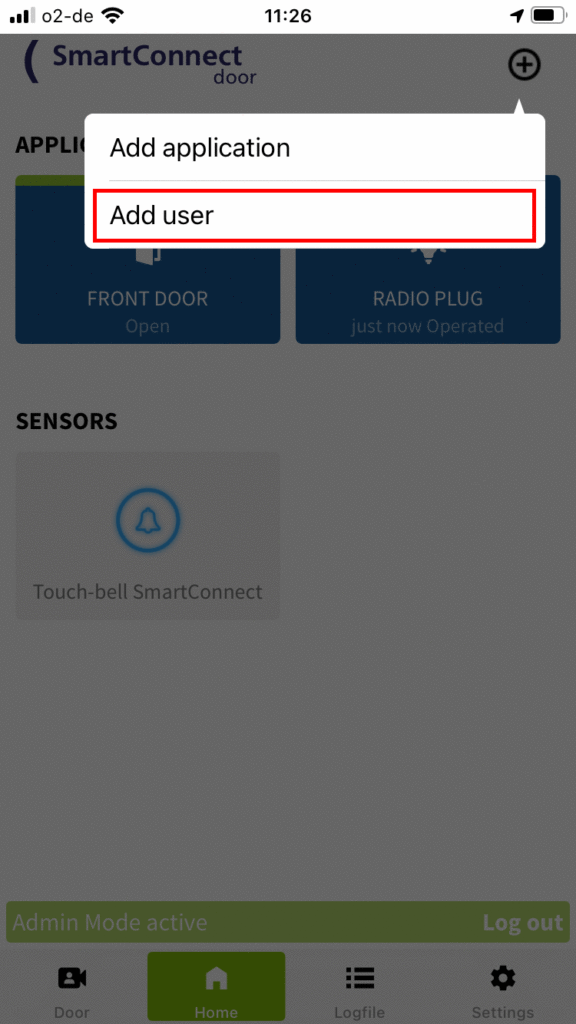
- Tap Add user.
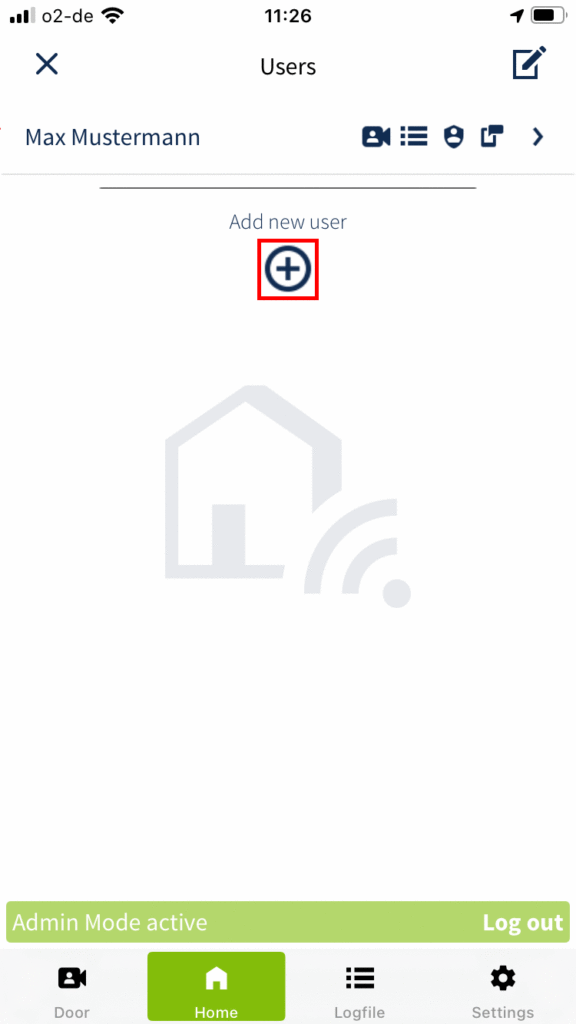
- Tap the plus icon below the user list.
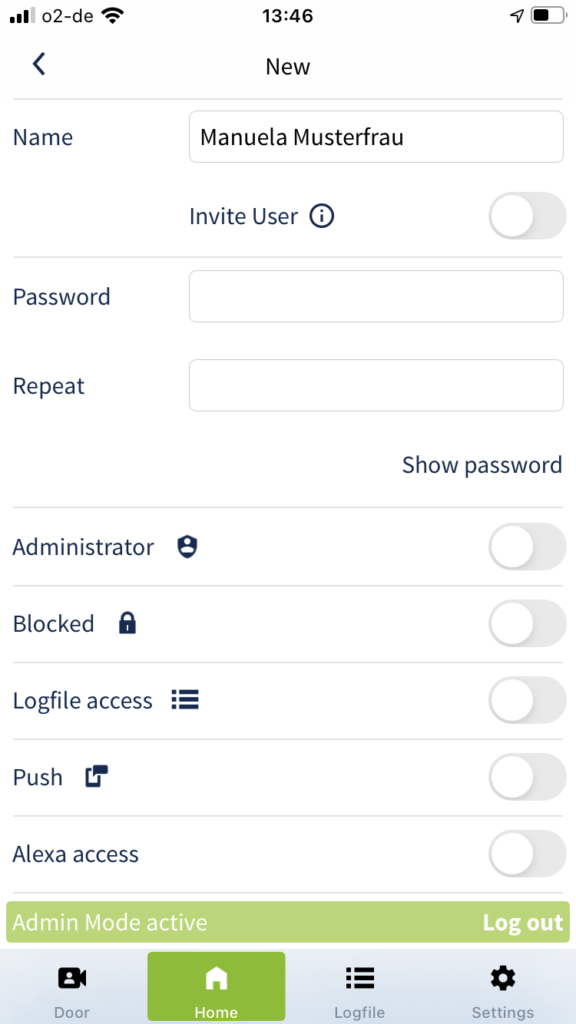
- Enter the name of the user and define a secure password (see chapter General information). Only assign unique names in order to be able to assign the user precisely later.
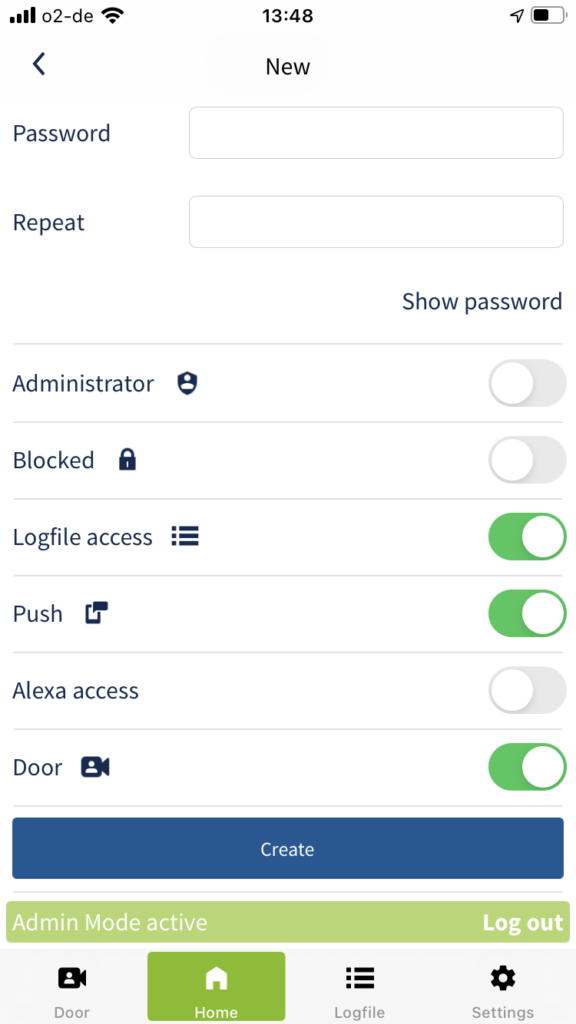
- Define the rights of the user by activating the respective switch. A list with explanations of the respective rights can be found below.
As an administrator, you can edit the rights of users at any time. To do this, follow the instructions described in the chapter User administration.
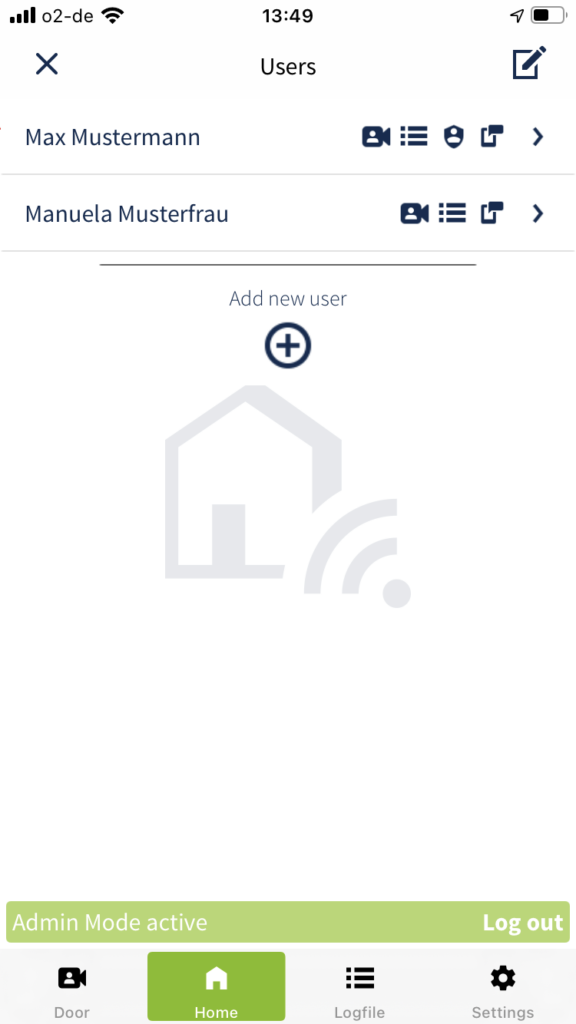
Save the new user by tapping Create or Send Invitation. - You will now see the overview of the users again. The icons next to the username indicates what rights the user has.
Invite users
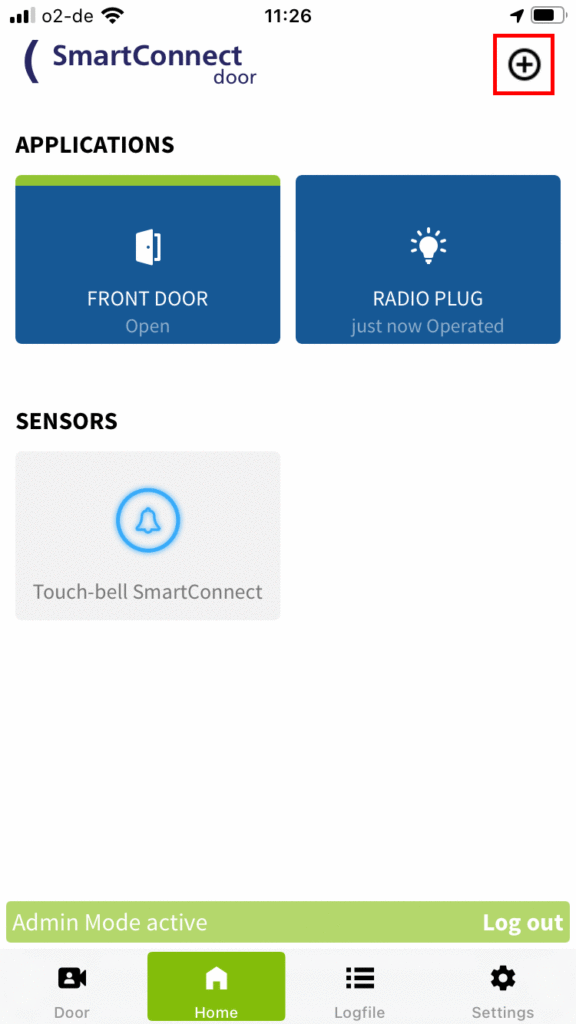
- Tap the Plus icon in the top right of the header.
- Tap Add user.
- Tap the plus icon below the user list.
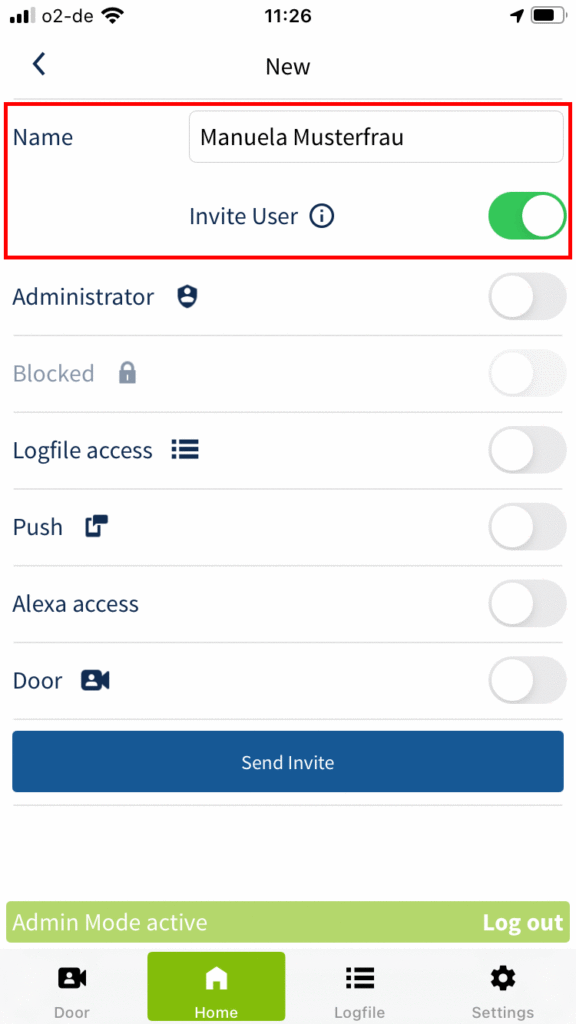
- Enter the name of the user and activate the switch Invite User.
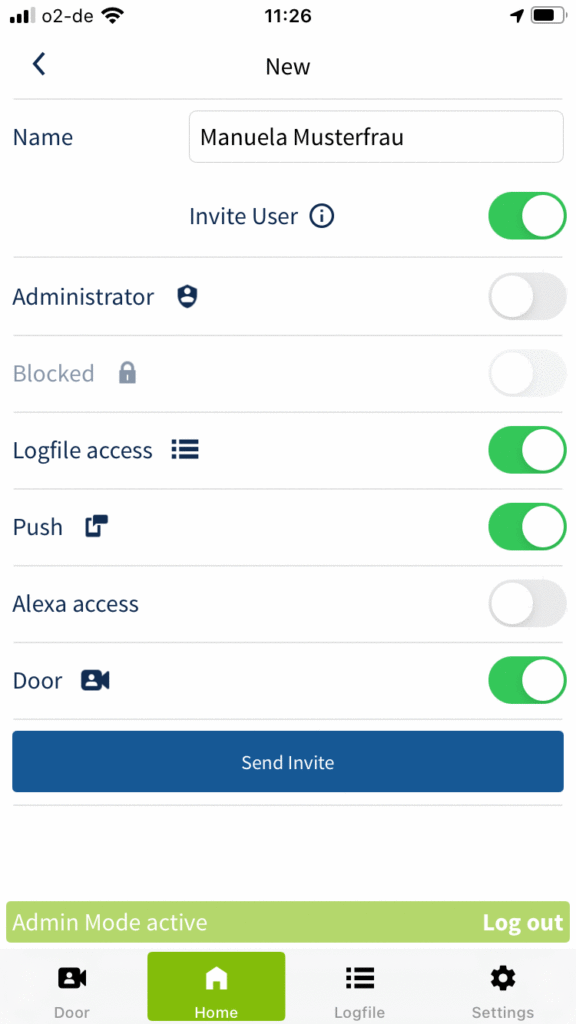
- Define the rights of the user by activating the respective switch. A list with explanations of the respective rights can be found below.
As an administrator, you can edit the rights of users at any time. To do this, follow the instructions described in the chapter User administration.
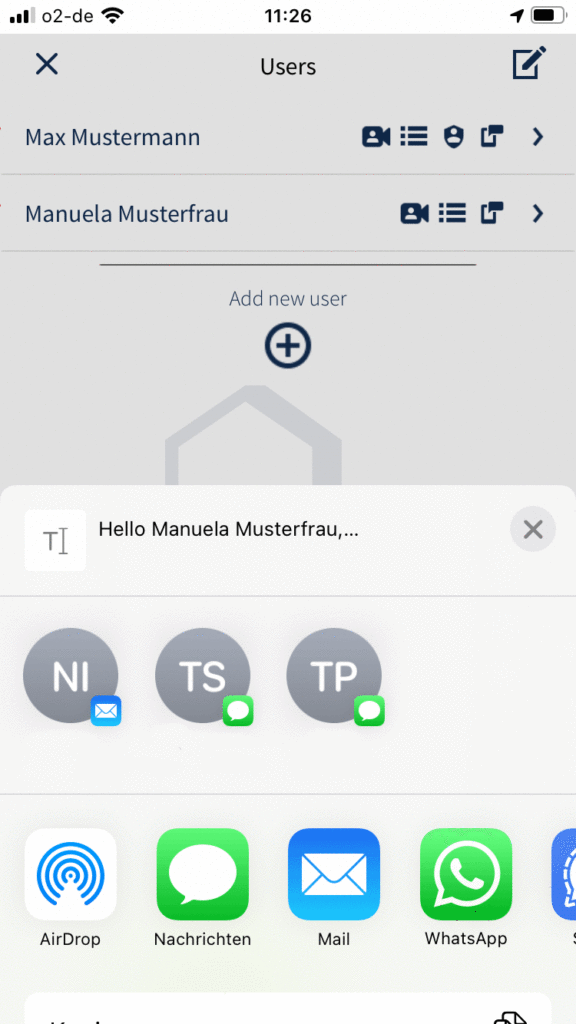
Save the new user by tapping Send Invite. - The “Share menu” of your smartphone will now open. Choose which service (messages, mail, messenger, etc.) you want to use to send the invitation or link.
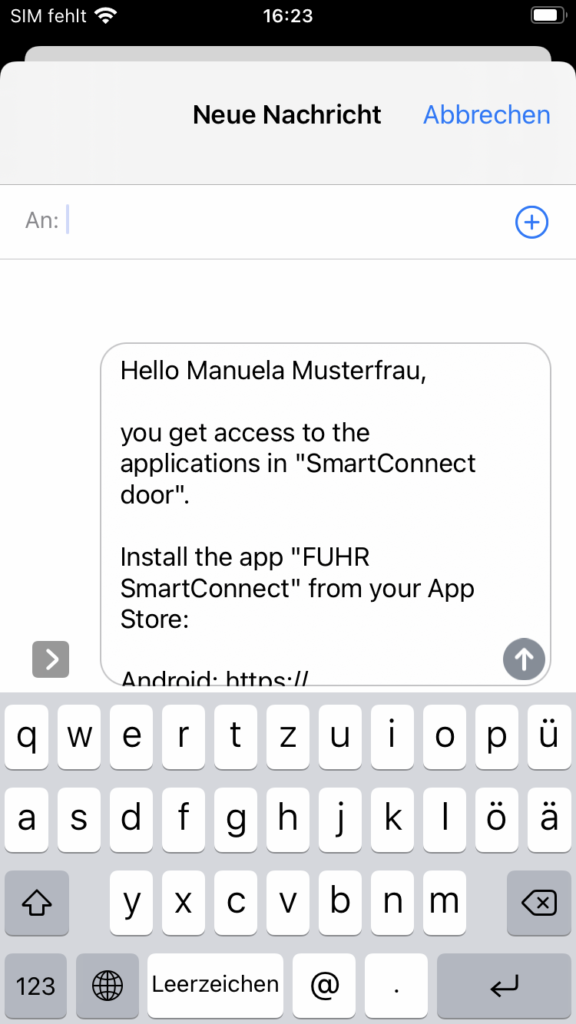
- The previously selected service will open. Enter the user’s contact details and then send the invitation or link.
The user can use the link to assign a personal password. For security reasons, this link is no longer valid after 24 hours. - You will now see the overview of the users again. The icons next to the username indicates what rights the user has.
Administrators can set the following rights for each user:
- Administrator: Activate this switch if the user is to be granted administrator rights. These rights may be granted or withdrawn at any time.
- Blocked: Activate this switch if you want to temporarily lock the user. He can then neither log on nor operate applications.
- Logfile access: Activate this switch if the user is allowed to read the logfile entries.
- Push: Activate this switch if the user is allowed to receive push notifications.
- Alexa access: Activate this switch if the user is allowed to use Alexa.
- Door: Activate this switch if the user is allowed to access the camera.